Before you can plan a route, you need to know where you're going! At the very least, Routific needs a list of addresses.
You might also want to add extra information like:
Customer name
Order number
Contact details (email or phone number)
Delivery time windows
Duration
Load
Delivery notes for the driver
There are two ways to do this:
Upload a spreadsheet
Add orders manually
This is what your spreadsheet should look like:
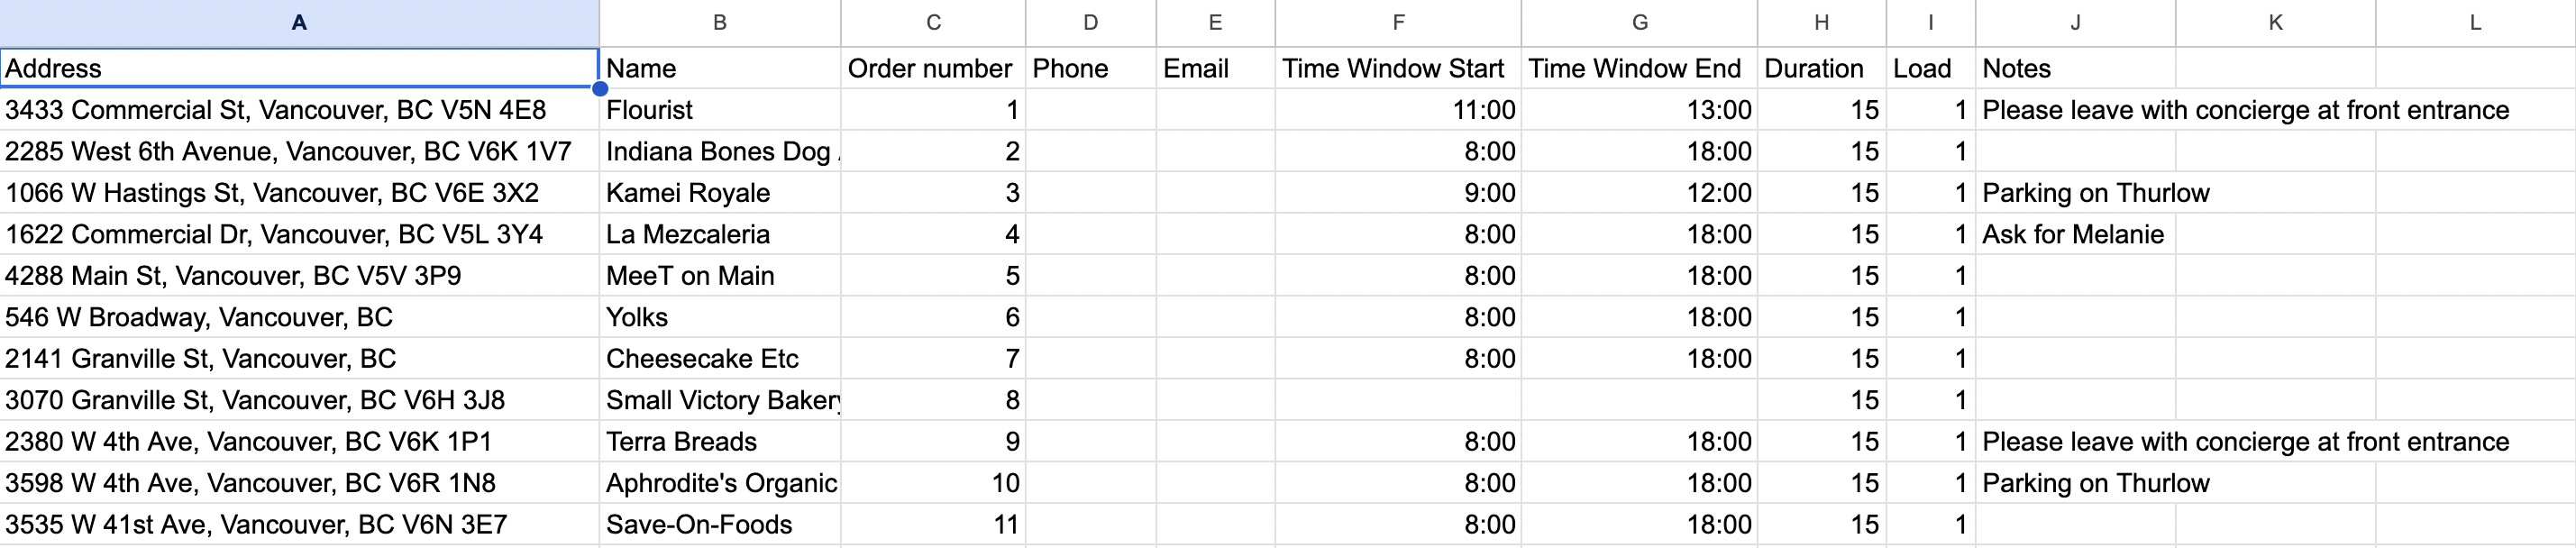
You can download a sample to use as a formatting guide or learn more about how to format addresses.
Required information
Address | The best format for making addresses easy to find is: Street Number and Street Name, City, State/Province (when applicable), Zip/Postal Code (when applicable), Country. You can also split the address into separate columns (Street Address, City, State, Zip/Postal Code, Country). *Please note: If you're delivering to an apartment, you should include the Unit Number in a separate column. This will help ensure that the address and apartment number are plotted correctly. |

Optional information
Customer Name | Adding a customer name makes it easier to find and manage orders. If you don't have a customer name, Routific will automatically assign a unique number to all your orders, so this field isn't mandatory. |
Order Number | You can input your own order number; this number will show up in the order details for the dispatcher to see, in the mobile app for the drivers, and in the Delivery Tracker sent to your customers. If you do not have your own order number, Routific also automatically generates a unique Routific ID. Dispatchers may use this unique identifier to keep track of orders when route planning. Drivers will also see this ID attached to orders on the mobile app, and it will also be visible to customers in the Delivery Tracker. |
Time window start and end | Use these if an order must be served during a certain time window. Routific accepts two different time formats: |
Duration | This is how long, in minutes, you expect each order to take. A simple package drop-off, for example, will be a lot quicker than an order that involves delivering and installing a piece of equipment. You can also use this field to adjust order duration for places where you know it's very difficult to find parking. *If you leave the order duration blank for any orders, we'll use the default duration from your Settings. *When uploading via CSV, this field accepts fractional durations. For example, four-and-a-half minutes can be entered as 4.5 in the Duration column. |
Load | How much are you delivering for each order? Routific will match loads to the capacity of each route to ensure you won't be delivering more than you can carry! Learn more about loads and capacities here. |
Notes | You can include any additional information you want to give your driver. Buzzer numbers, special delivery instructions, warnings about aggressive dogs — whatever you need in here. |
If you have customer email notifications enabled, this field is required for the notifications to be sent. | |
Packages | This field can be used to add barcodes to the order for our barcode scanning feature. |
Got more columns? No problem, you can create custom fields and map those fields when you upload your spreadsheet in Routific. (See below!)
Make sure your spreadsheet is in the right format!
Microsoft Excel: File > Download as > Comma-separated values (.csv, current sheet).
Google Sheets: File > Download as > Comma-separated values (.csv, current sheet)
ERP, CSM, Order Management systems: Every system has a different way of handling exports, but they should always be possible. Look for "Export Orders" or a similar command.
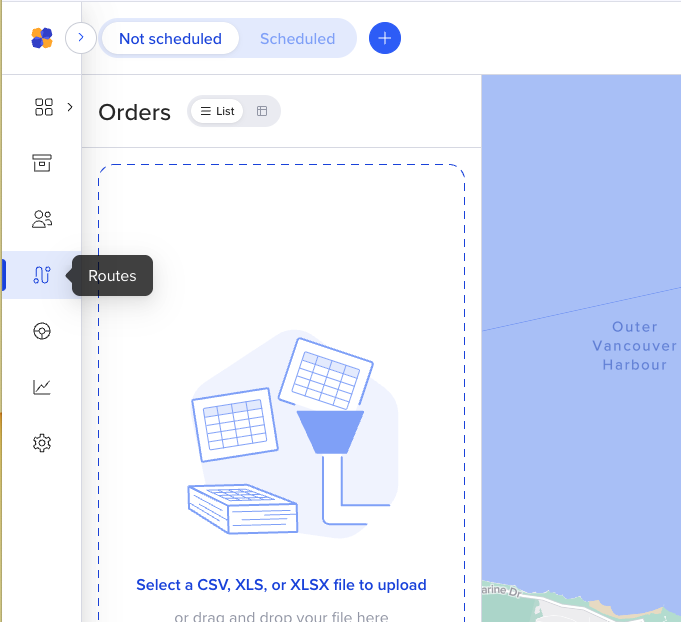
Next, click on the Routes tab in the left-hand menu. Drag and drop your spreadsheet into Routific.
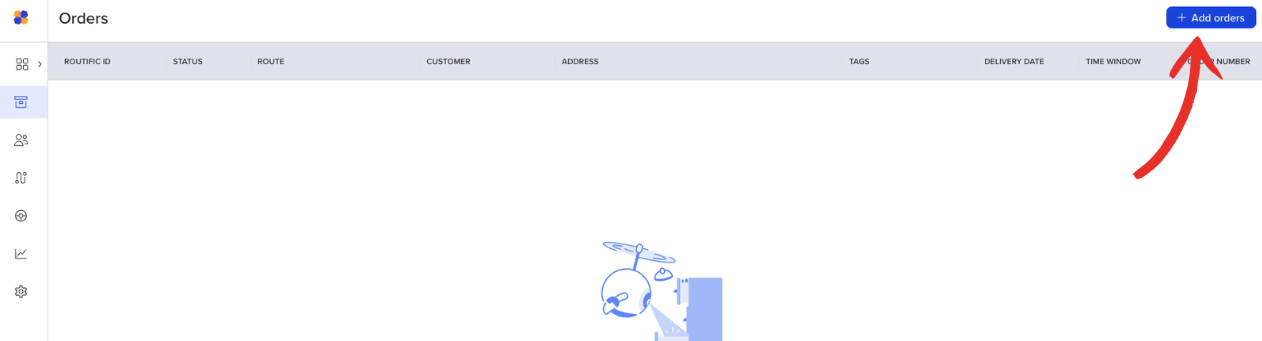
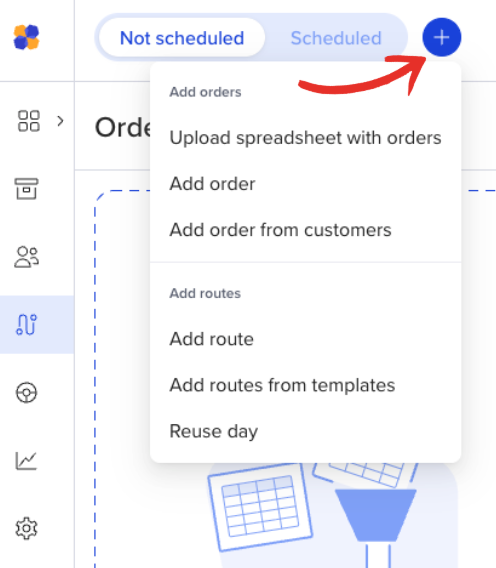
Or, click on the Orders tab, and click +Add orders.
After your spreadsheet uploads, our data mapping tool will pop up if you've used different column headings than we expect.
This will let you match your column headings to ours. Just use the dropdown menus to select the right match.
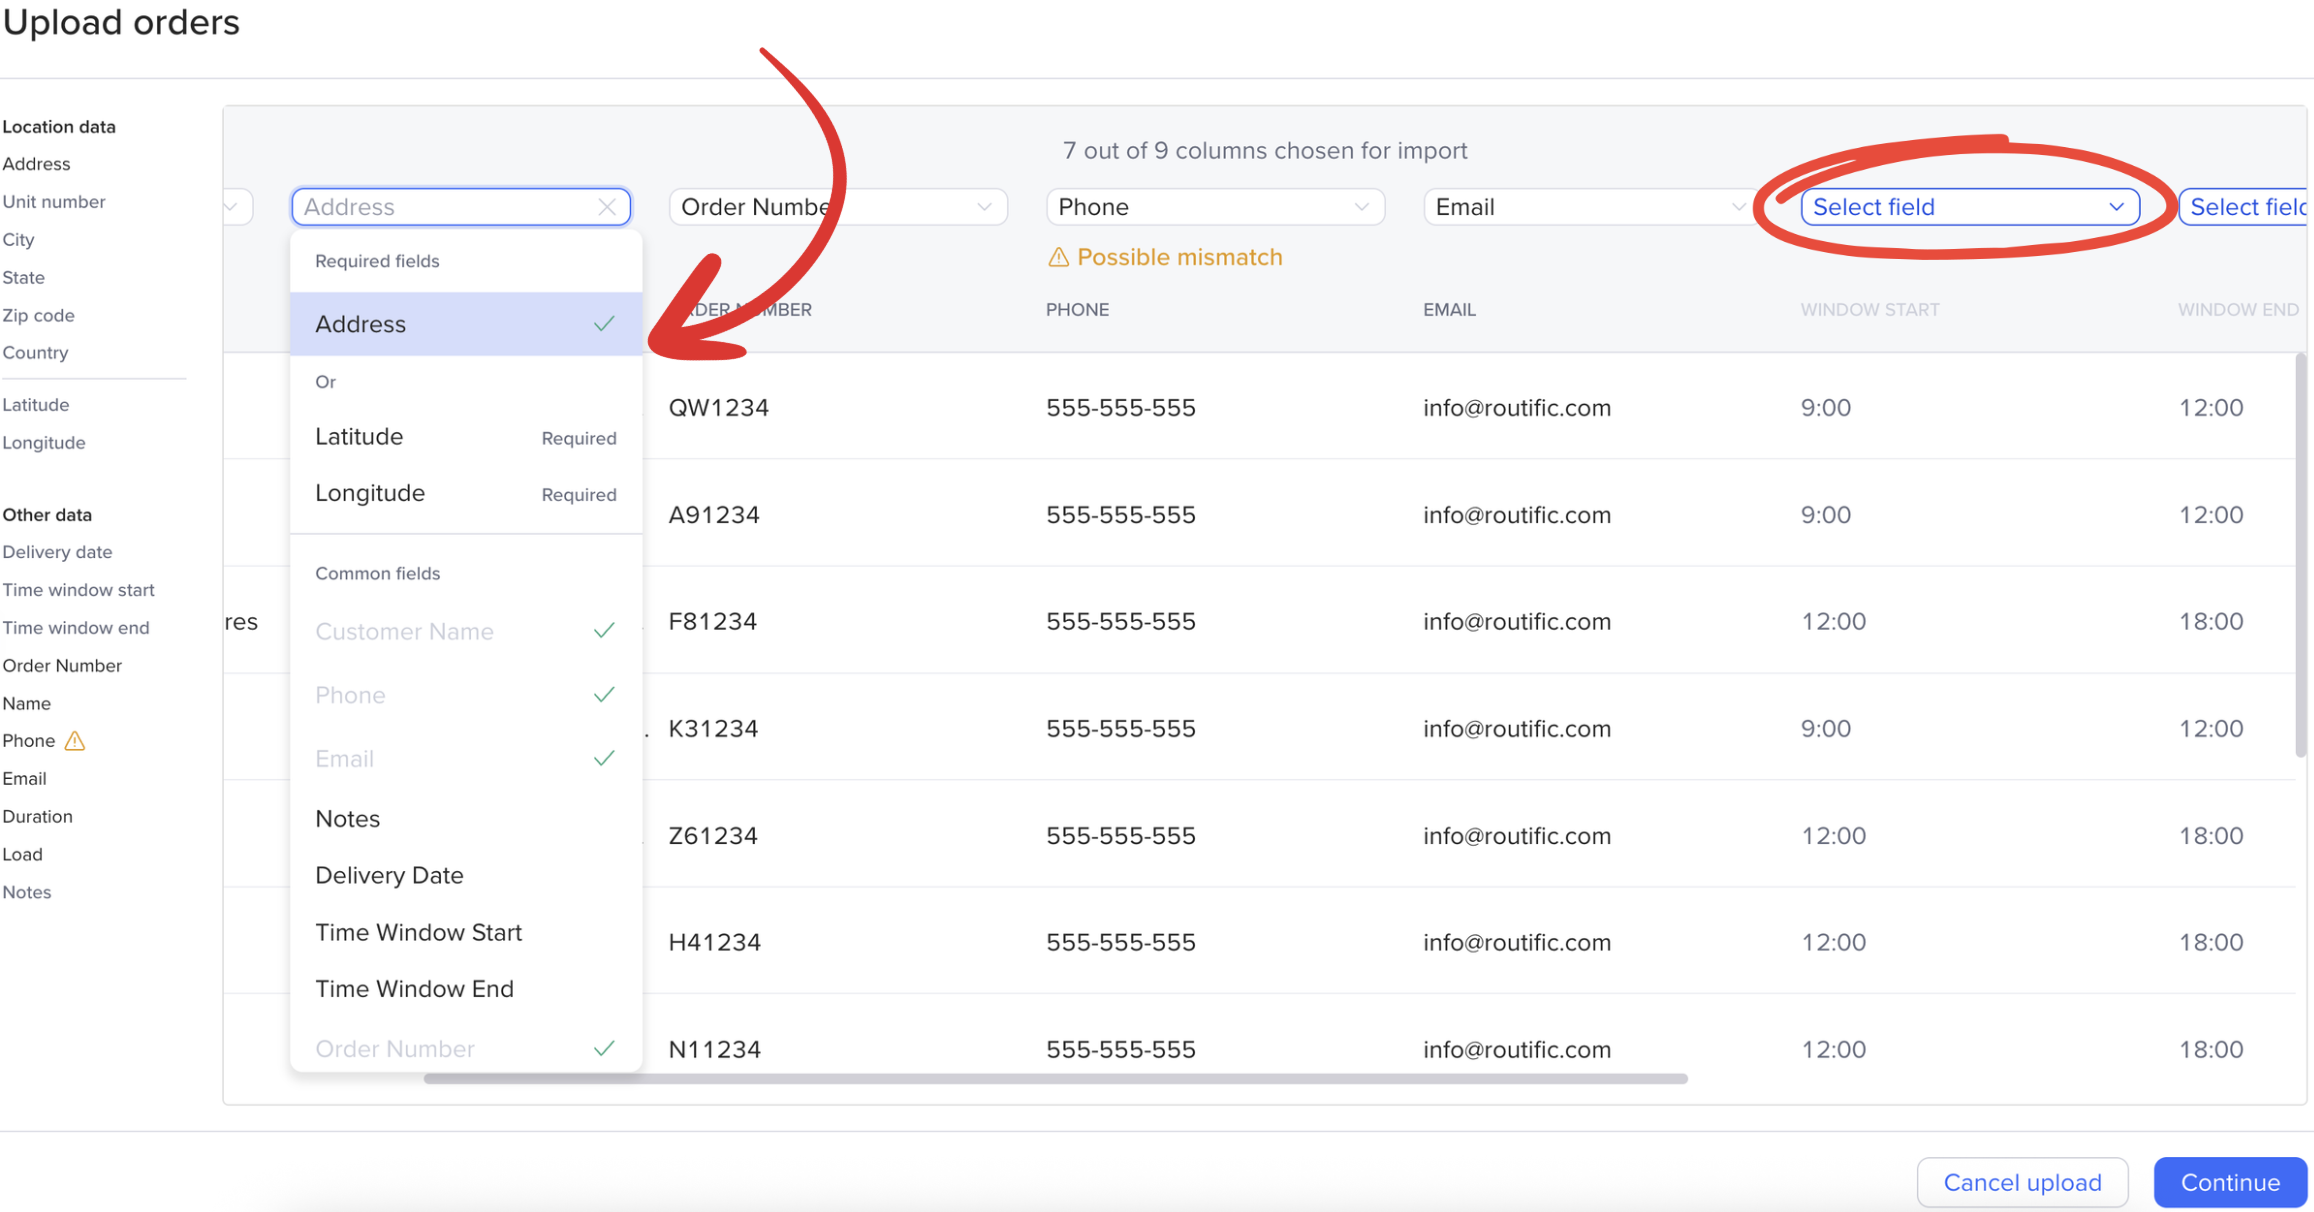
For custom fields, just find the column you need and click Select field.
Enter the field in the text box and click the + sign.
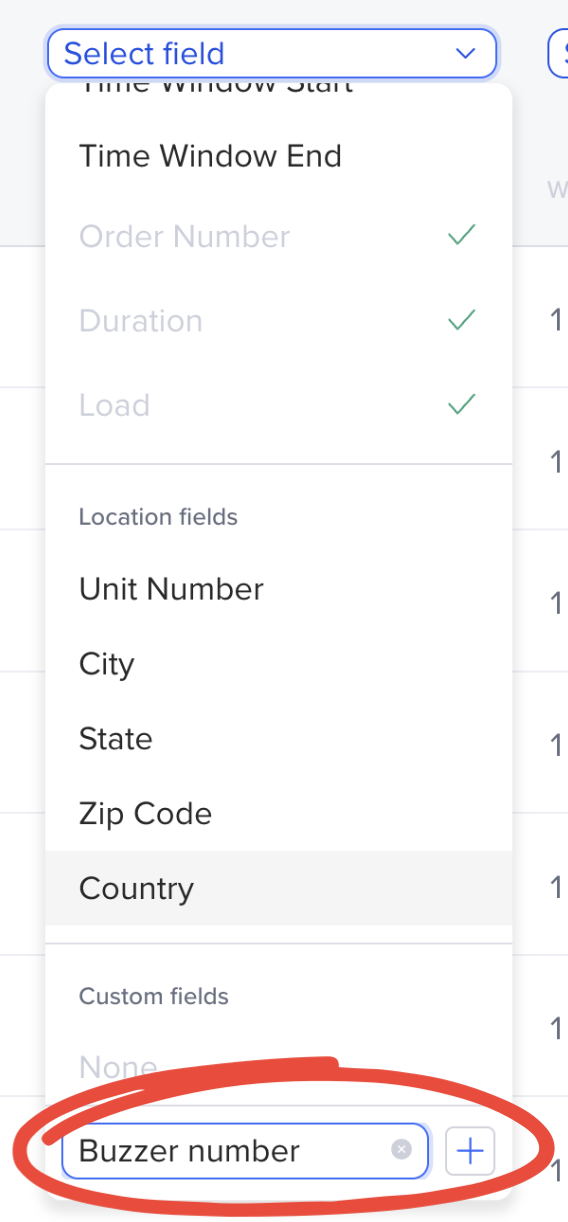
Your custom field will now be mapped, and it will appear in the order details page as well as the Routific mobile app for drivers.
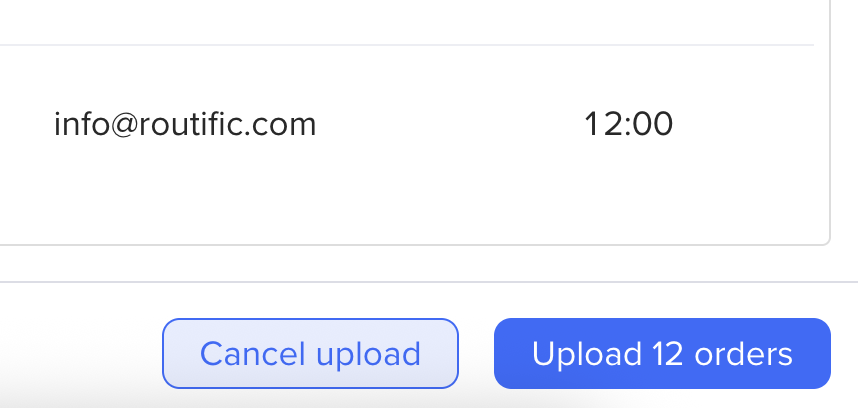
When you're done, click the "Upload" button to continue.
If you don't have a spreadsheet, you can add orders manually. Just click the + button, then click Add Order
Add your address and other order details.

*Please note that you can enter an address, coordinates (lat-long), or pin the location on the map. Learn how Routific ensures you find the right address.
Click Add when you're ready!
Once all your orders are in, you can plan and optimize your routes.