Load and Capacity are flexible settings that will help you tailor Routific to the needs of your business. For example:
Some businesses need to match vehicle capacity to load sizes. You don’t want to schedule an order with 50 boxes to a vehicle that can only handle 20!
Others want to set a cap on the number of orders they serve per route.
For every order you add, you can specify the load size. One way is to include load size in your spreadsheet before you upload it.
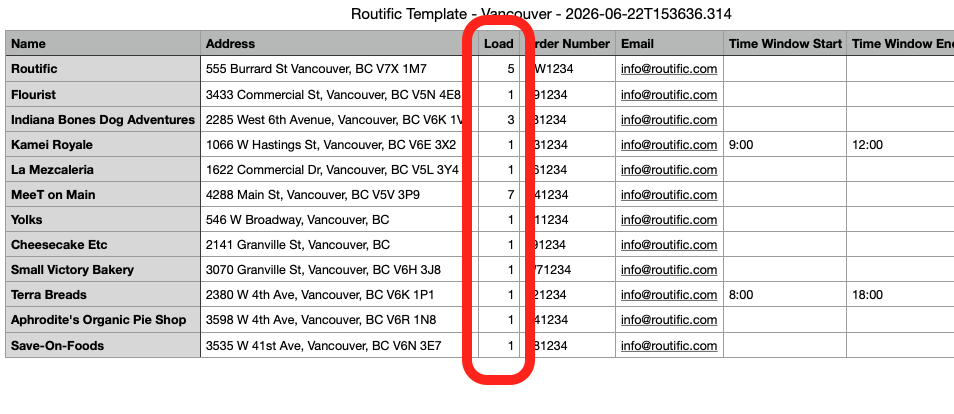
Load represents the number of units associated with an order. It could consist of boxes, meals, flower bunches, or anything else that makes sense in your business — so long as the size of each load is consistent.
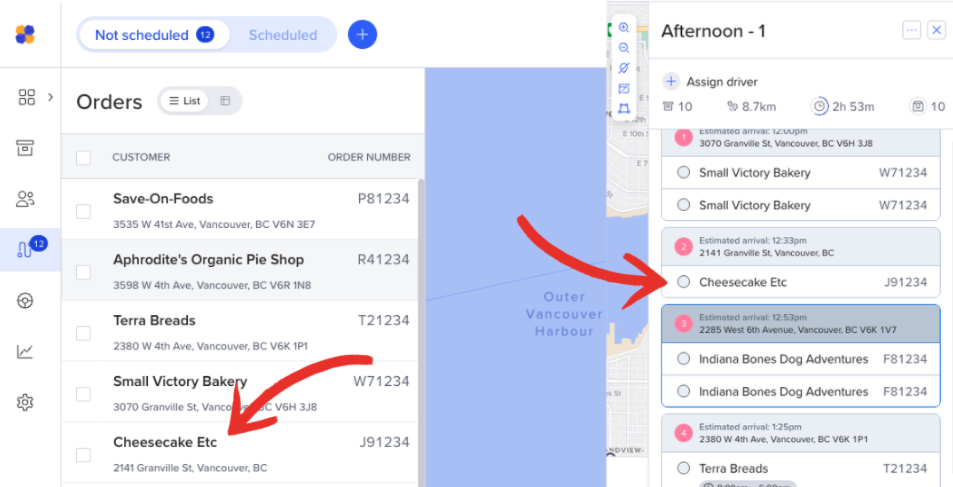
You can also adjust the load for an order after uploading. Click on the order wither in the unscheduled tray, or in a route in the right-hand panel list view to open the order details.
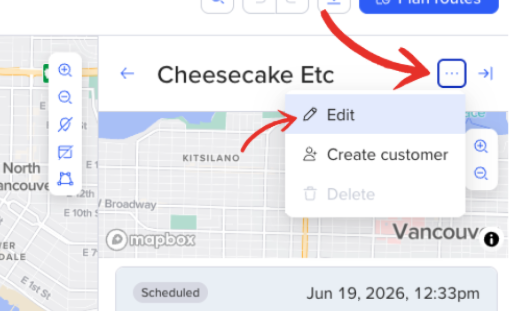
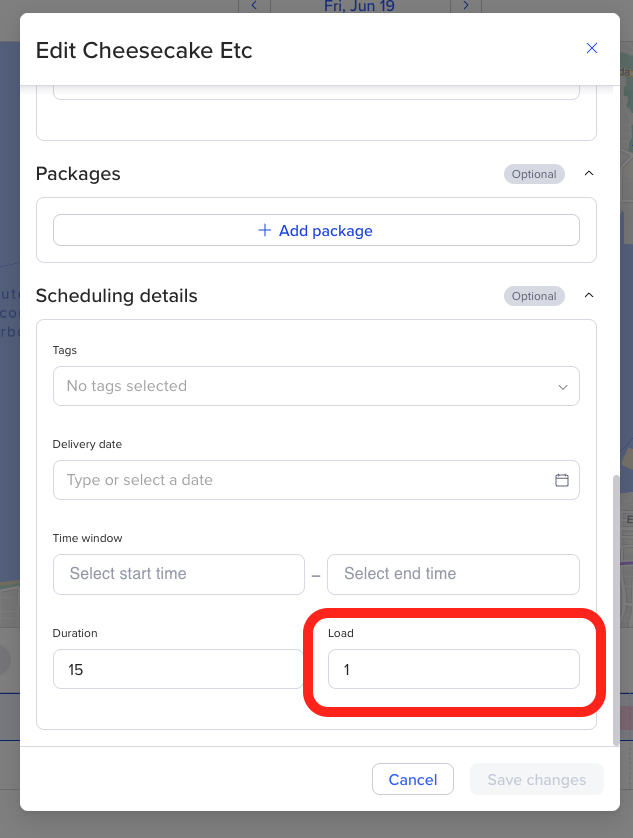
Click the three dots icon (…) then Edit to edit the load. Scroll to the bottom of the pop-up to get to the load variable.
What if you have multiple boxes of varying sizes? Assign a numerical number to each box size. For example, a small box could be 1, a medium box is 5, and a large box is 15.
Capacity in Routific can refer to vehicle capacity, or the number of orders per route — whatever suits your business best. The Capacity setting is inside your Route Templates.
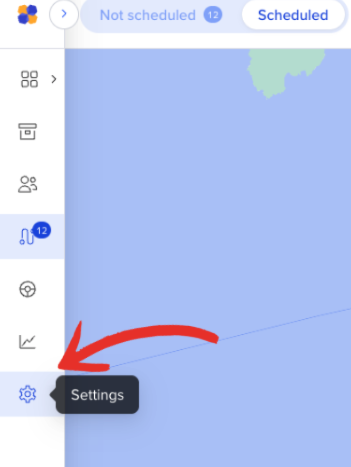
To open Route Templates, click the settings cog icon in the left hand navigation bar.
Your existing Route Templates will pop up.
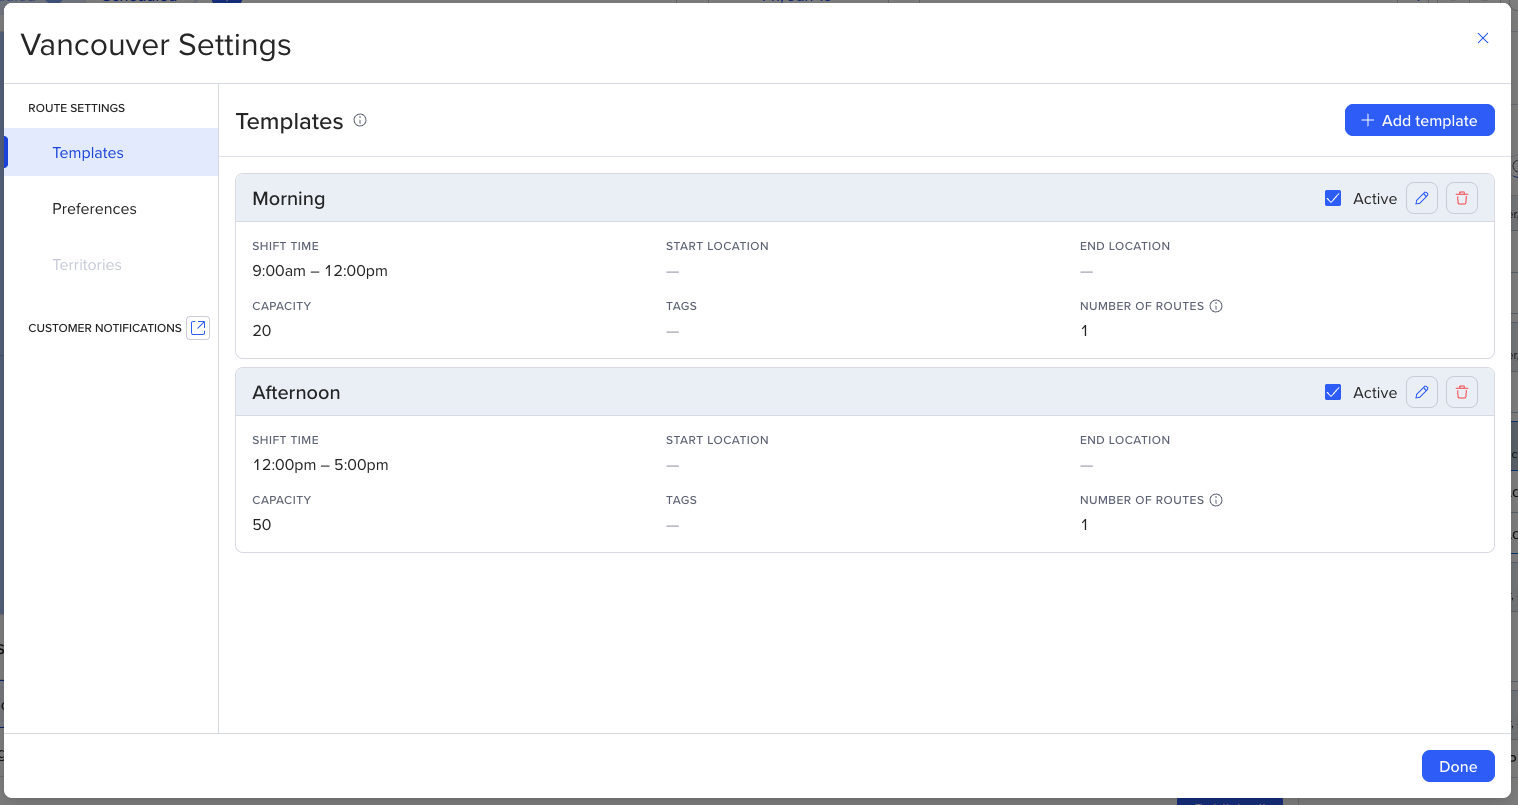
In the example below, you can see that we’ve set up 2 different templates for three different vehicle sizes:
The large van can take 50 units
The small van can take 20 units
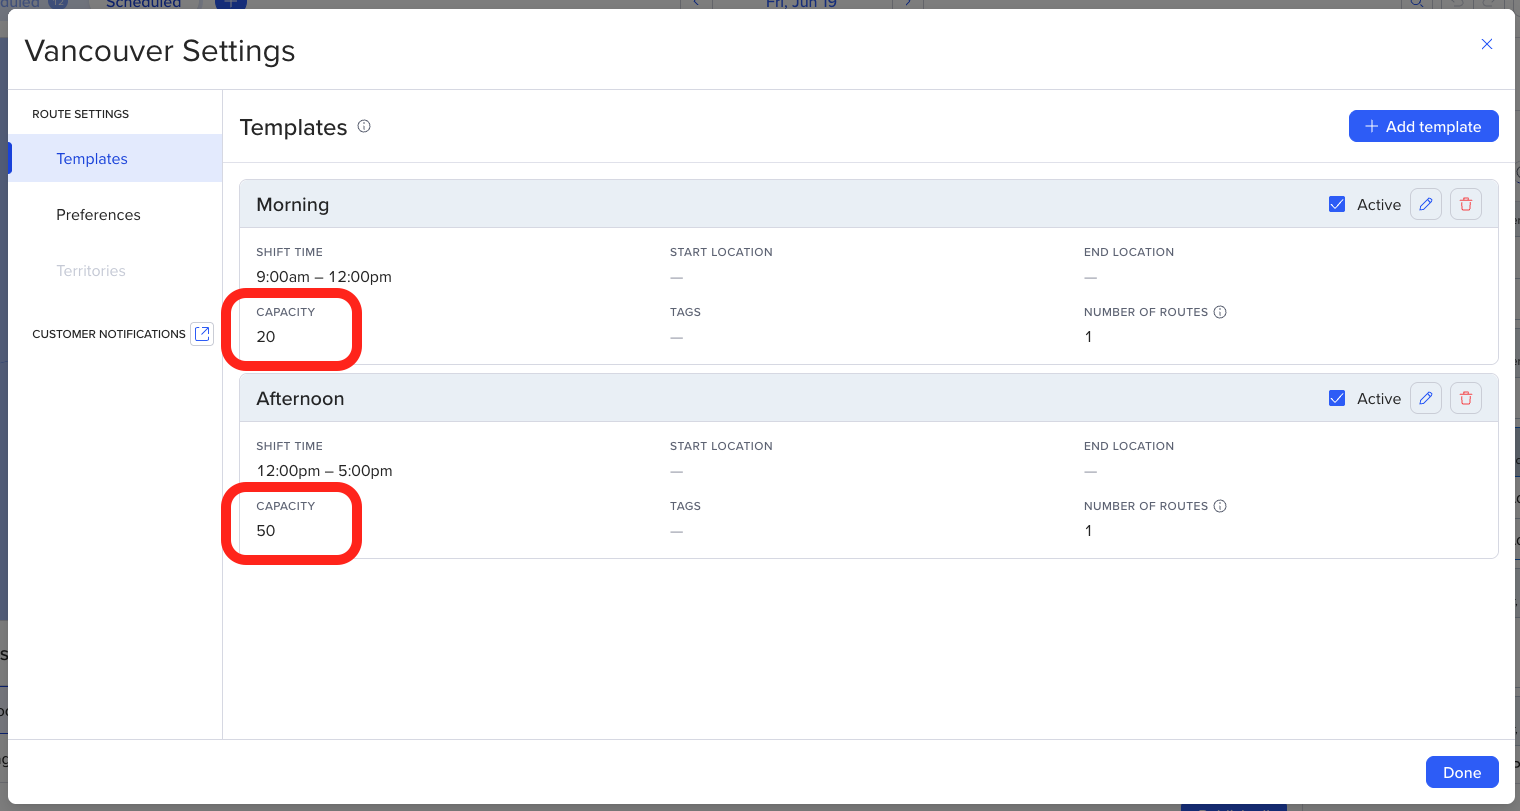
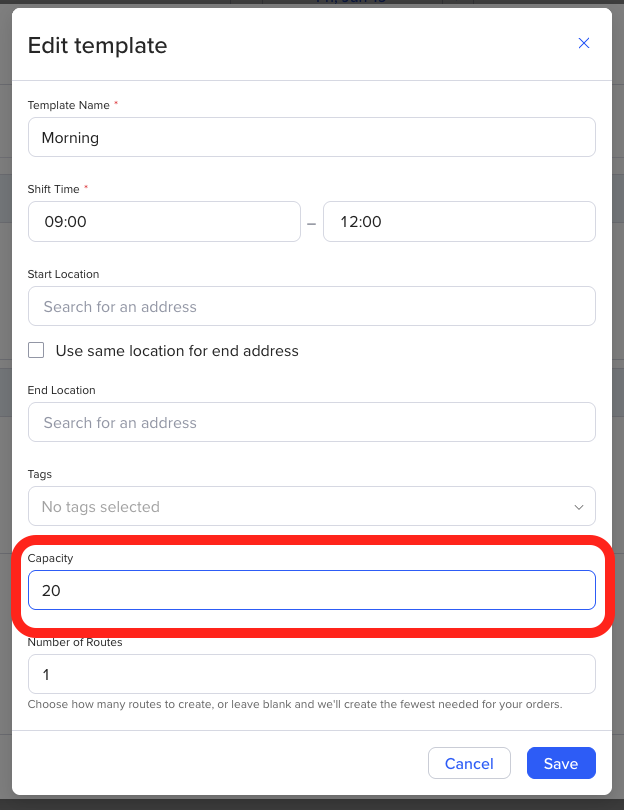
To edit this amount, click the pencil icon in the right-hand corner of each template then click Save.
Once you’ve set this up, Routific will automatically match load size to vehicle capacity next time you click Schedule.