Even small delivery mistakes can create big problems: missed meals, frustrated customers, and drivers sent back out to fix errors. That’s why we’re introducing barcode scanning so drivers can scan packages at the door to confirm they’re delivering the right items to the right customer. Meanwhile, dispatchers get a clear audit trail of each scan.
Implementing barcode scanning results in fewer wrong deliveries, fewer support calls, and more confidence across the entire delivery operation.
This is the first version of barcode scanning in Routific. Currently, it allows you to:
Upload barcodes to orders
Have drivers scan barcodes at the point of delivery
Validate that the correct barcodes have been scanned for the correct customer
As we gather feedback, we’ll continue evolving barcode scanning based on how teams use it in real-world delivery operations. Email us at [email protected] to share your questions or comments!
Dispatchers may input barcodes into Routific 3 ways:
manually
by CSV
or via the API
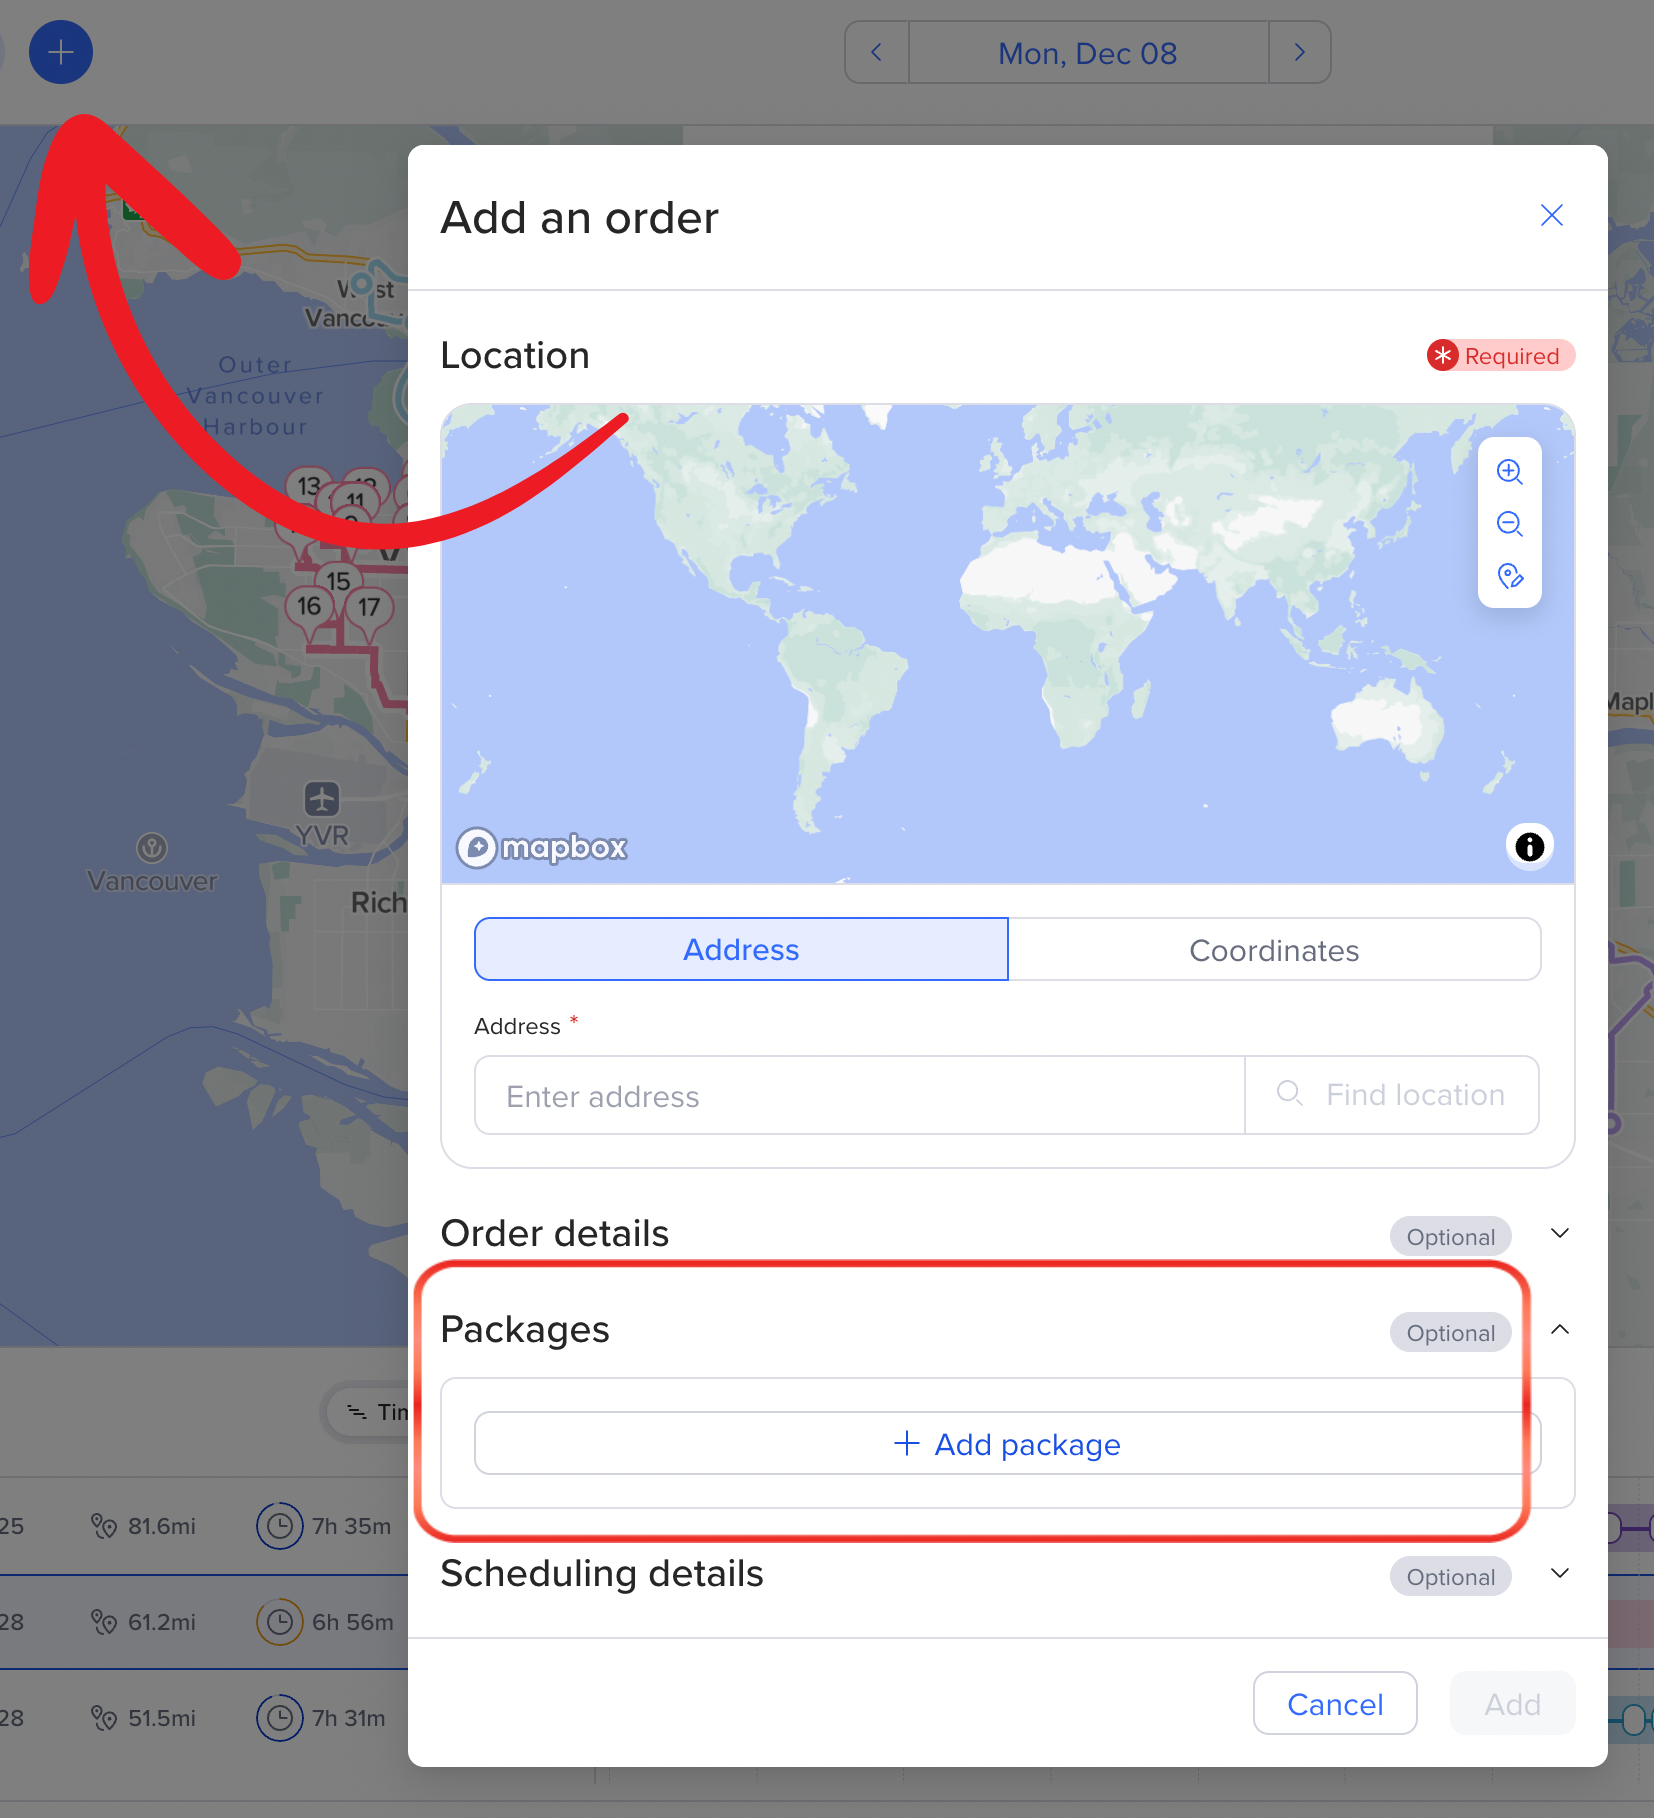
Click the blue plus sign to add an order.
From there, find the section called Packages
Click + Add package
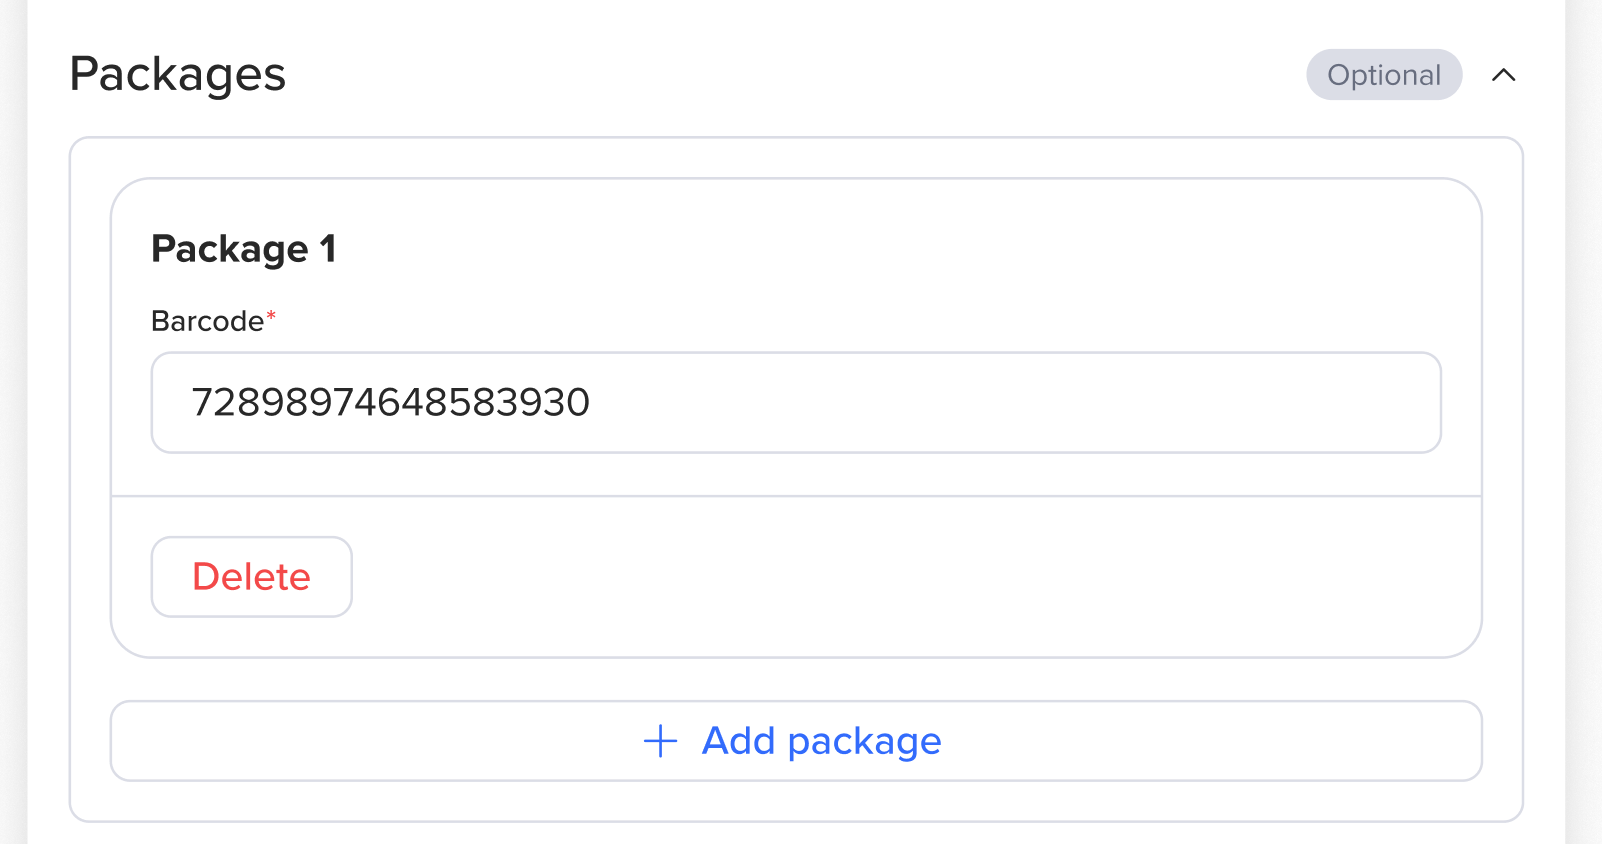
Enter the barcode number here. You may add multiple packages if needed.
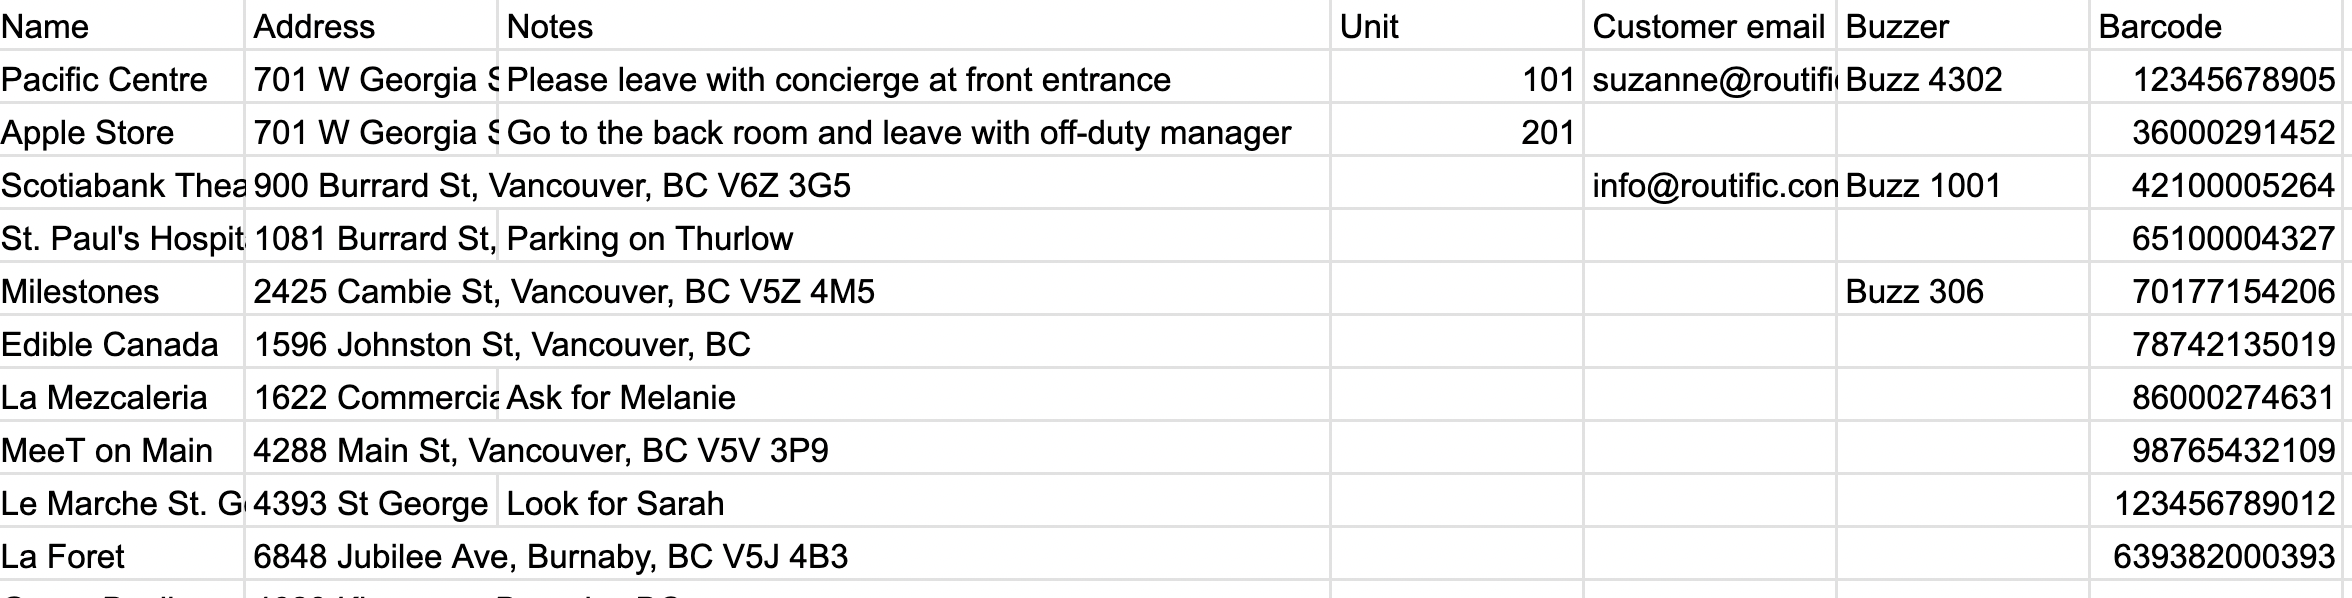
To upload barcodes with your CSV:
Add a new column to your spreadsheet.
You can name the column anything, but Barcode might make the most sense.
When you add this new column to your spreadsheet, the spreadsheet mapper will pop up.
Map the new column to Barcode to make sure the data will be uploaded alongside your orders.
If you use the API to import your orders into Routific, you can now include barcode information. Please see our API docs for details.
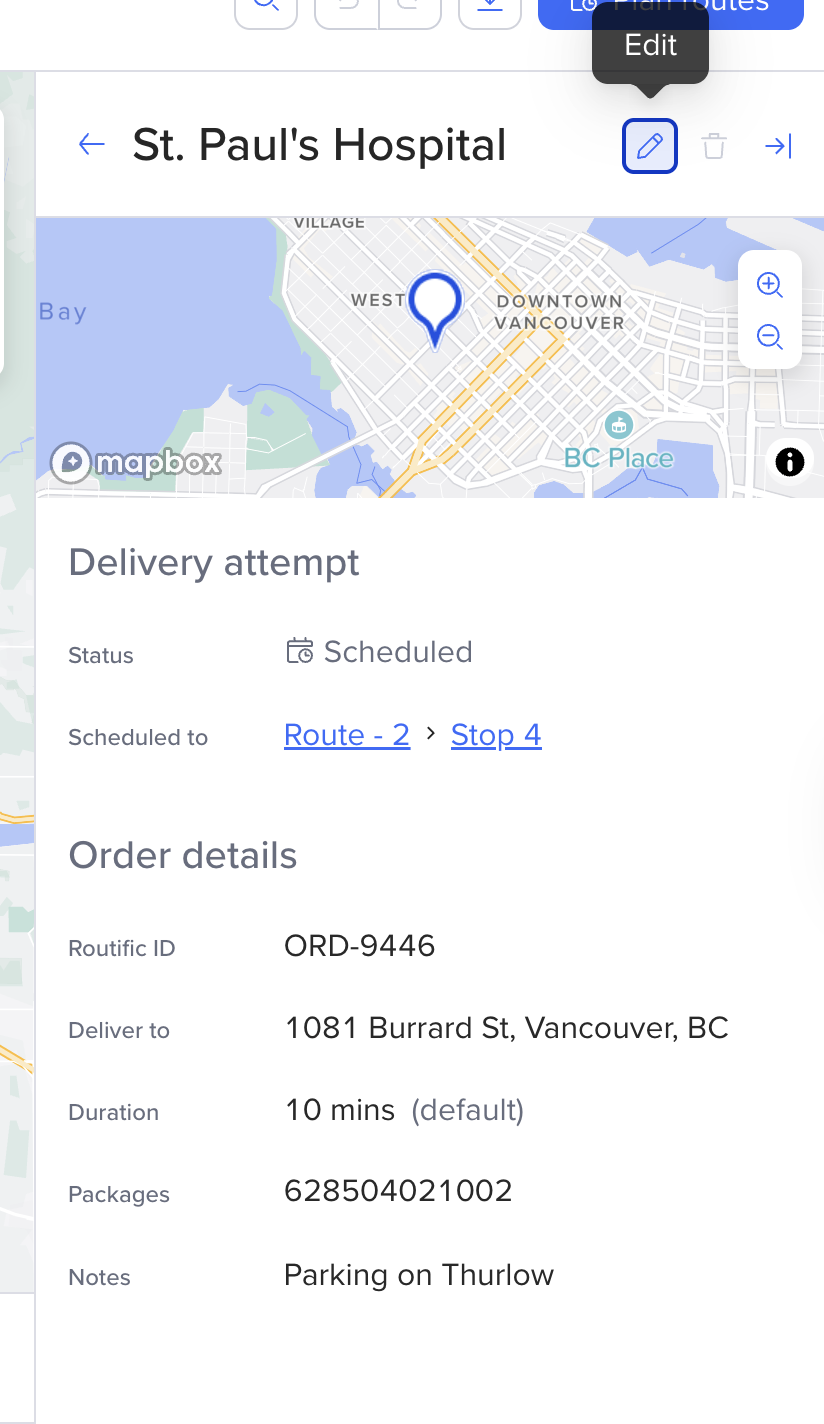
If you need to edit or change the barcodes, you can click into each order and click the pencil icon.
If a dispatcher has uploaded barcodes, drivers will see them in the Routific mobile app.
Open an order in the app.
Tap Scan packages.
This activates the phone’s camera.
Scan each package for the delivery.
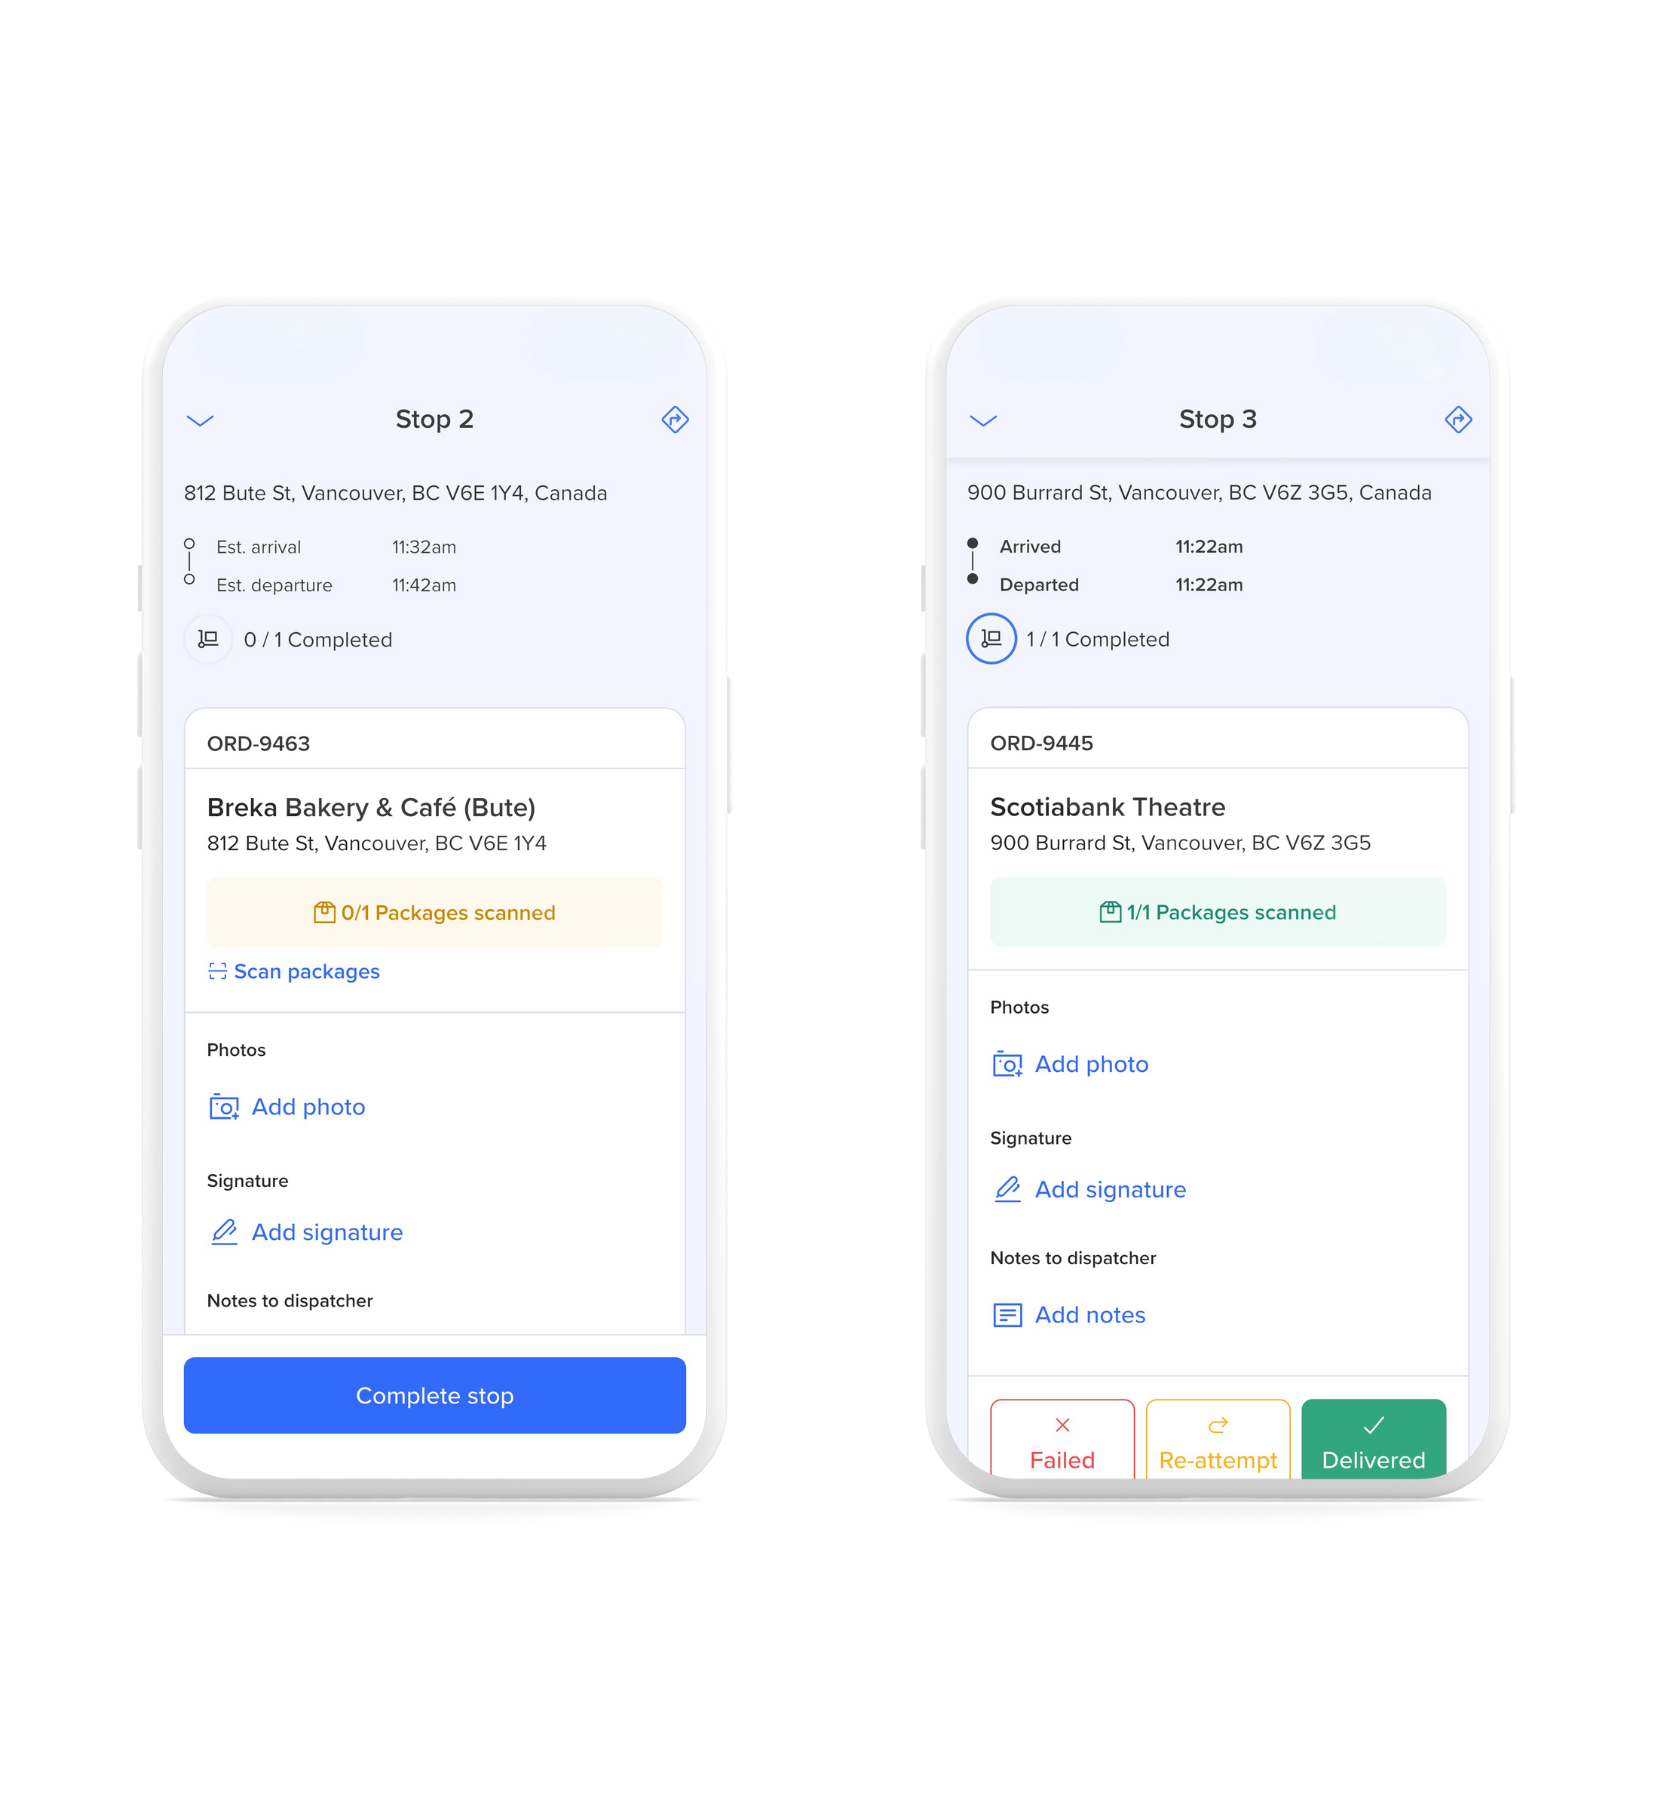
When no packages have been scanned: A yellow message appears (for example, 0/1 Packages scanned).
When drivers have successfully scanned the right packages: A green message appears (for example, 1/1 Packages scanned).
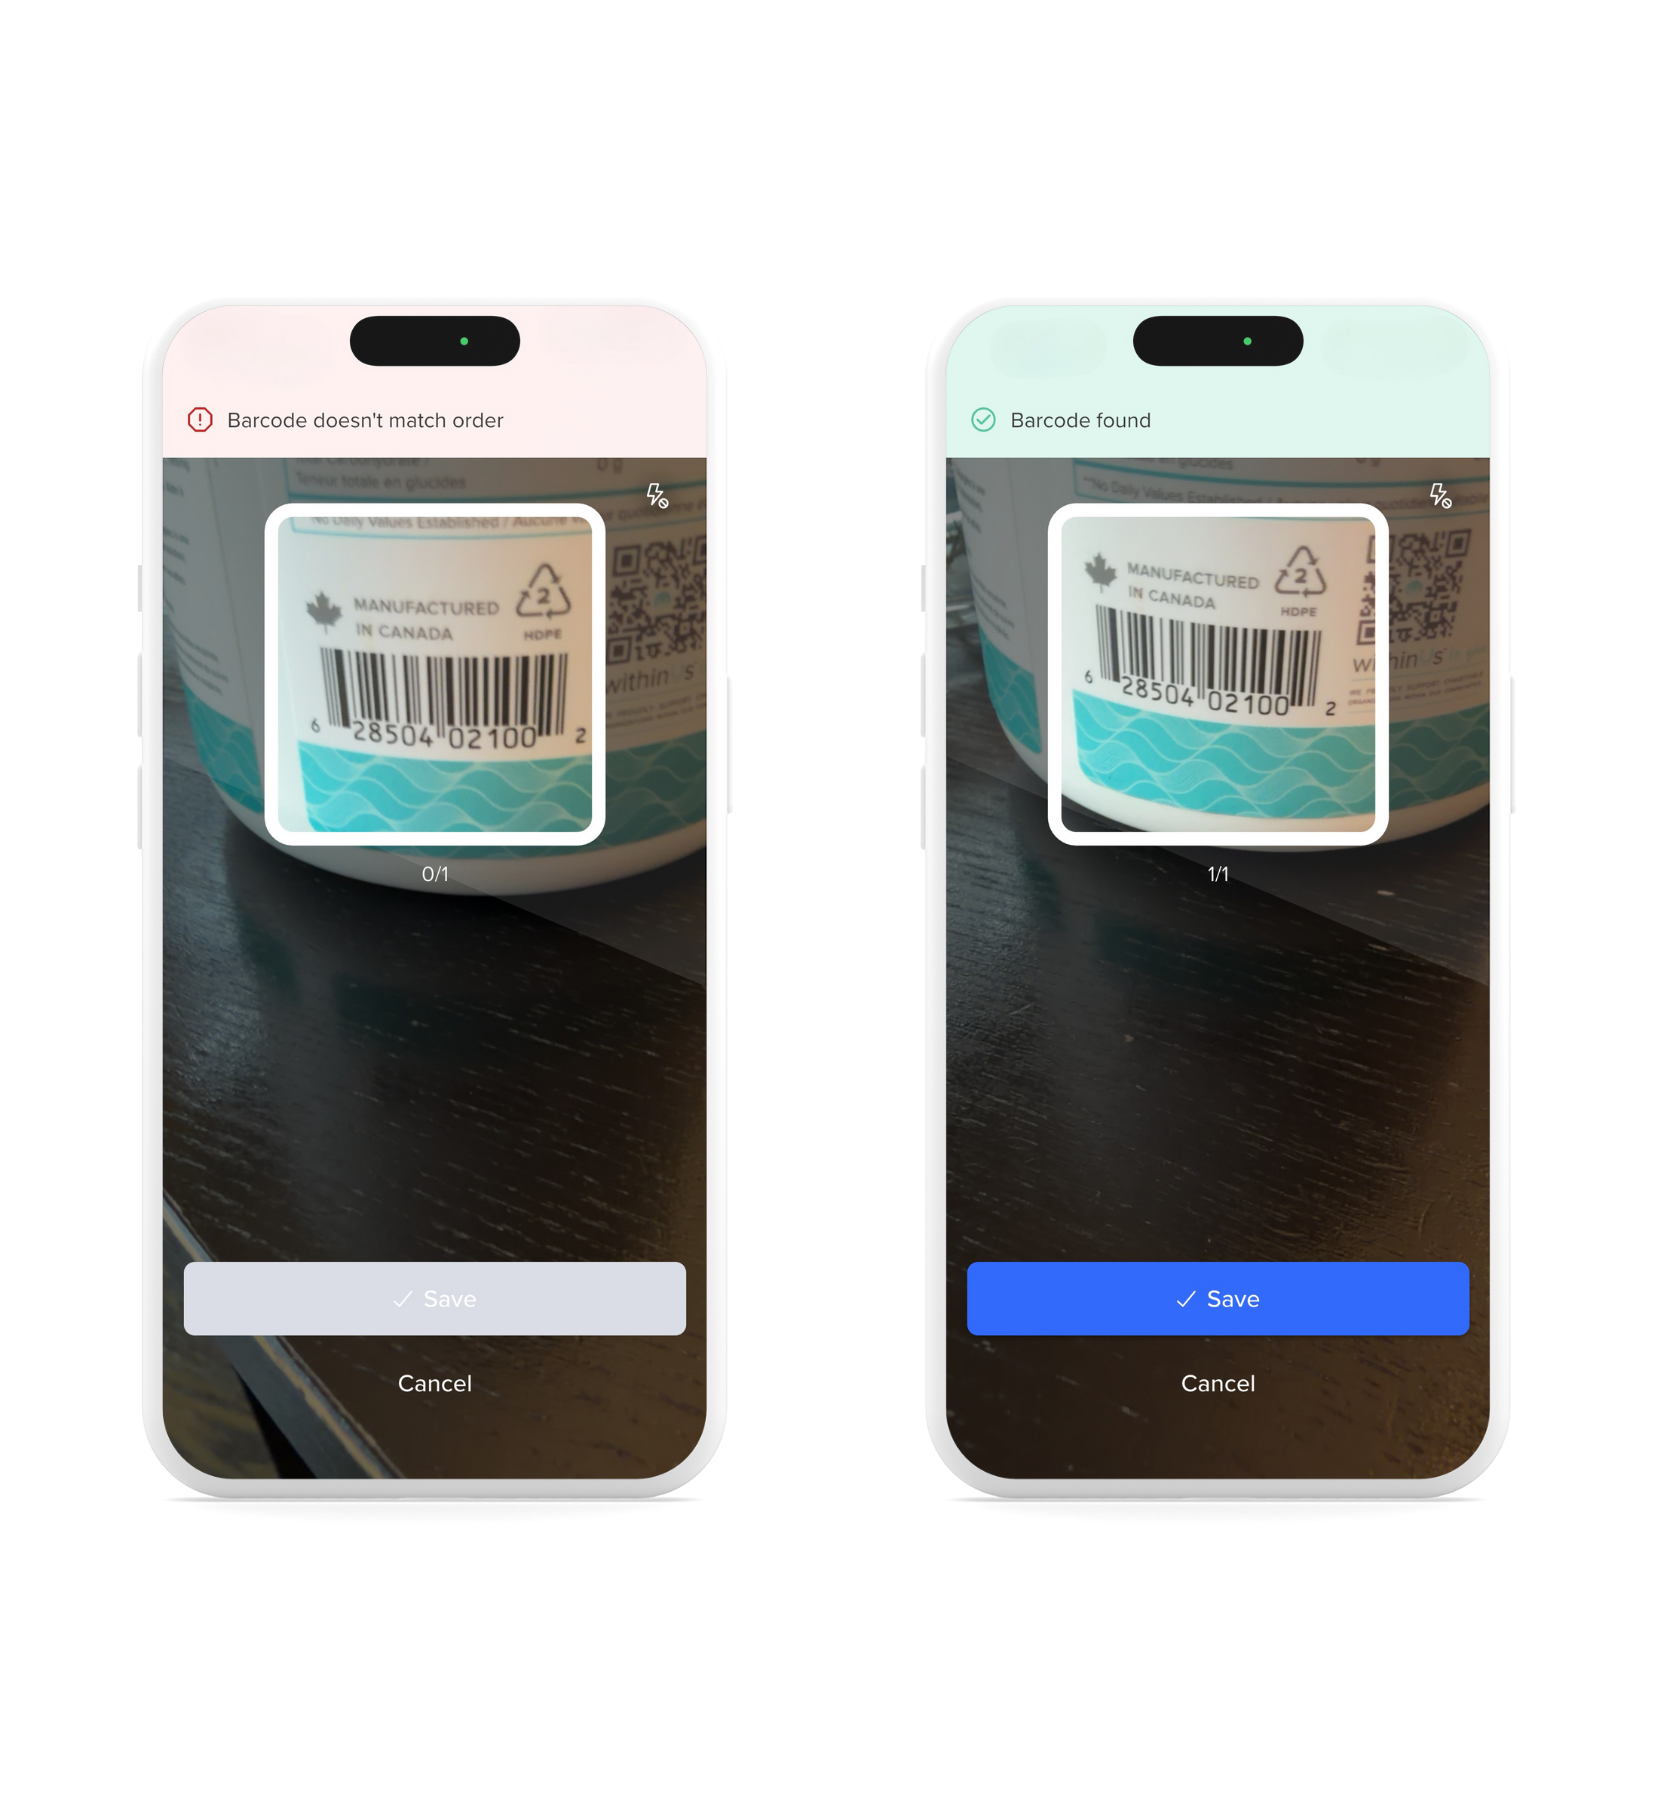
When drivers scan packages with their mobile phone camera, Routific will validate the correct package is being scanned.
If the driver is scanning the wrong package, a message will appear in red: Barcode doesn’t match order
If the driver is scanning the right package, a message will appear in green: Barcode found
Like GPS live tracking and photo + signature PODs, dispatchers can watch the driver’s barcode scanning progress live on plan.routific.com.
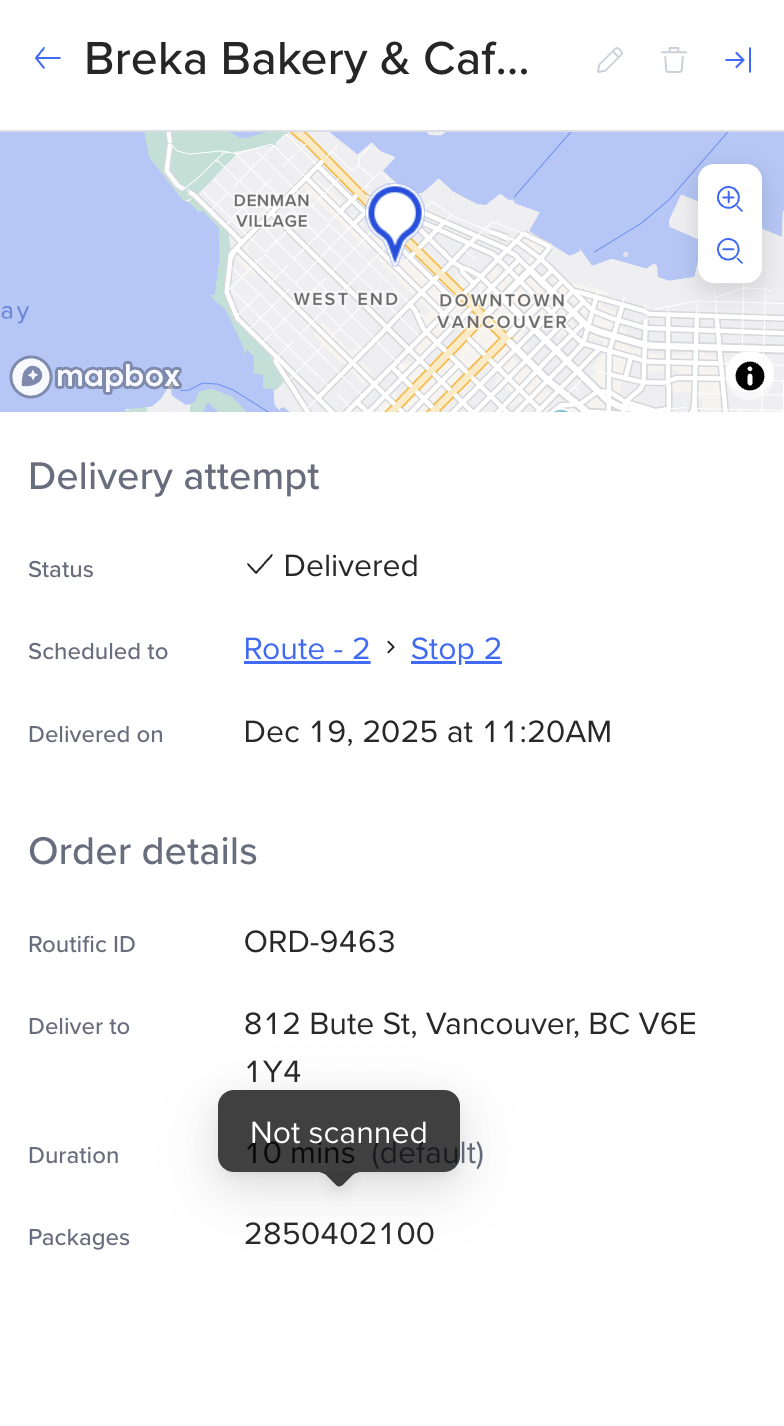
The barcode number appears without a status change.
Hovering over the barcode shows: Not scanned.
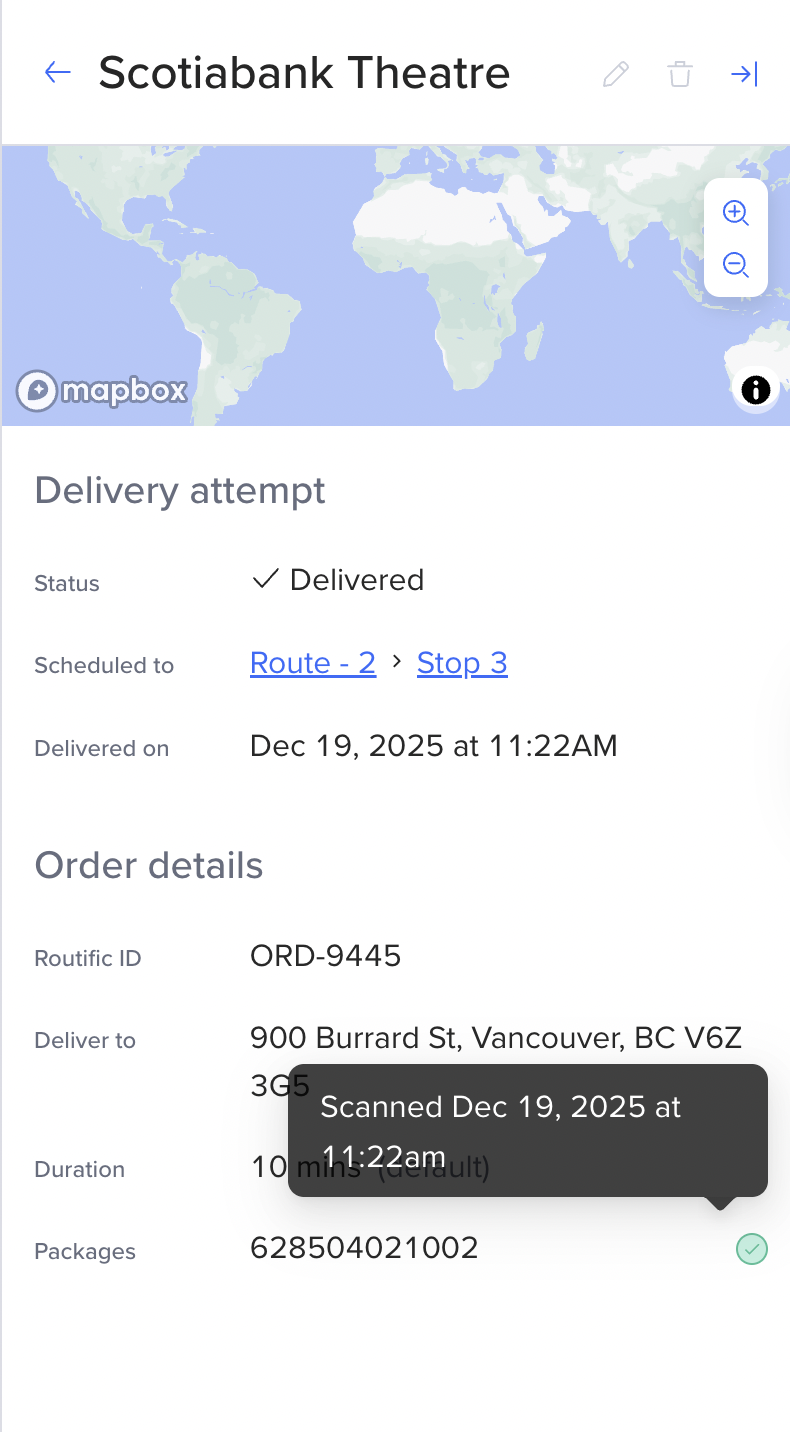
A green check mark appears next to the barcode.
Hovering over the barcode shows:
Scanned, along with the date and time the driver scanned it.
Questions or comments? Let us know via in-app chat or email [email protected]! We’ll continue improving barcode scanning based on what we hear from you.