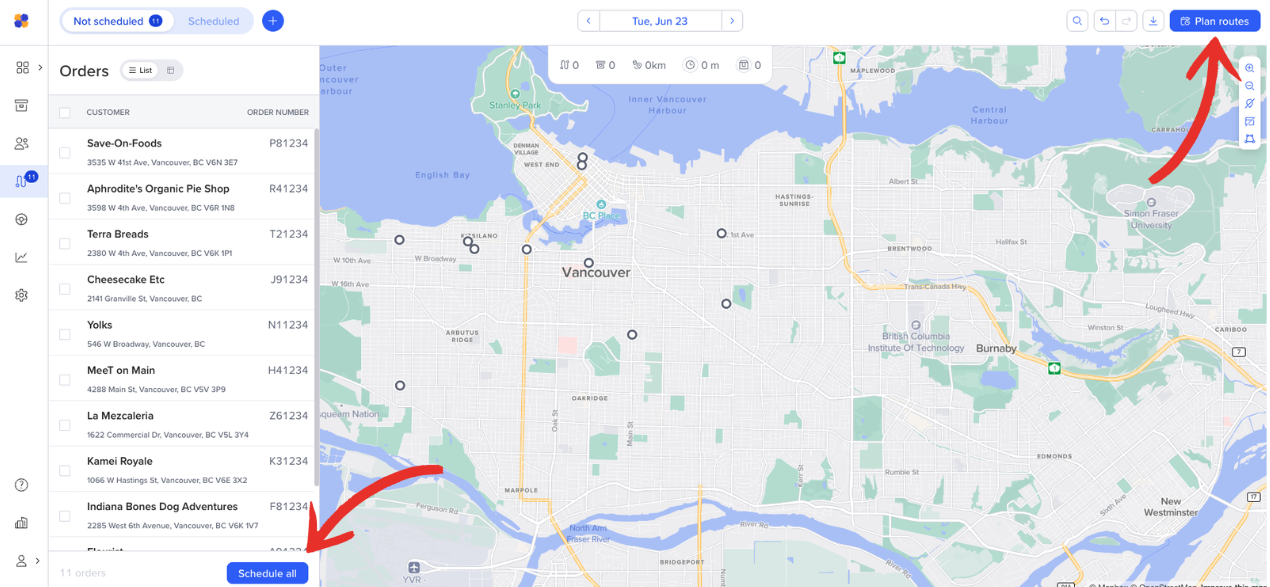
Once you've added your orders to Routific, it's time to plan and optimize your routes.
Click Plan Routes at the top right-hand corner, or Schedule All at the bottom of the order list.
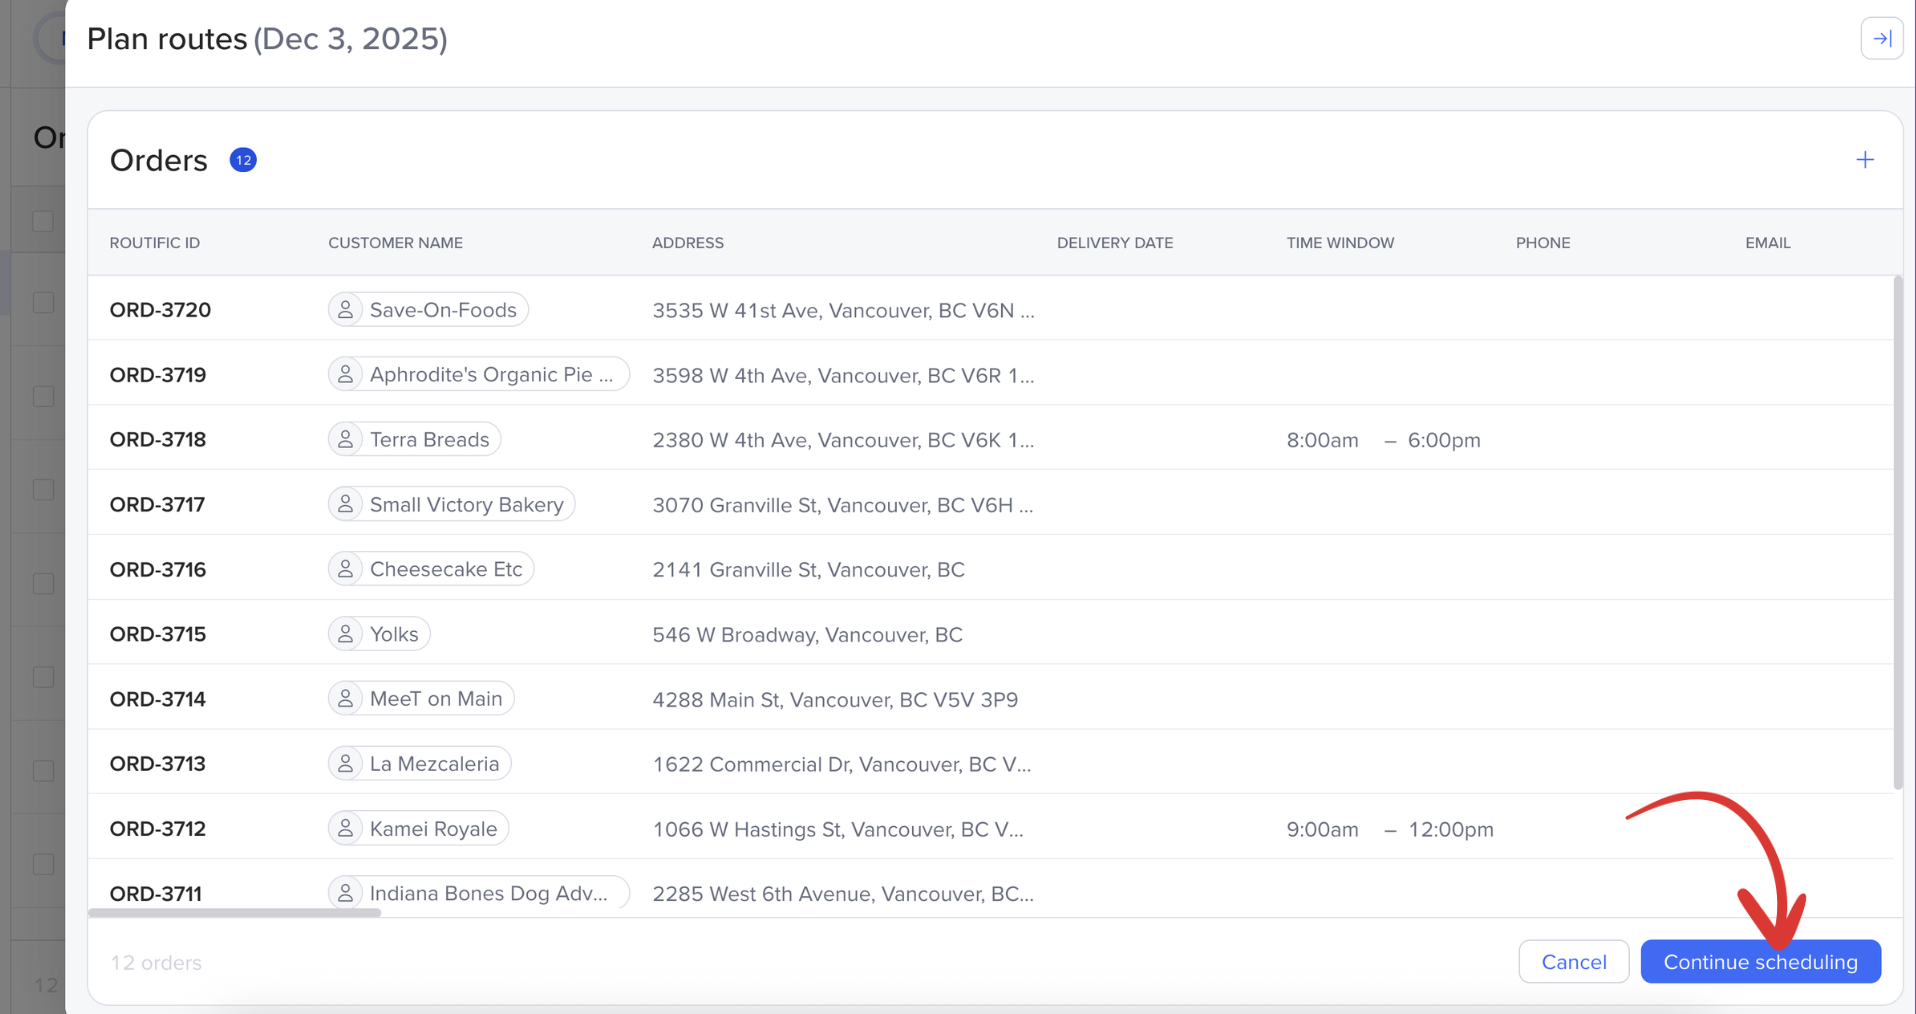
You'll get a chance to confirm all your orders. Scroll through and confirm all the details are correct. We'll highlight problem addresses so you can fix them.
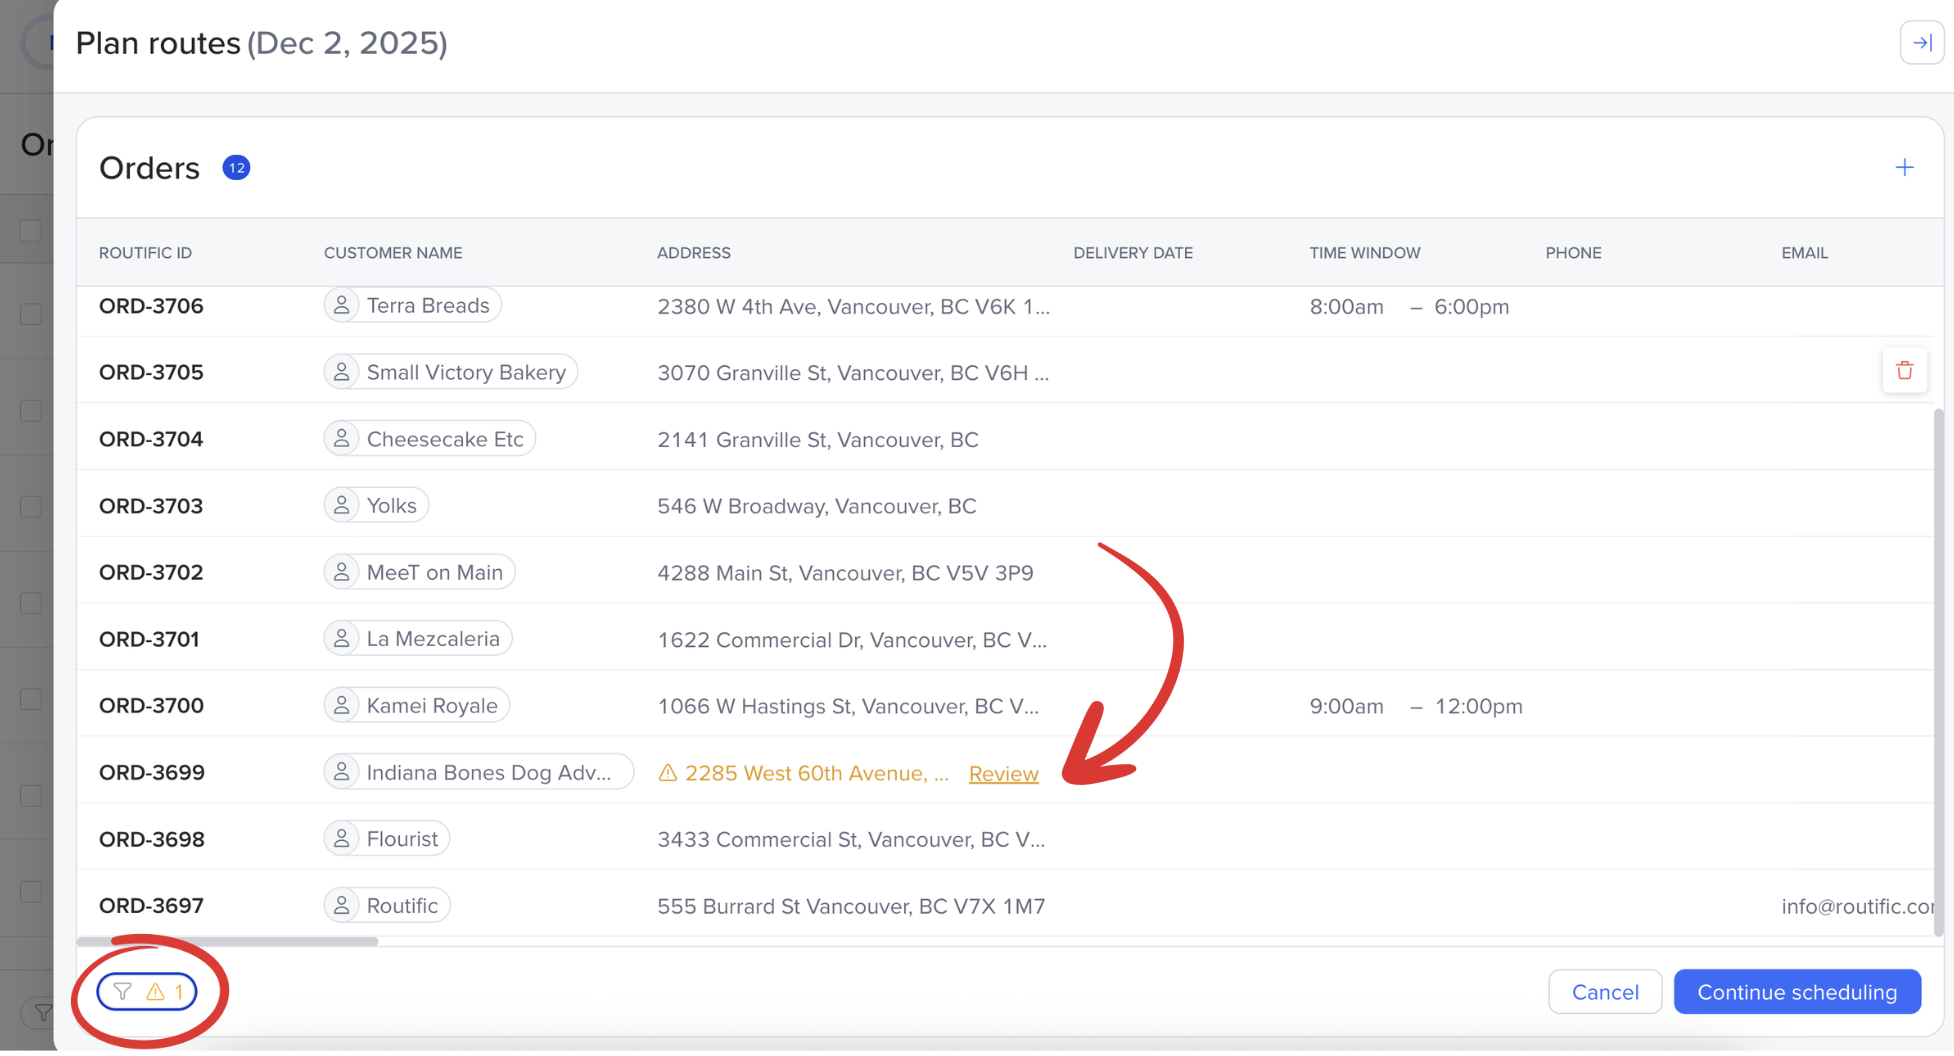
You can click the filter icon in the bottom left corner to view only the orders with problem addresses.
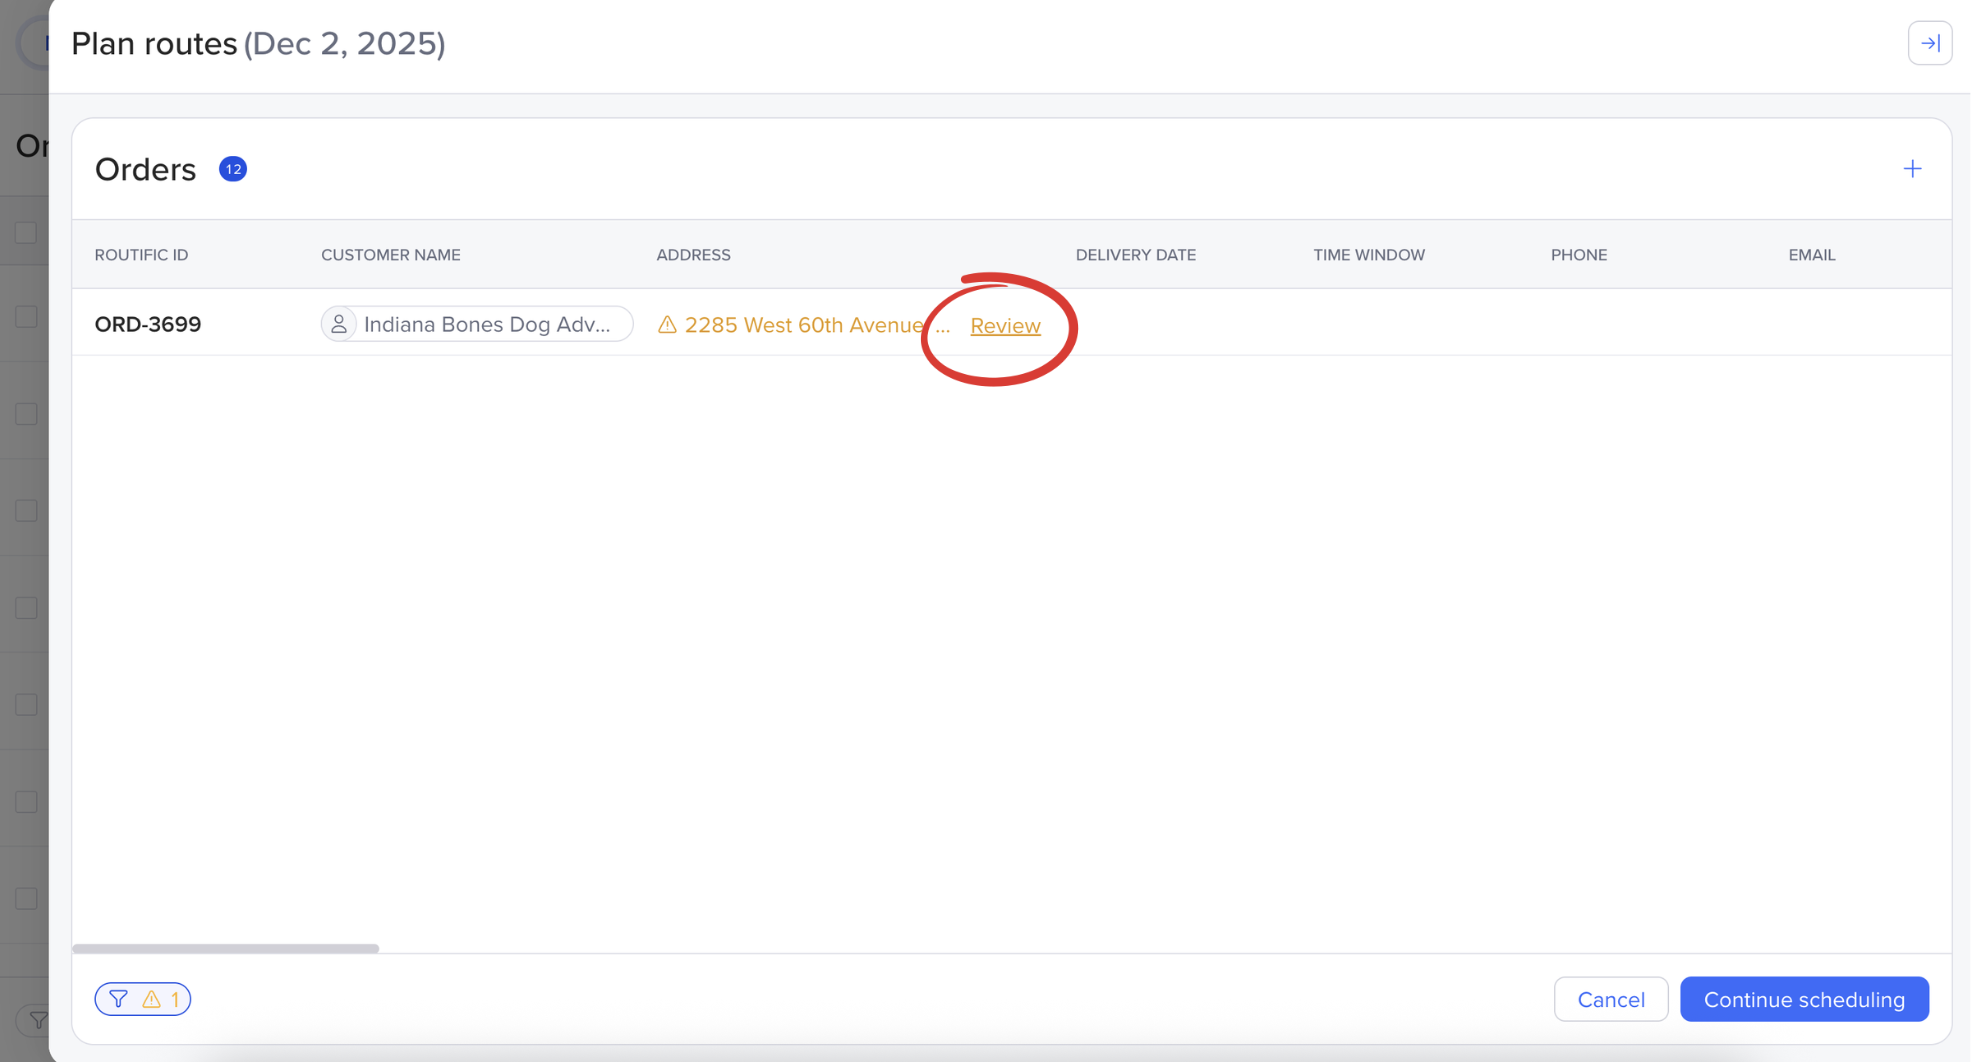
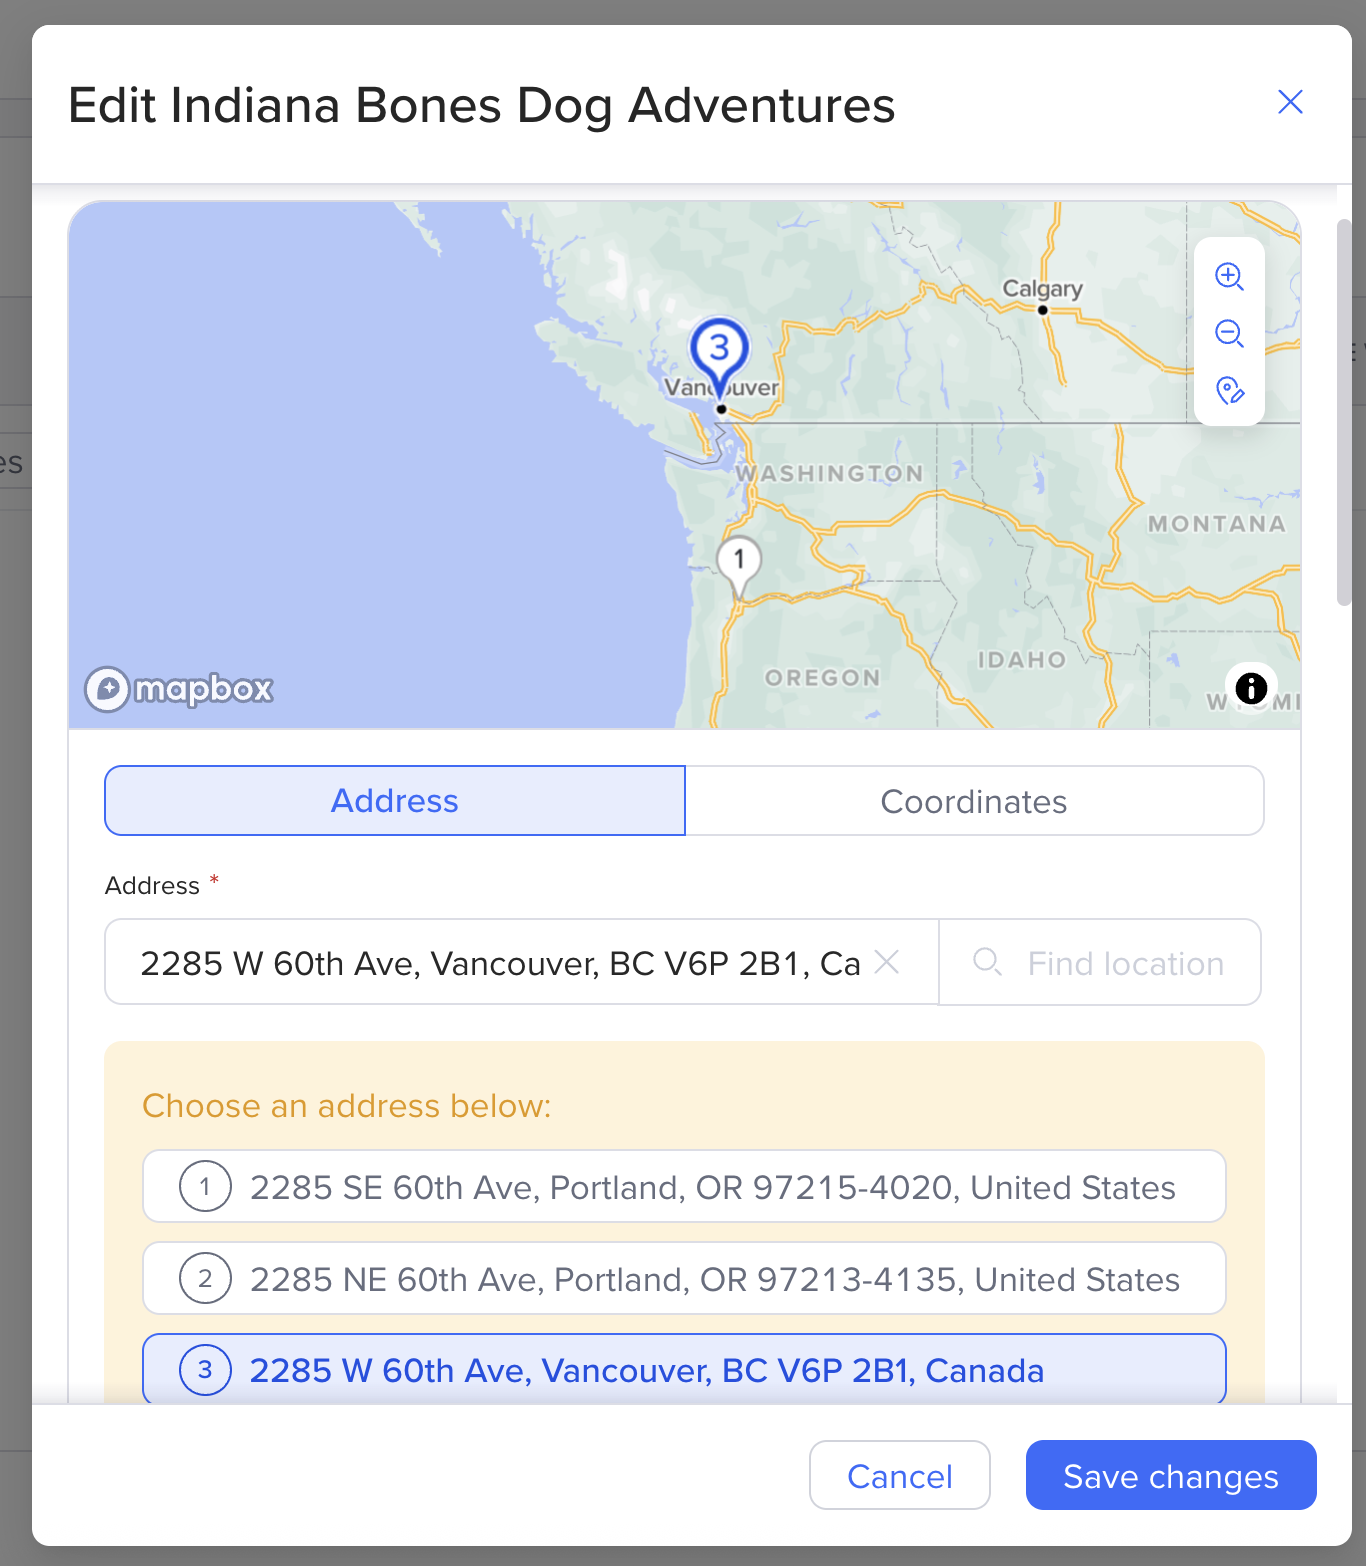
Click on Review, and Routific will show a few address options it has found. Just click on the correct one, or pin the correct location on the map, and then click Save changes.
Once you're sure everything looks right, click Continue Scheduling.
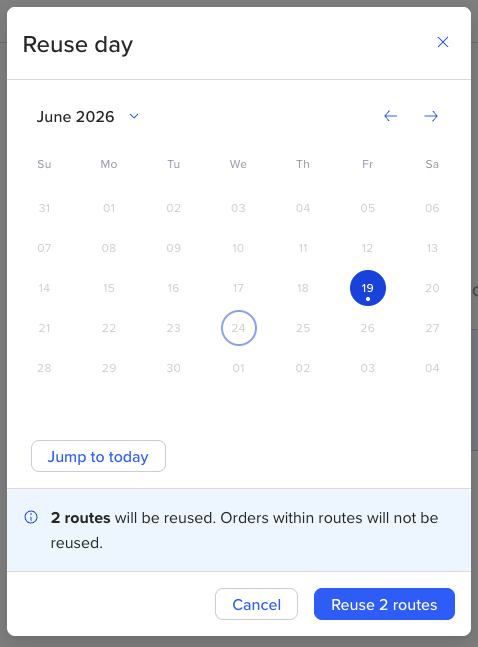
The next screen shows all your orders on the left, and your options on how to create routes on the right. You can either Reuse a past date- or have Routific automatically create routes for you.

If you want to use the same route structures from a previous date, you can pick a past date from the calendar, then click Reuse routes.
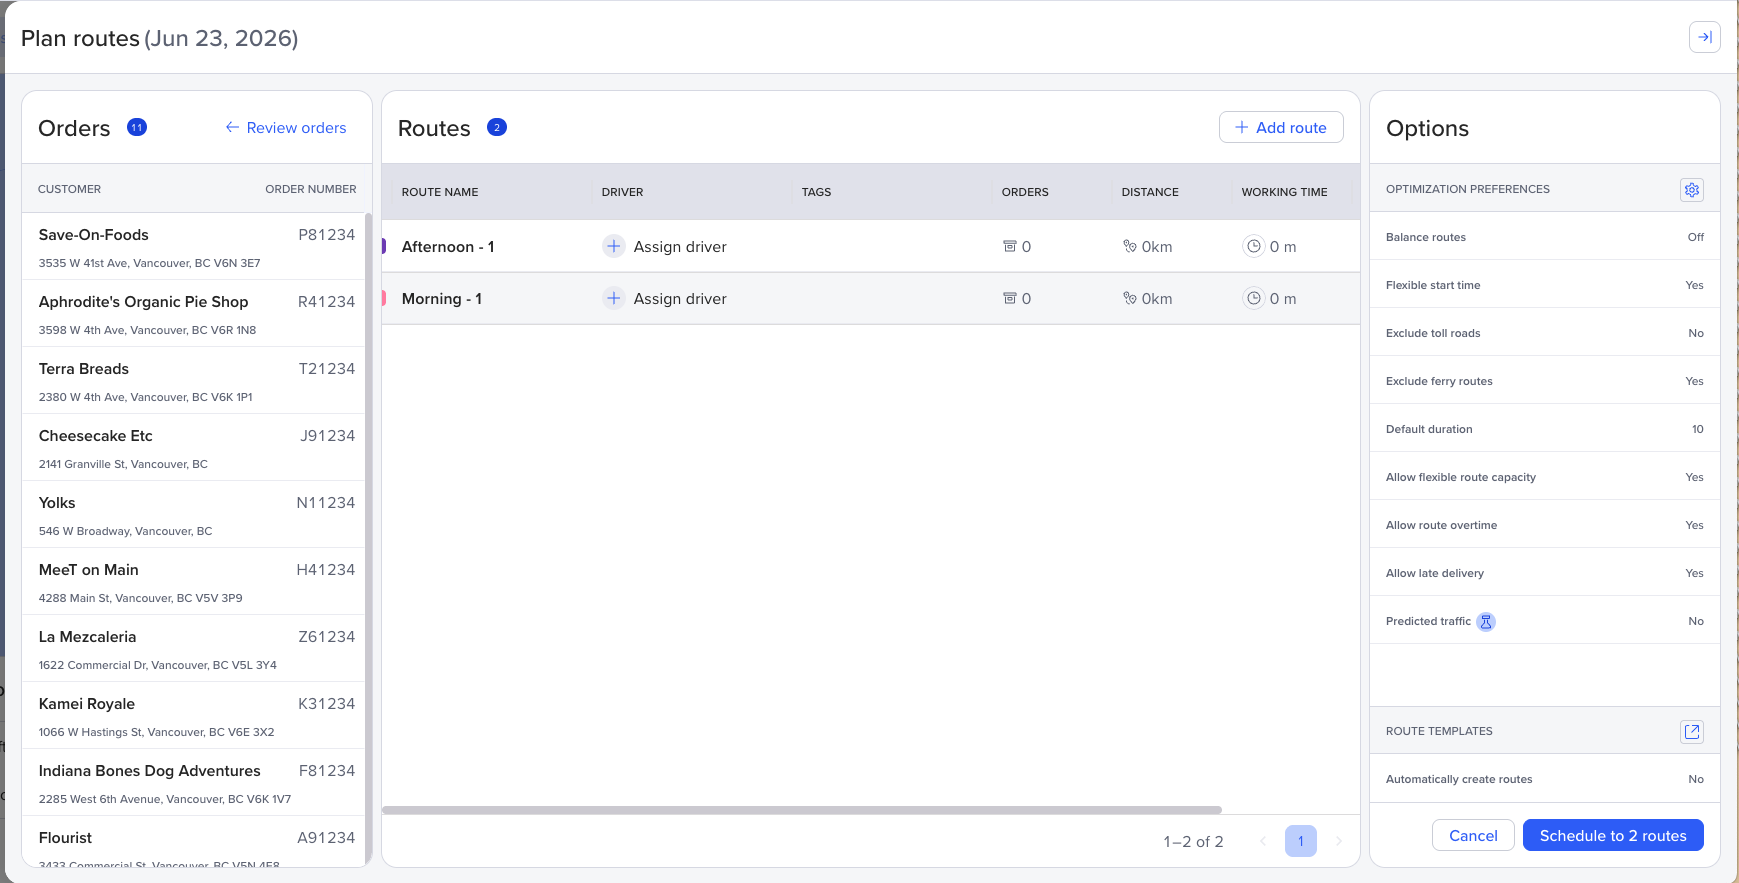
You will then see two empty routes added, were you can assign a driver if you would like (you can do this later as well).
If you choose the Automatically create routes option - you are letting Routific decide the routes you need based on our algorithm and your templates selected. You will see no routes appear in the routes section for this option.
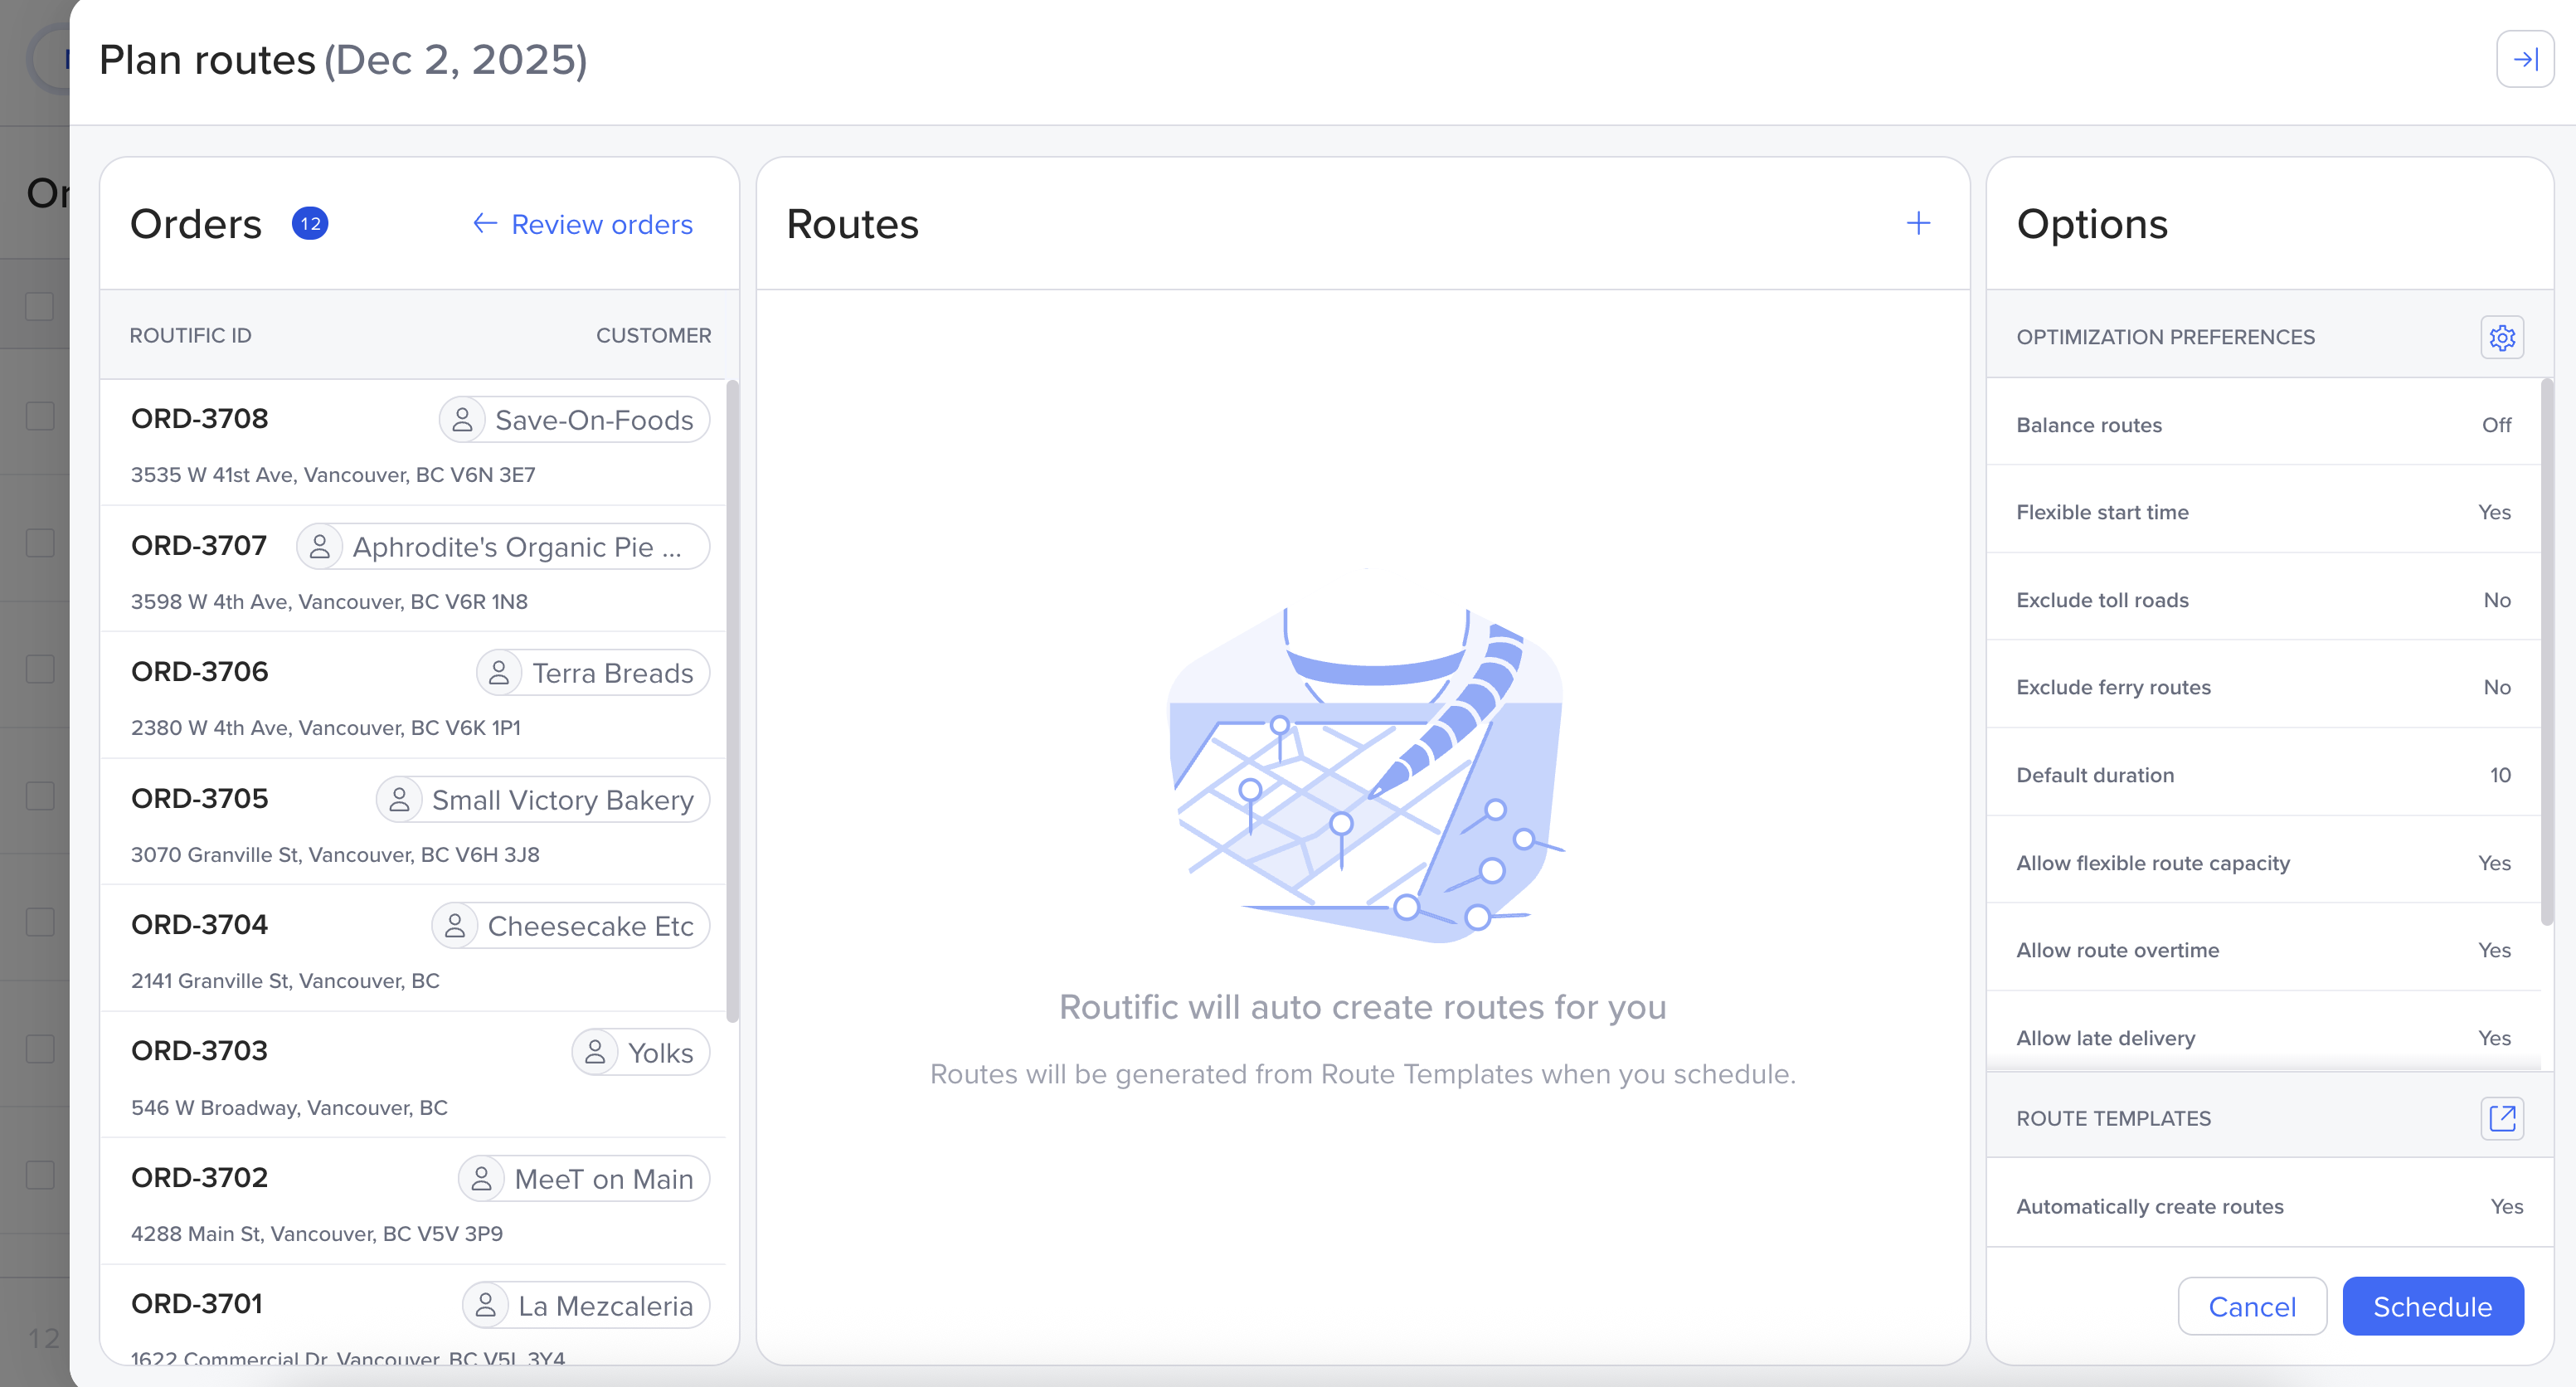
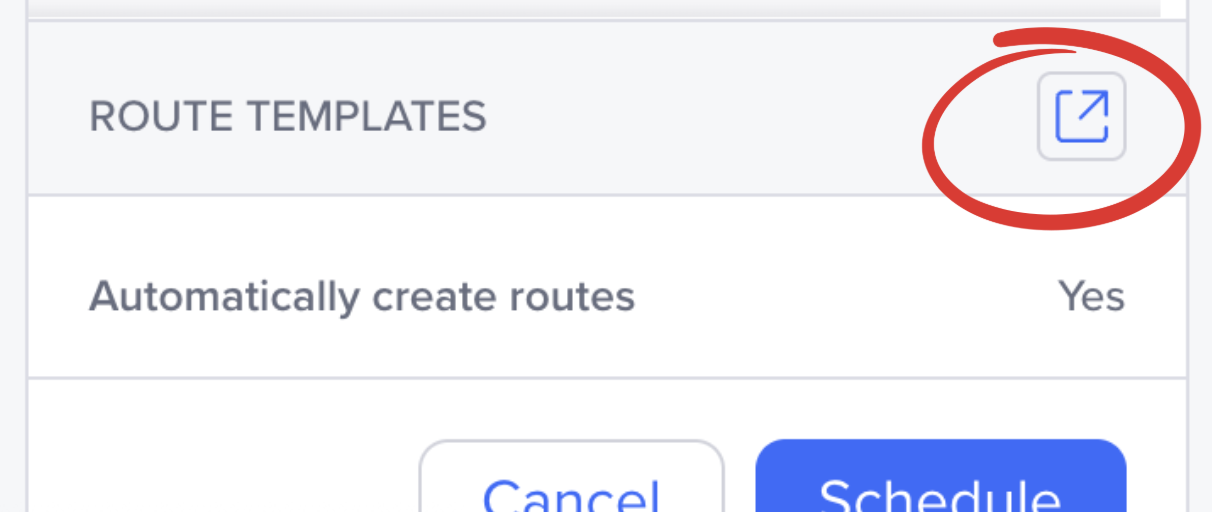
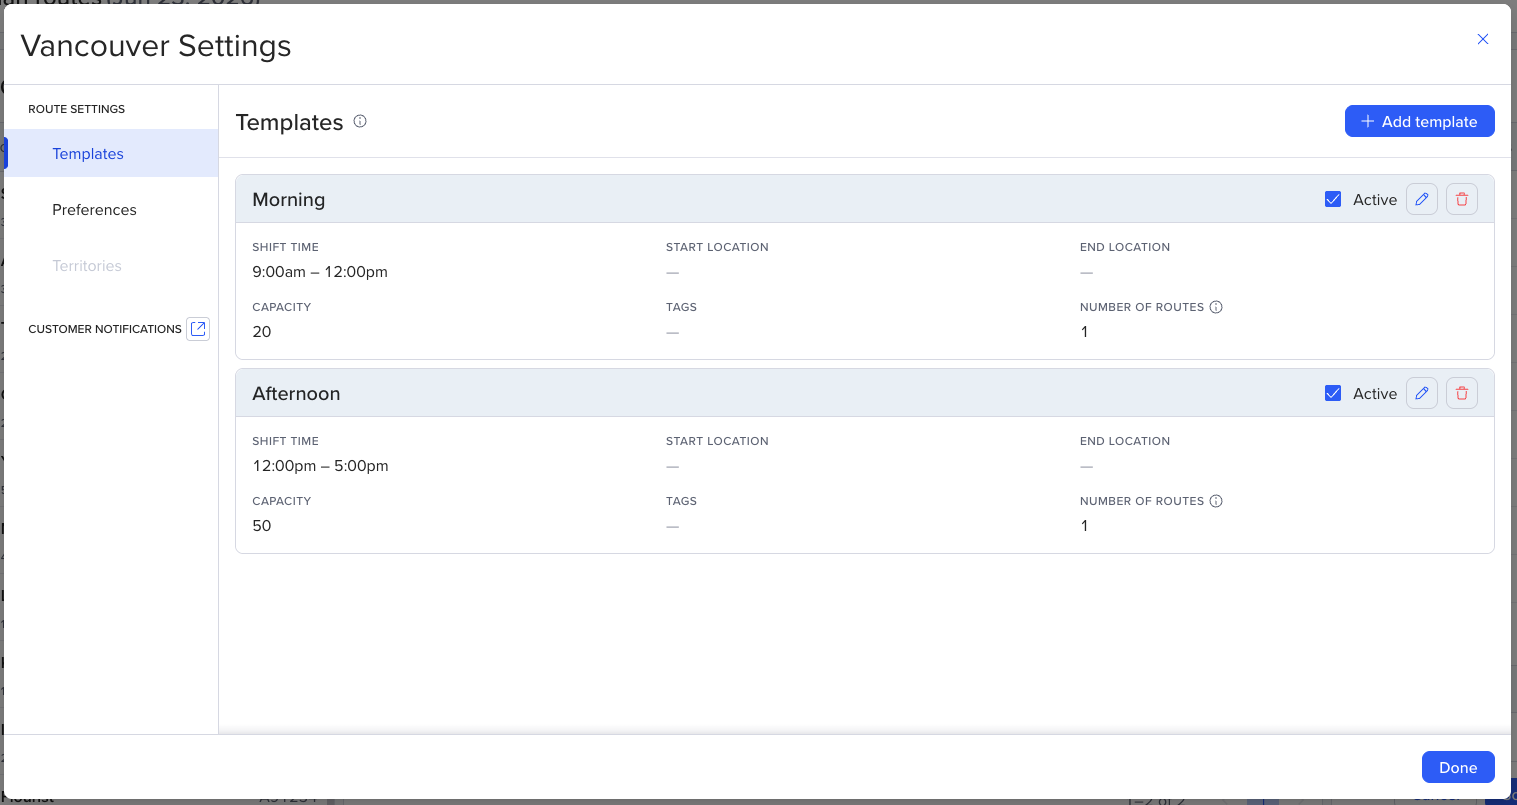
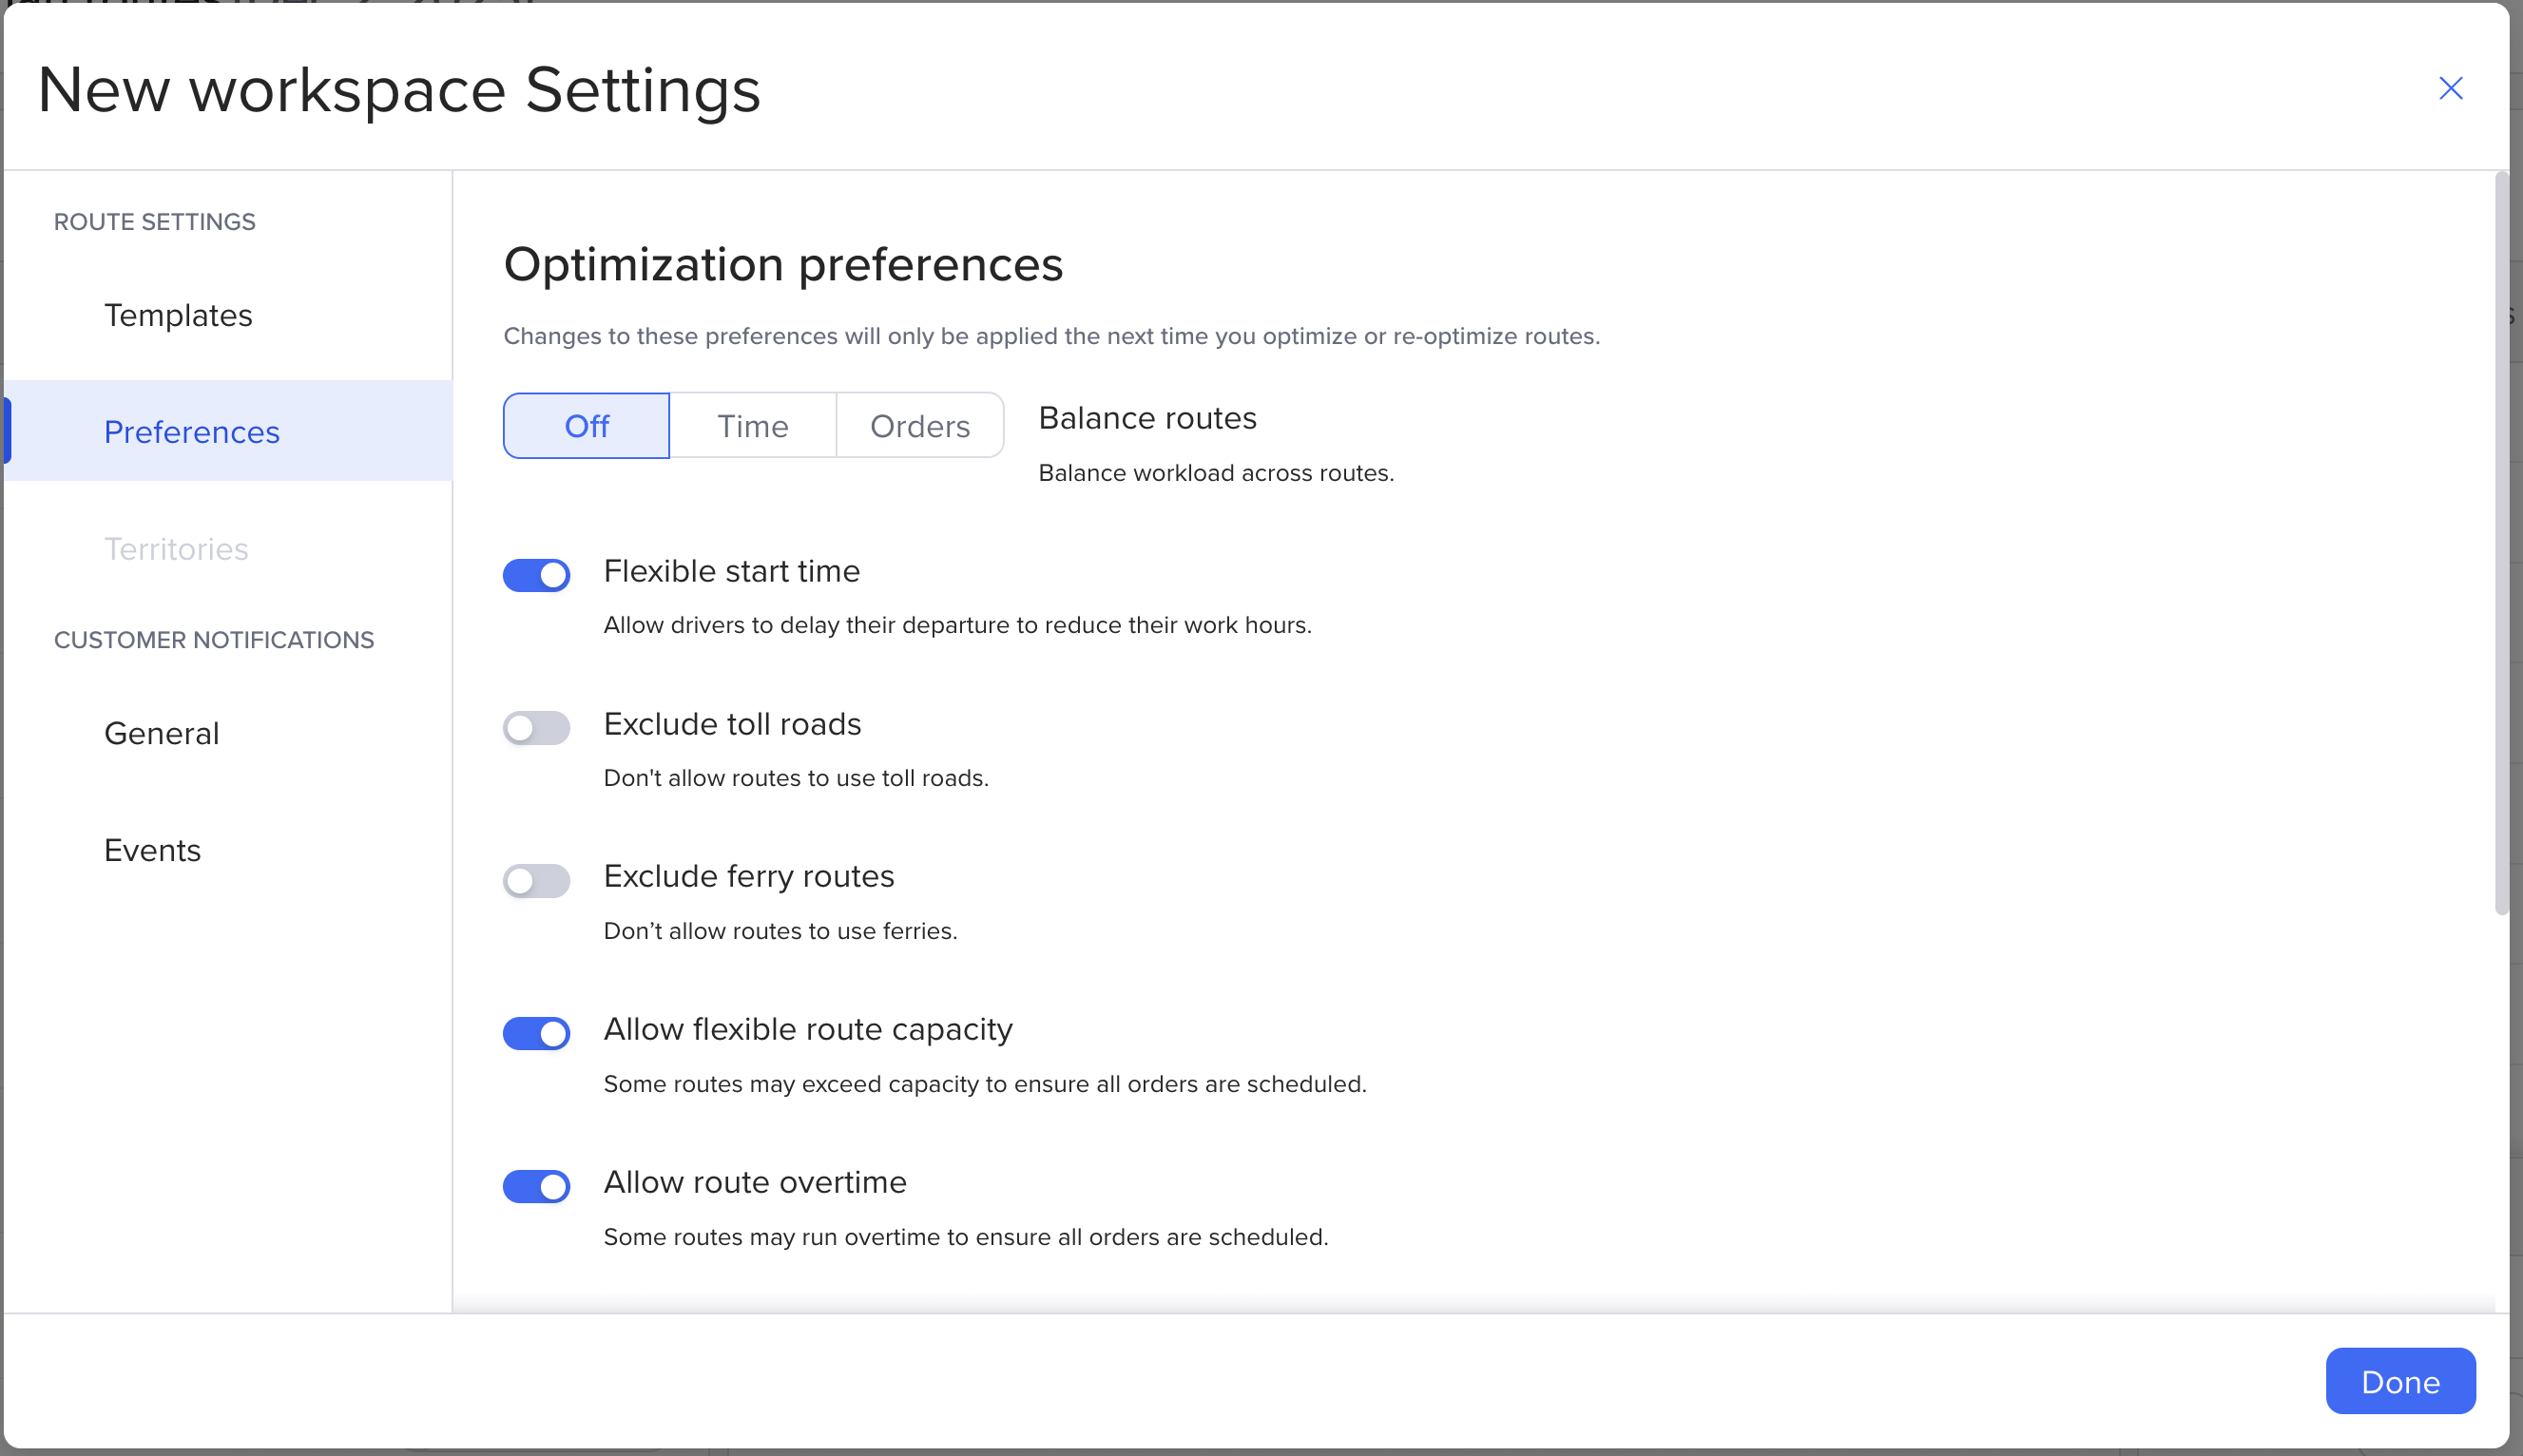
At the bottom right-hand corner, you can create or adjust your Route Templates. Route templates are used to set the number of routes, start and end times and locations, and capacity.
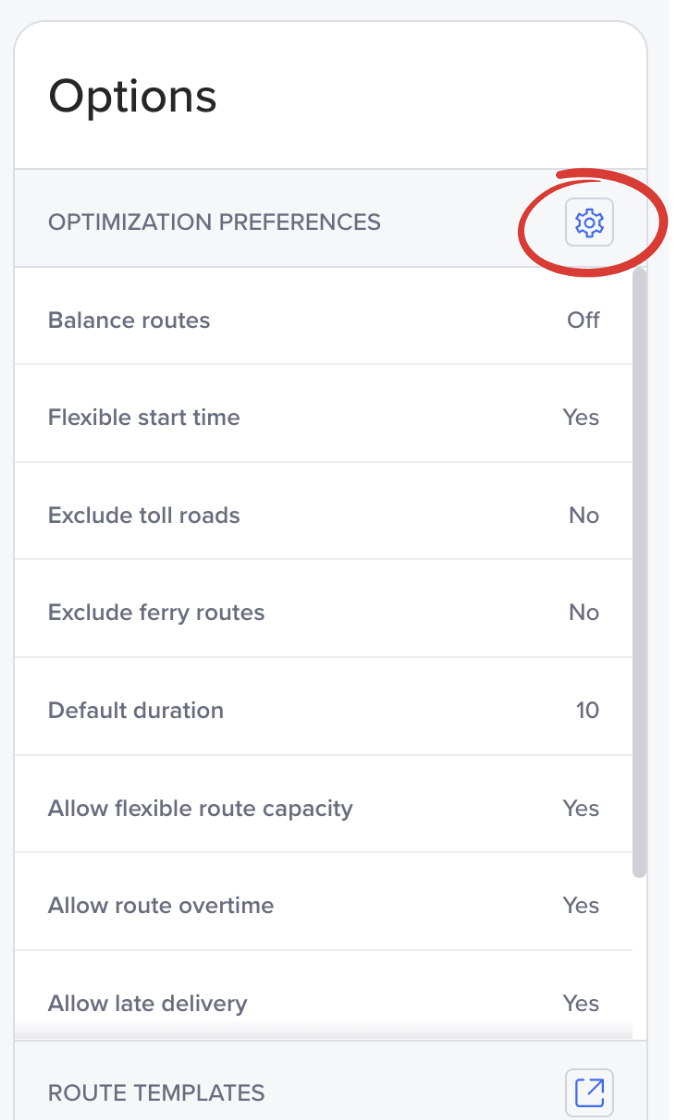
At the top right, you can adjust your Optimization preferences. We have many settings to choose from to configure your routes according to your business needs.
Once everything looks good, click Schedule.

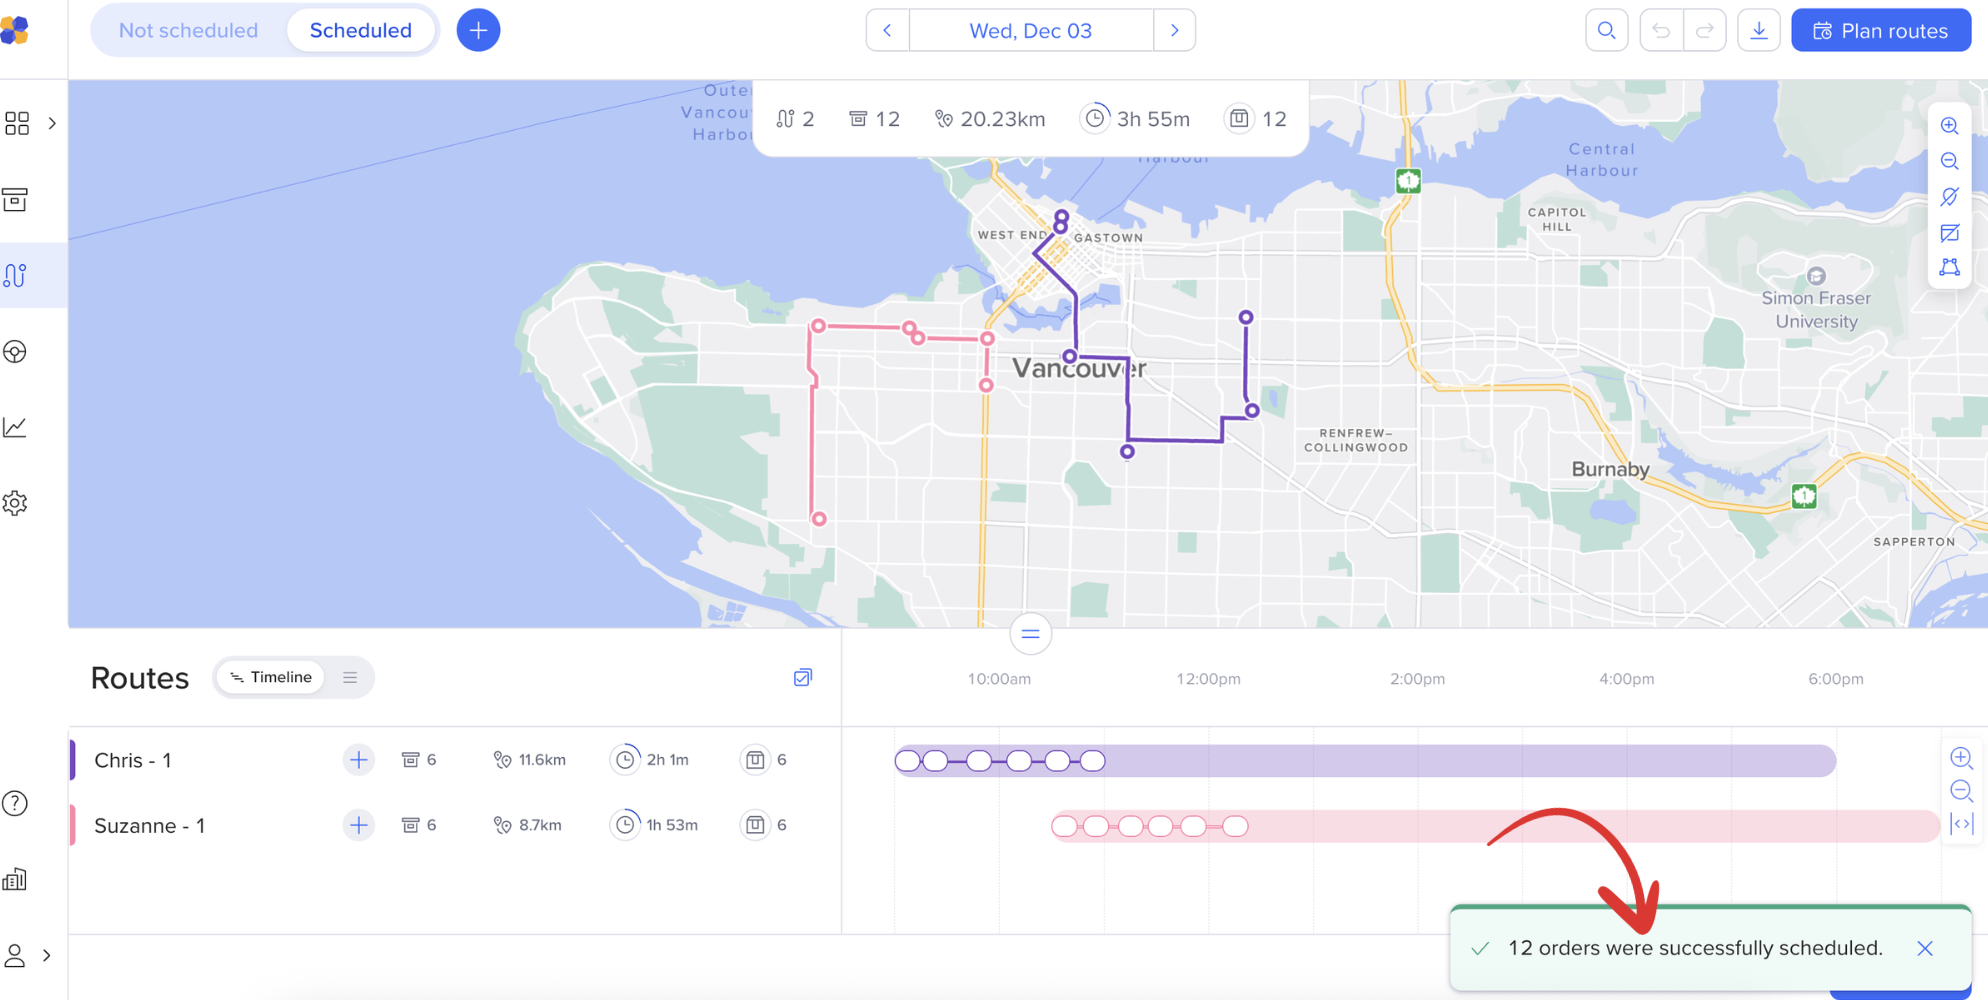
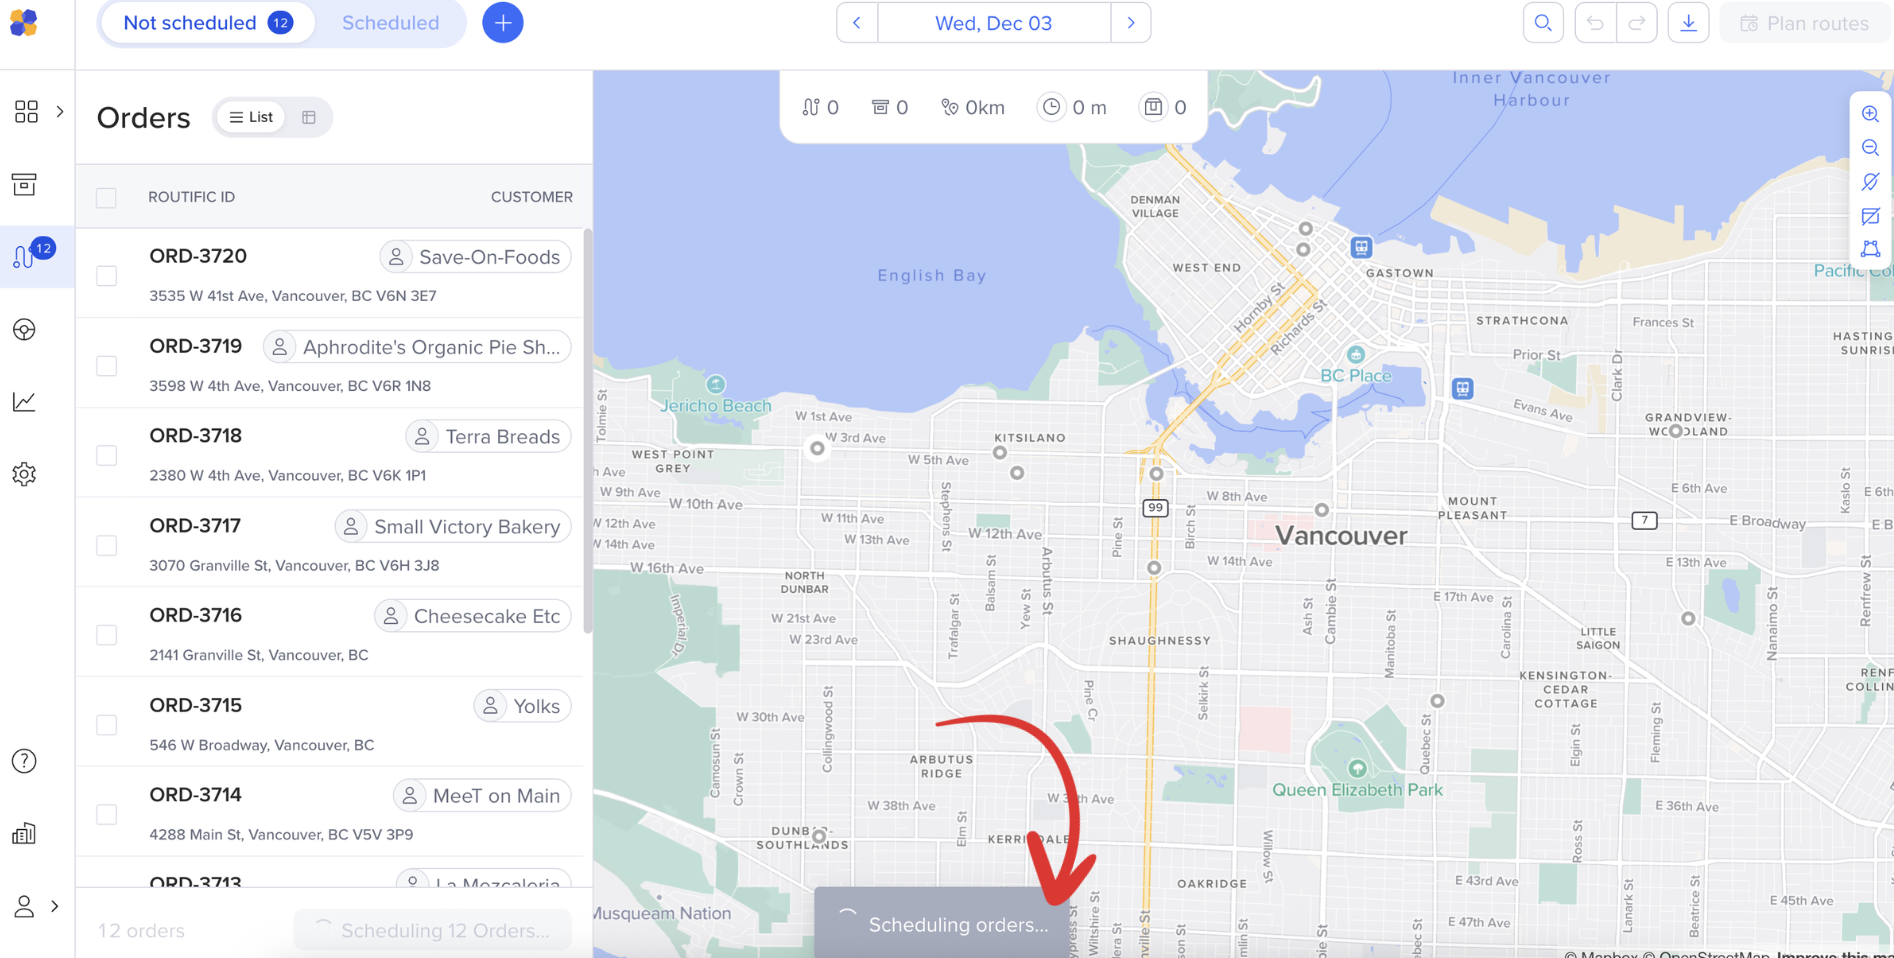
Routific will then begin the optimization, and you will see it scheduling your orders at the bottom of the map.
And voila! Your routes have been optimized, and you will be notified in the bottom right-hand corner how many orders have been scheduled.