Routific's Shopify integration lets you import orders directly from your store — no manual re-entry. Once connected, you can select orders, review how Shopify fields map to Routific fields, and create your routes in just a few clicks.
There are 2 ways to connect your Shopify store:
Connect to your Shopify store from within Routific
Connect to Routific from within your Shopify store
We’ll outline how to do both below.
In Routific, go to Company Settings in the left navbar.
Select Shopify under Integrations.
Enter your Shopify store URL and click Connect.
You'll be redirected to Shopify to authorize the connection. Approve the request.
Once authorized, you'll be returned to Routific and your store will show as connected.
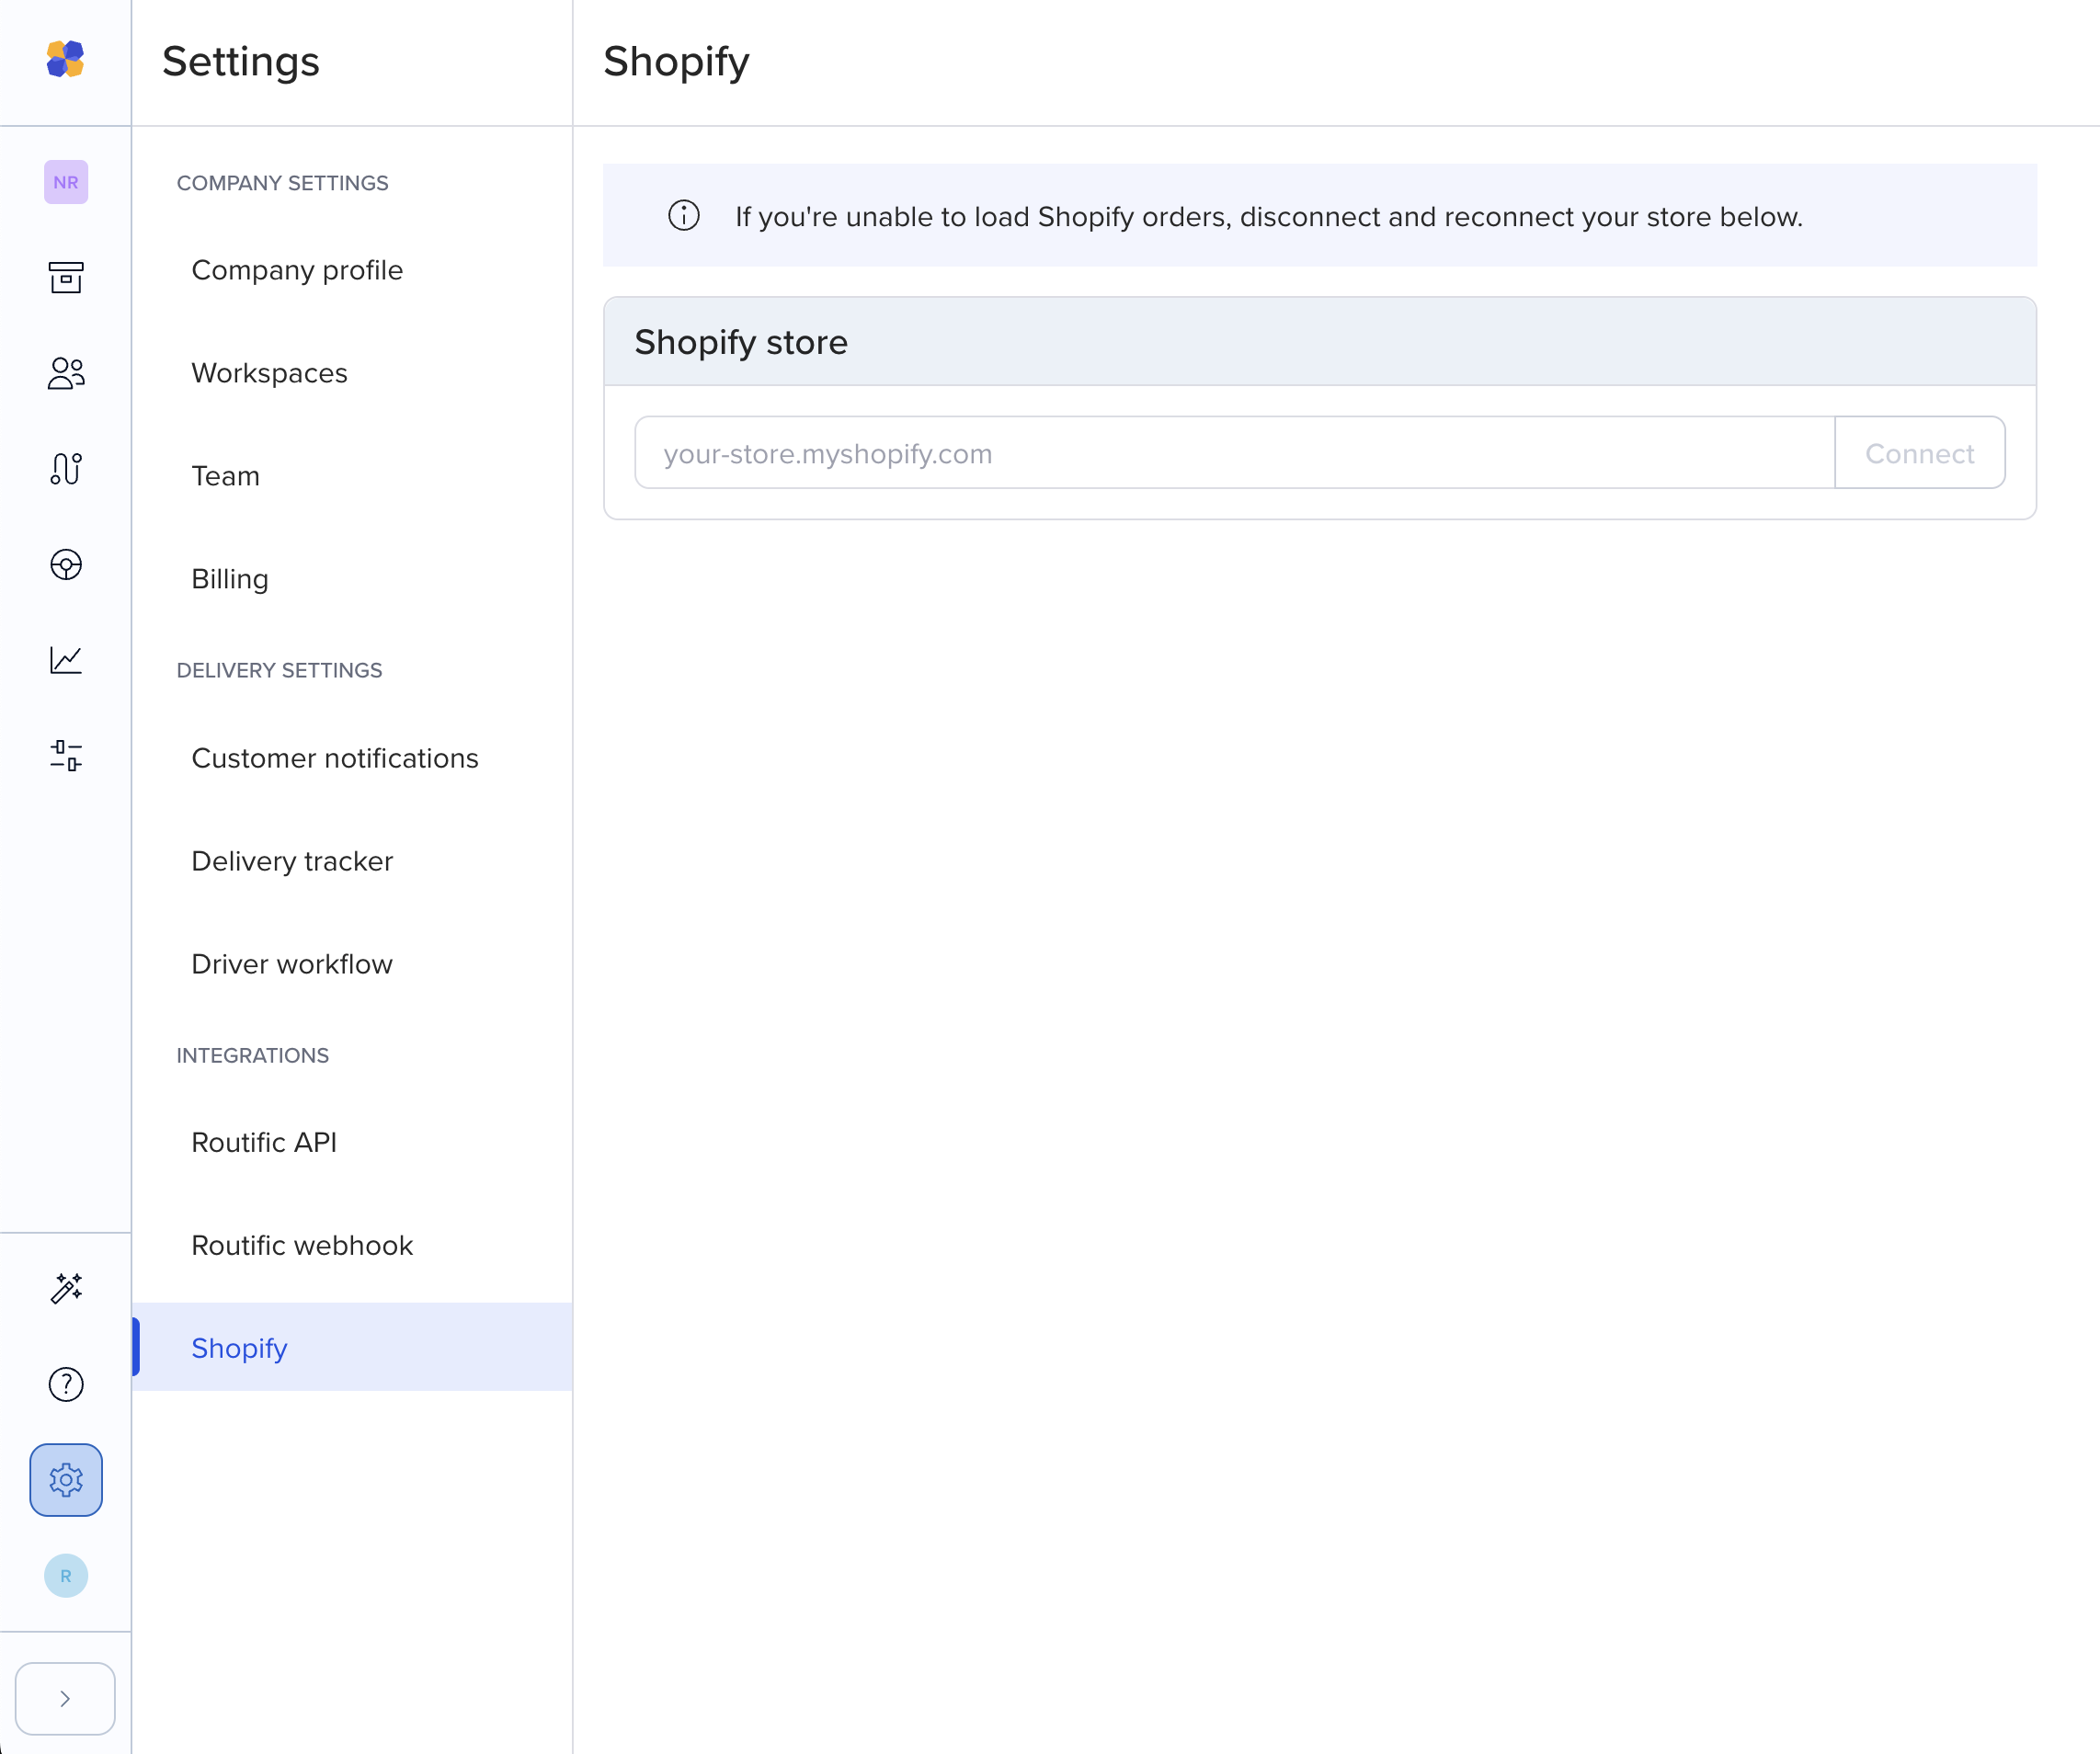
Note: Each Routific account can connect to one Shopify store at a time for now.
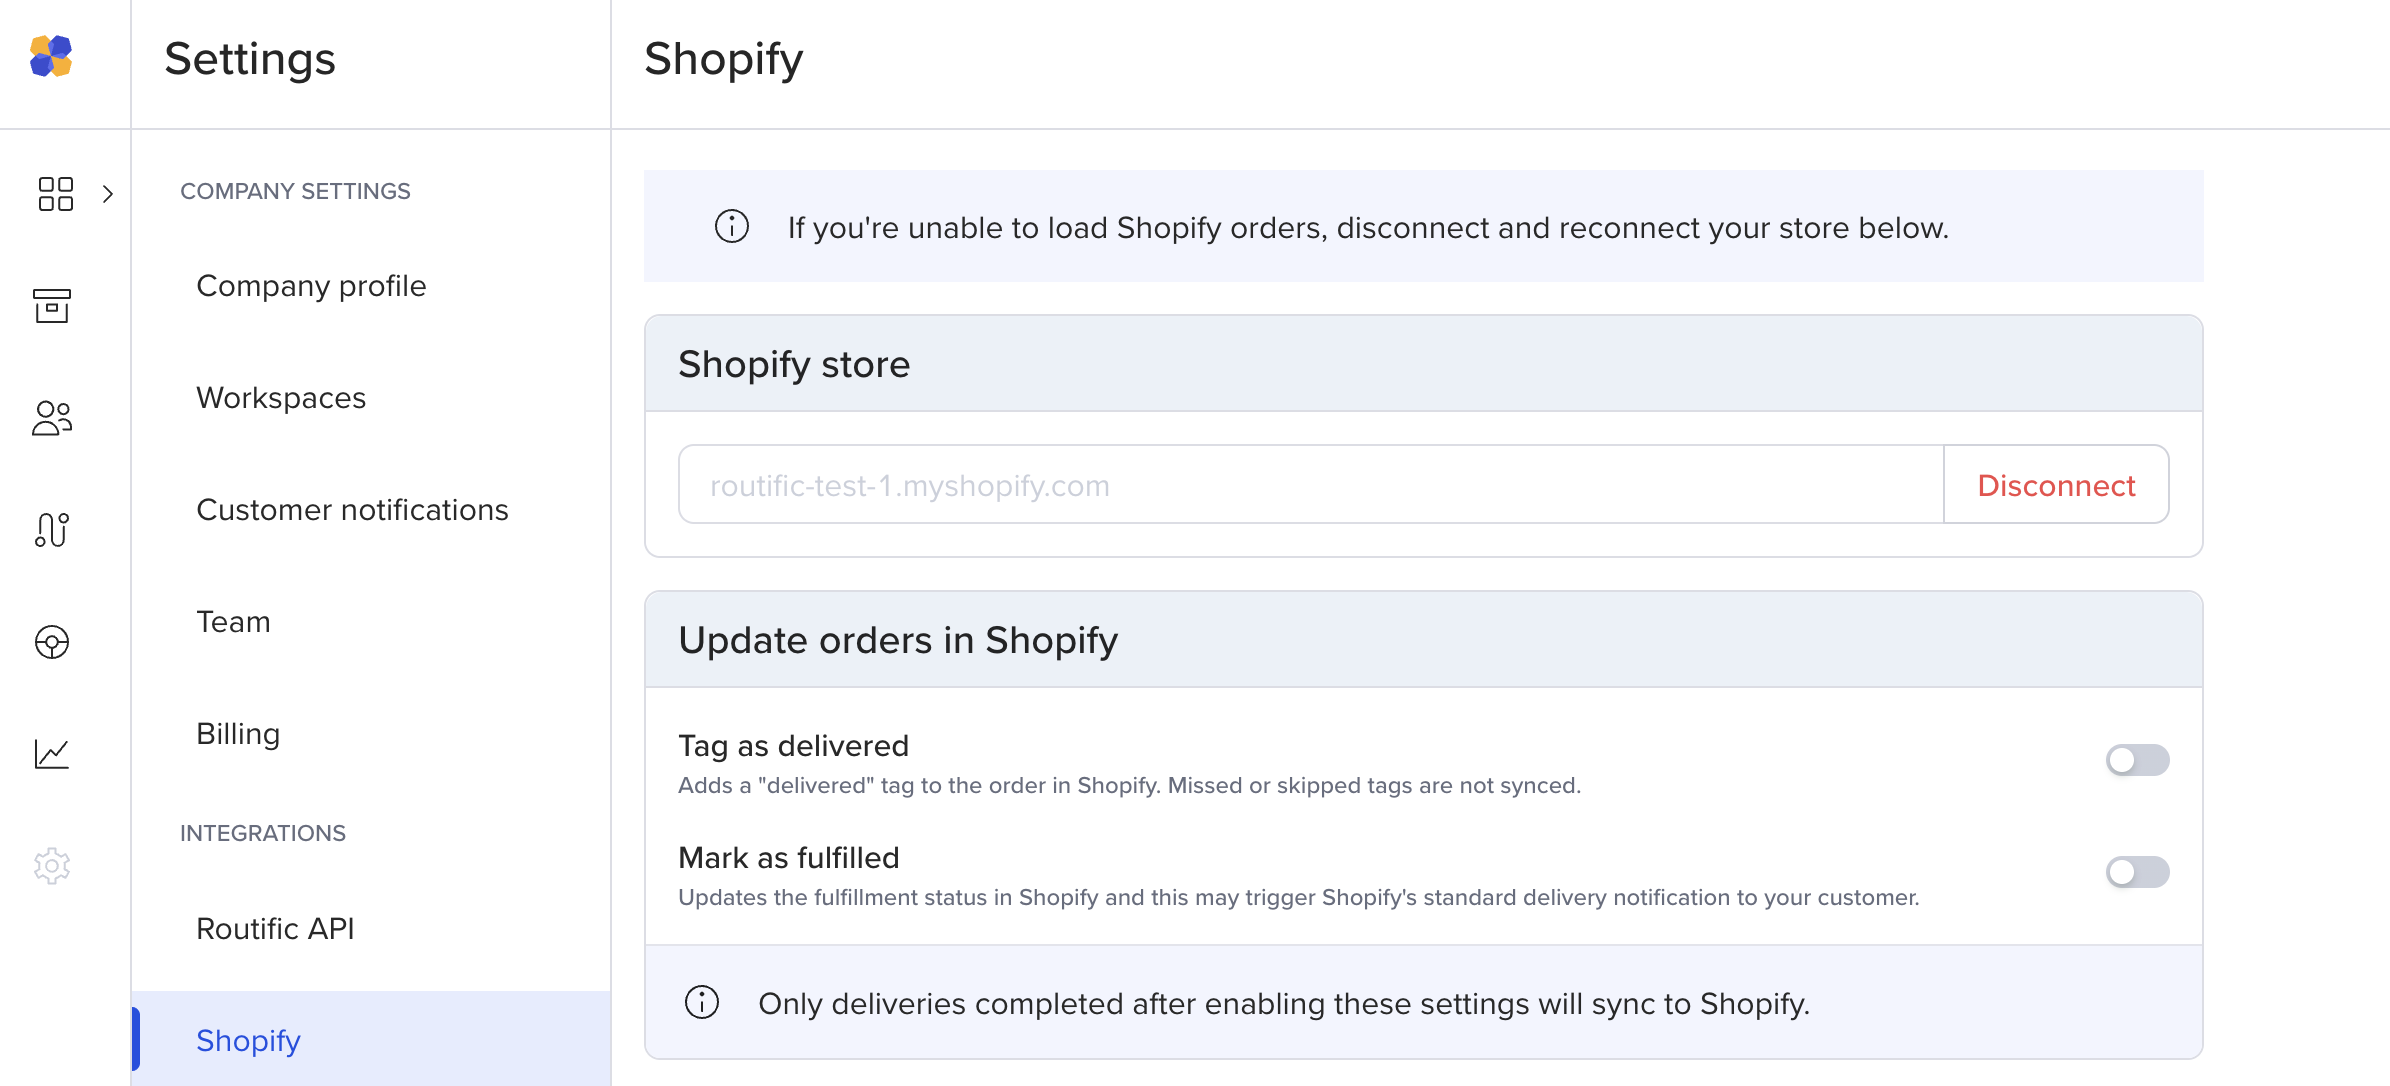
Our Routific-Shopify integration allows you to send data back to Shopify so you don’t need to manually update statuses.
Go to Update orders in Shopify
Toggle Tag as delivered if you want Routific to tag your Shopify order as “delivered” in your store.
Toggle Mark as fulfilled if you want the Shopify order to be tagged as “delivered” AND to have the fulfillment status updated.
Please note: Routific will not trigger the “fulfilled” Shopify notification to your customers but if you have other Shopify delivery notifications turned on, this toggle may trigger those notifications to be sent to your customers.
How merchants typically use these toggles:
Tag as delivered only — A bakery uses Shopify’s order tags to filter their fulfillment dashboard by delivery stage. Once a driver marks an order delivered in Routific, it’s tagged “delivered” in Shopify within minutes — no need to check two systems to see what’s actually delivered.
Mark as fulfilled, turned on — A furniture retailer has a Shopify flow set up to notify customers when an order’s fulfillment status changes. They turn on Mark as fulfilled so that status change happens the moment a driver delivers, and their existing Shopify automation picks it up from there.
Mark as fulfilled, left off on purpose — A meal-kit company found that as soon as an order was marked fulfilled, Shopify’s own notification rules fired immediately — before the customer had actually unpacked their delivery. Since Routific doesn’t control the timing of any Shopify-side notifications triggered by a fulfillment change, they leave Mark as fulfilled off and instead use Tag as delivered to track status internally, without setting off anything on the customer-facing side.
Neither toggle on — A flower shop handles all customer communication through Routific’s own SMS and email notifications and doesn’t want Shopify sending anything. They leave both toggles off and rely on Routific’s dispatcher dashboard as the single source of truth for delivery status.
A few things to keep in mind:
Only orders marked delivered get tagged or fulfilled — orders marked skipped or missed are never synced back to Shopify.
Turning a toggle on doesn’t retroactively update past orders. Only deliveries completed after you enable it will sync.
Routific doesn’t send the fulfillment notification itself. If you have other Shopify notifications or automations set up that react to fulfillment status, enabling Mark as fulfilled may trigger those — and Routific has no control over when or whether they fire. If that timing matters to you, test it in a low-stakes order first, or check your Shopify notification settings before turning the toggle on.
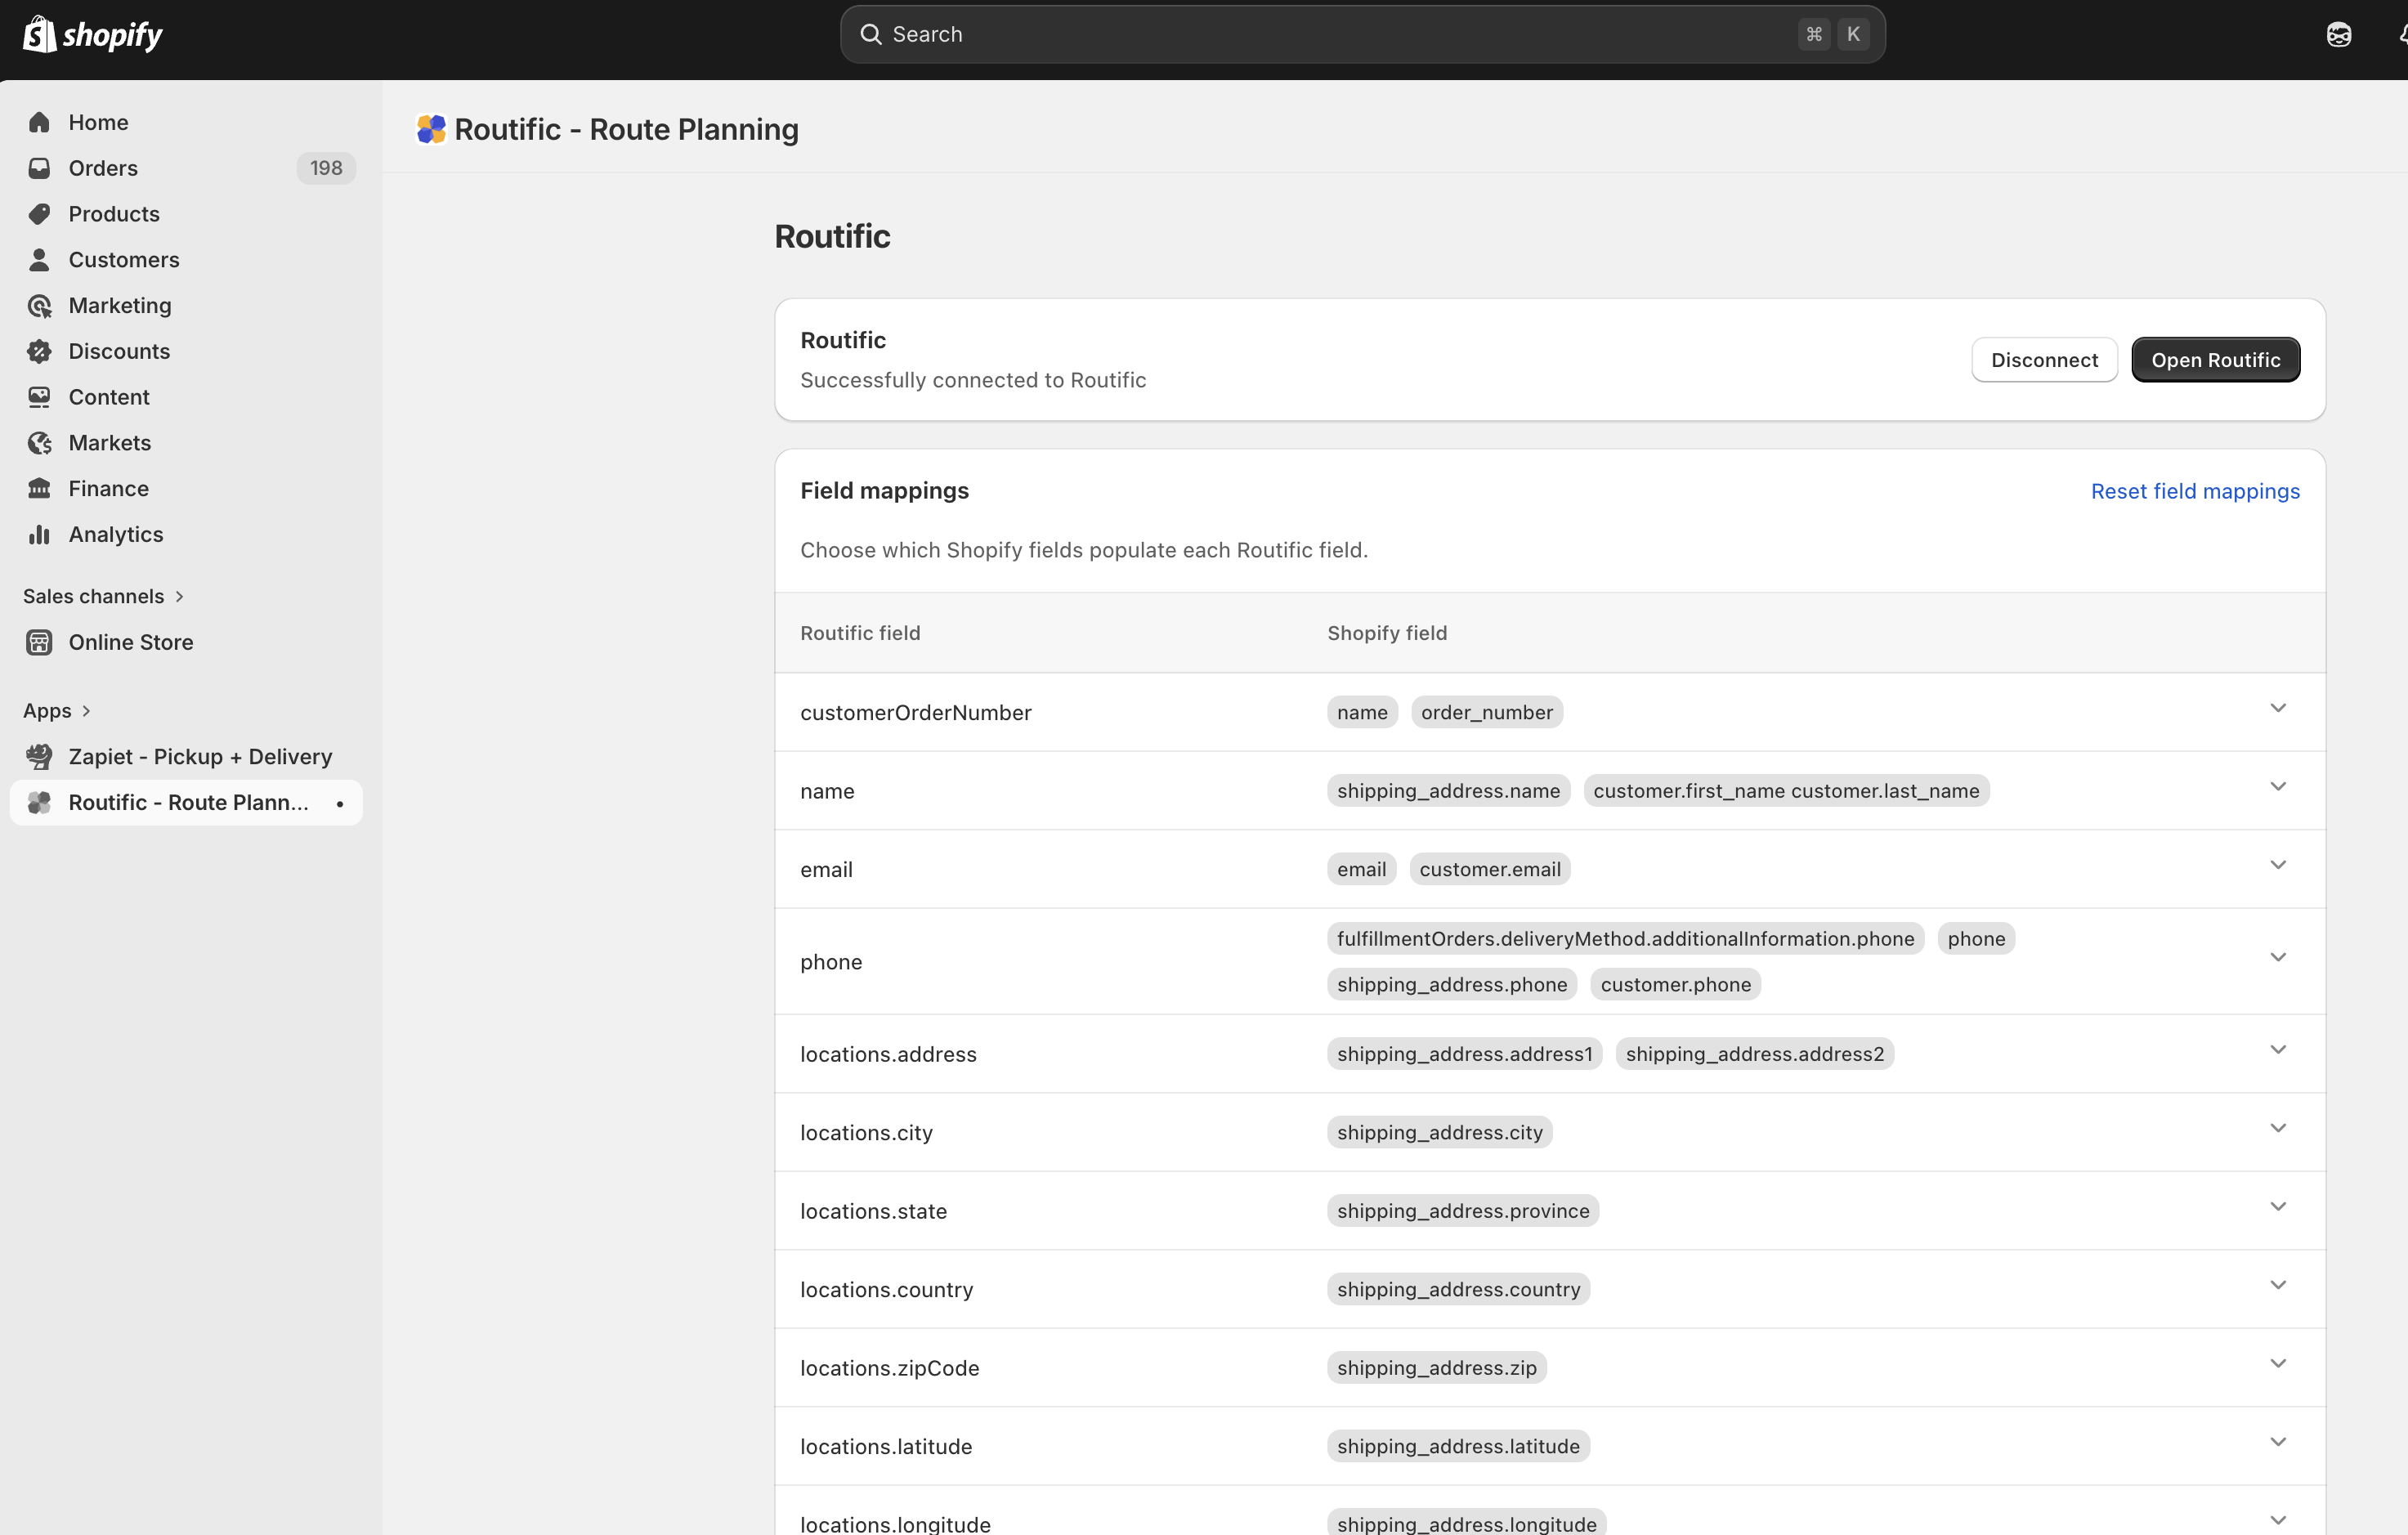
Now, let’s configure your field mappings. Field mappings control how your Shopify order data translates into Routific fields — things like the customer's name, address, phone number, and delivery notes.
Go to Integrations → Shopify → Field mappings to see the full list.
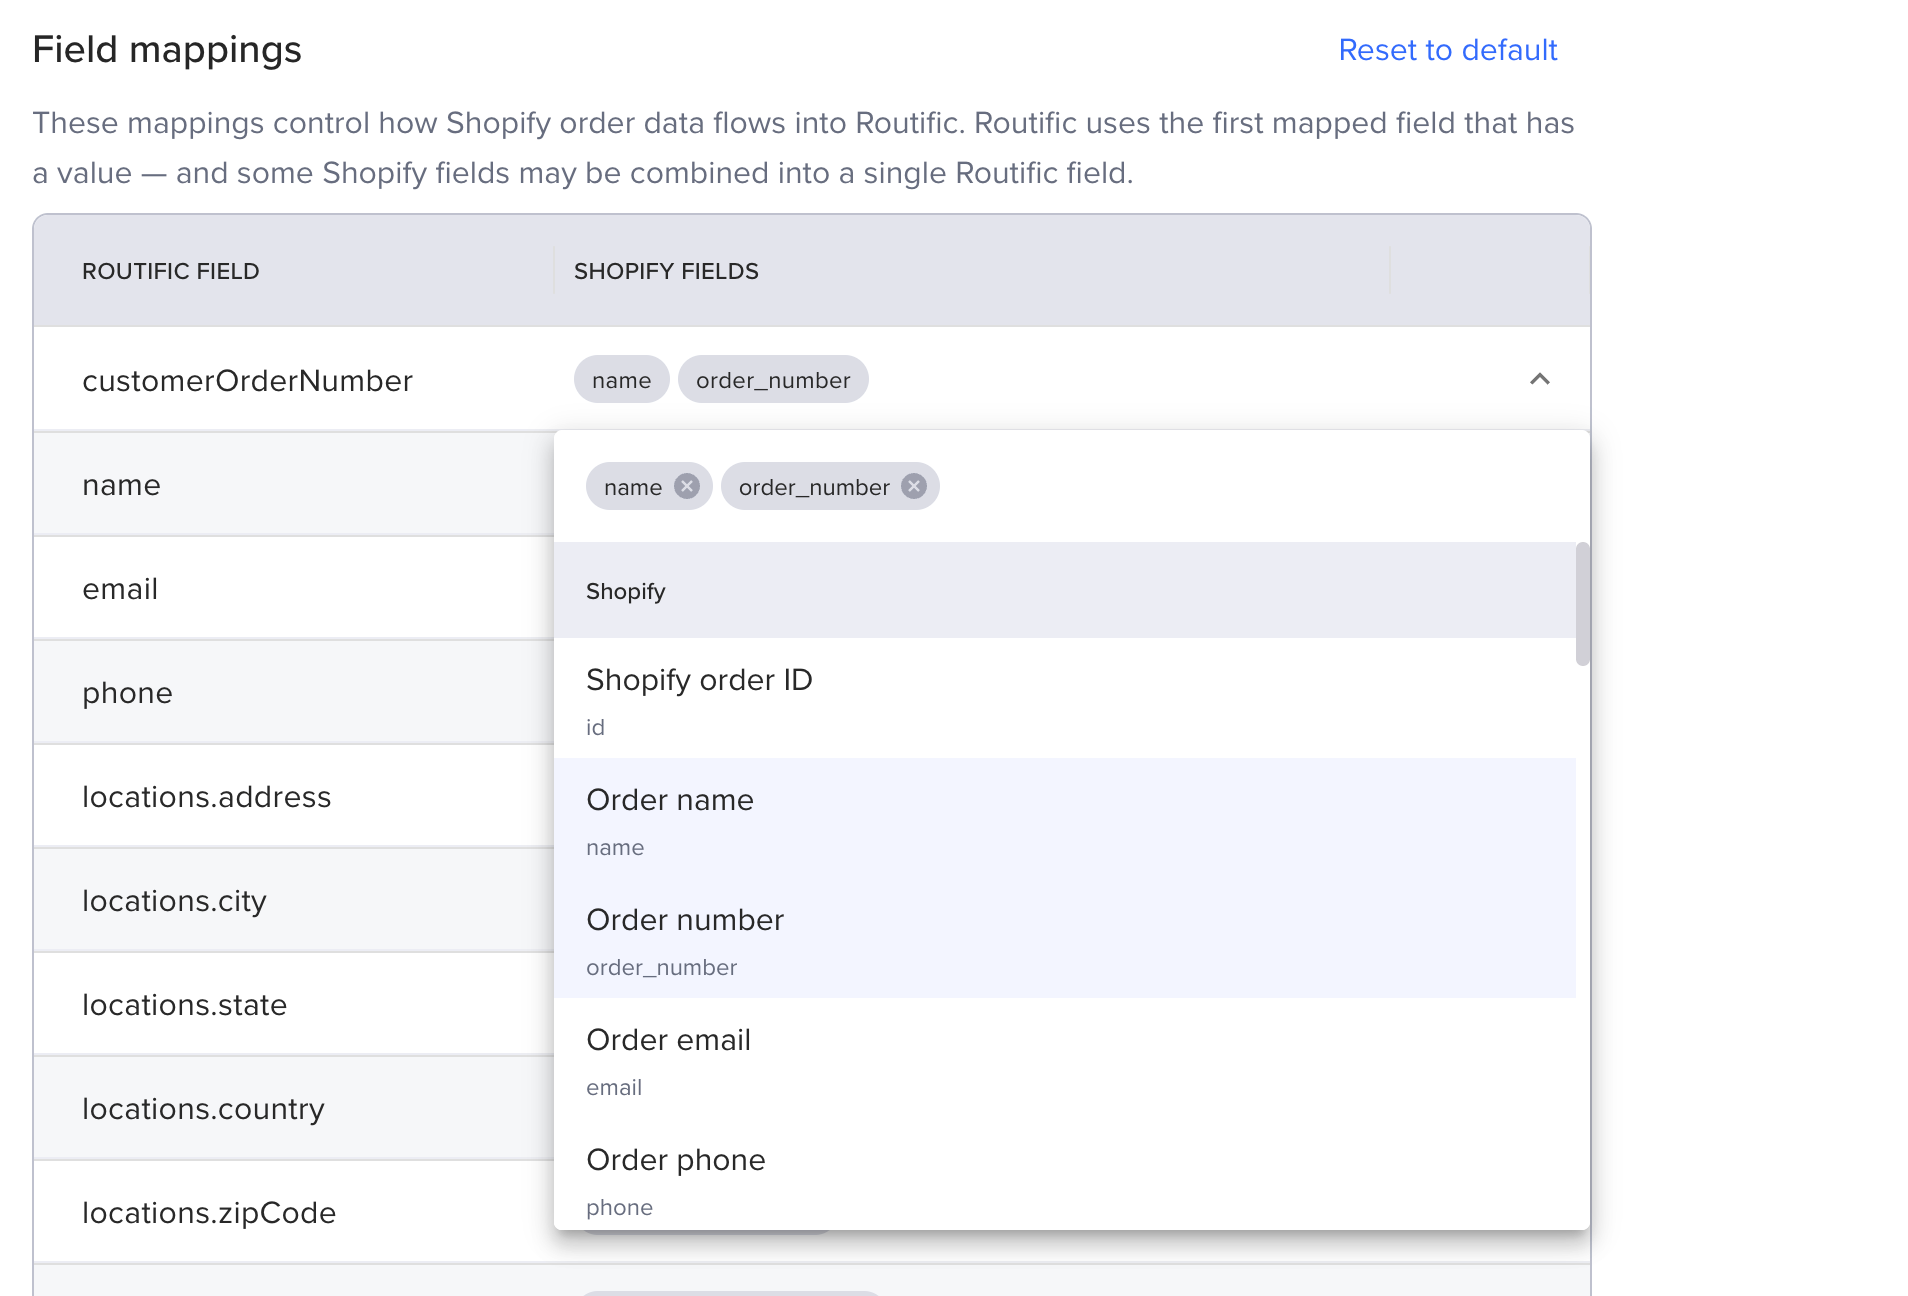
Each Routific field can pull from one or more Shopify fields. When multiple Shopify fields are listed, Routific uses the first one that has a value. This fallback order ensures the most useful data gets used even when some fields are empty on an order.
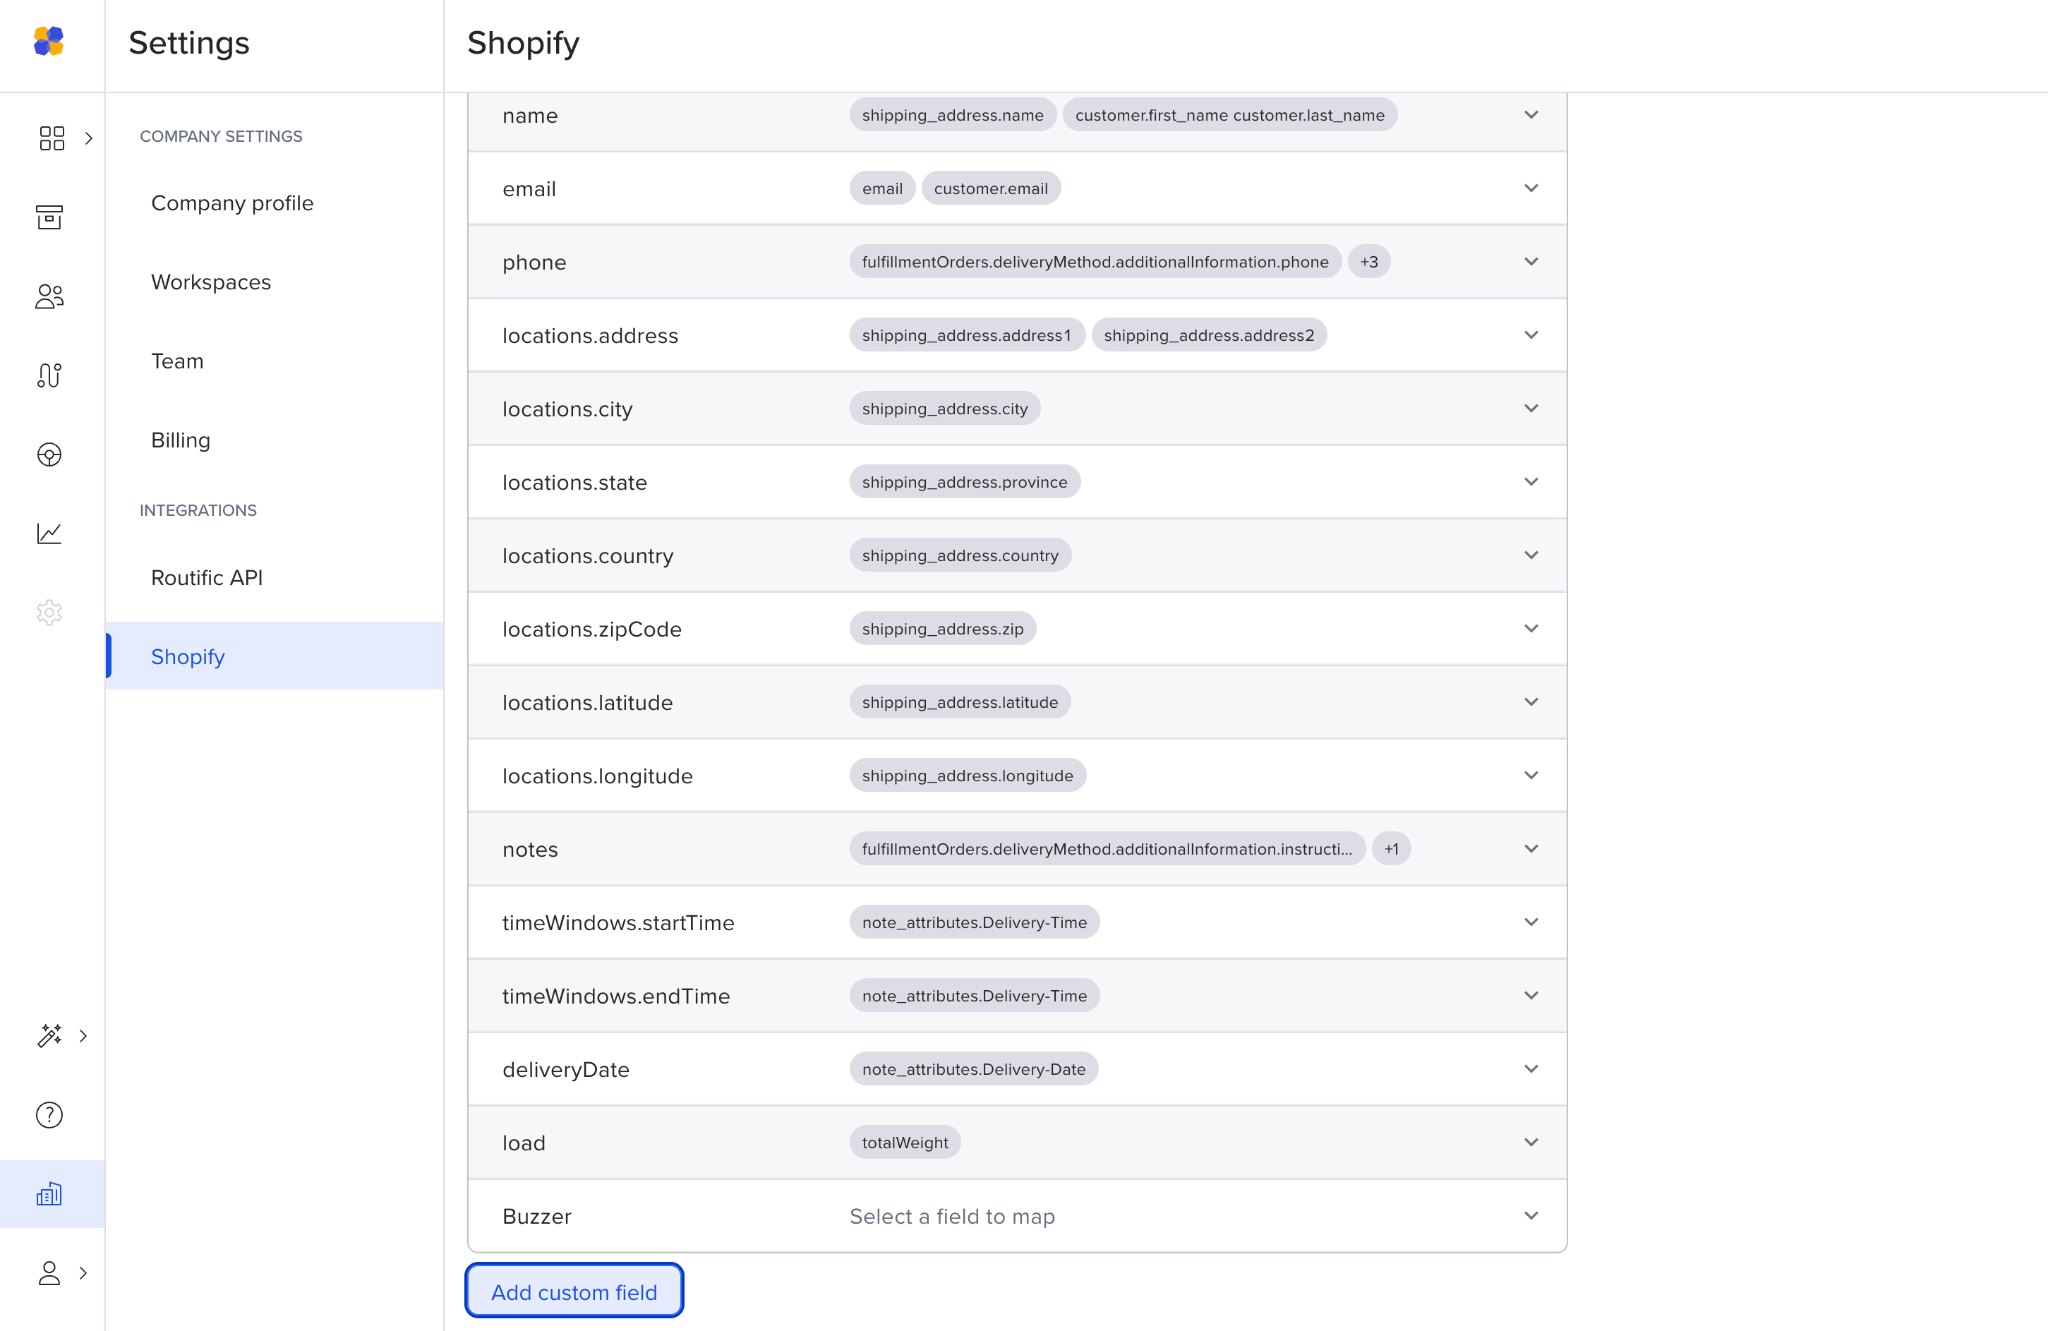
Some Routific fields are built from multiple Shopify fields combined — for example, location.address merges shipping_address.address1 and shipping_address.address2 into a single value.
You can customize mappings to match how your store is set up.
Go to Integrations → Shopify → Field mappings.
Click the little arrow next to the Shopify field you want to update.
Select or enter the Shopify field(s) you want to map to it.
Not seeing the fields you want? You can add custom fields at the bottom of the screen:
Once your store is connected, you can pull orders directly into Routific.
Go to the plus sign on the far-right of your dispatcher’s screen. Click and select Add orders from Shopify
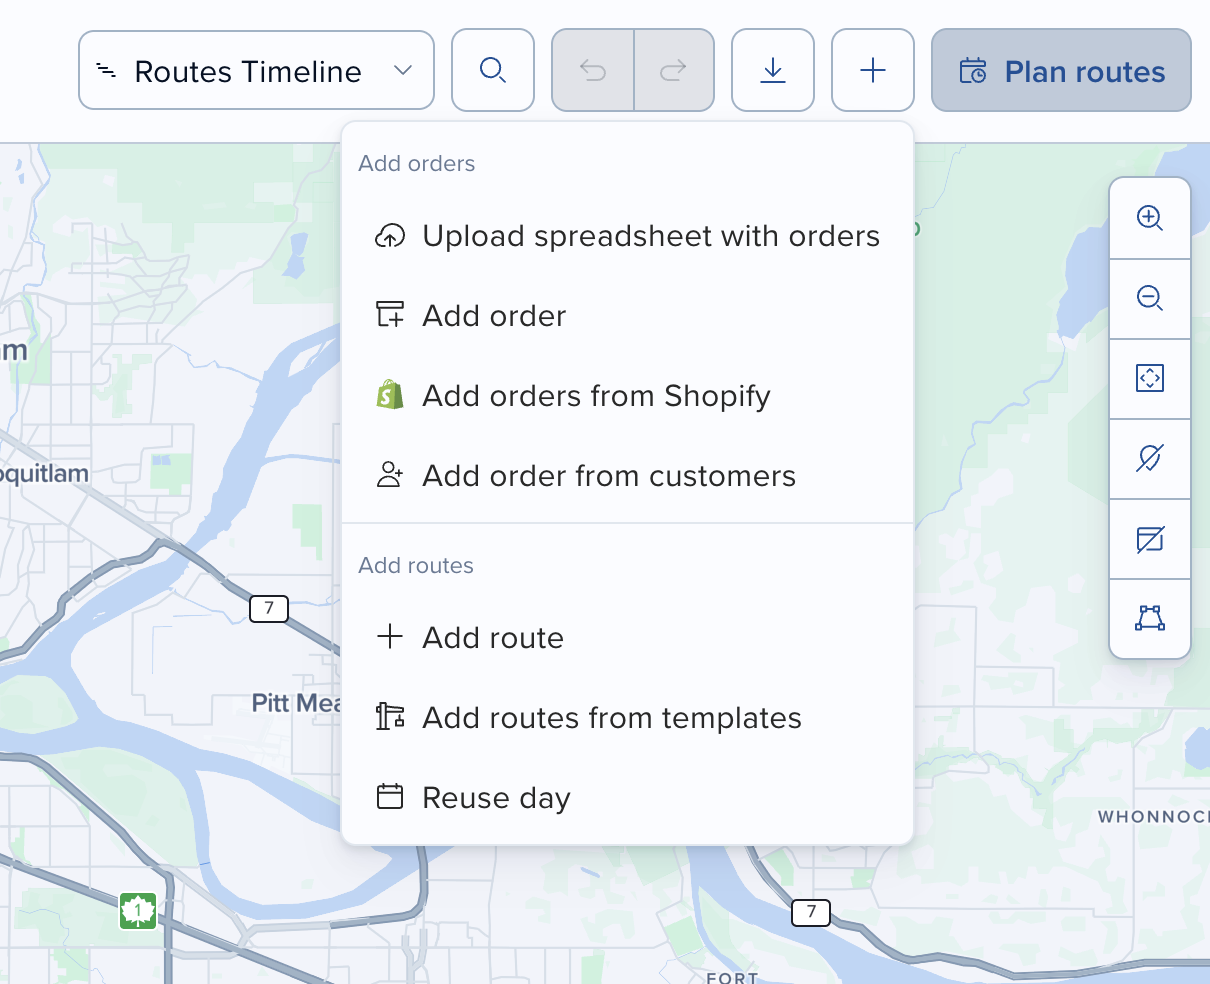
Browse your available Shopify orders. Orders that have been previously imported are marked so you can avoid duplicates, though you can import them again if needed.
Select the orders you want to add. You can sort or filter to find the right orders.
Click Create orders to add them to Routific.
The imported orders will appear in your orders list in the current workspace, ready to add to a route.
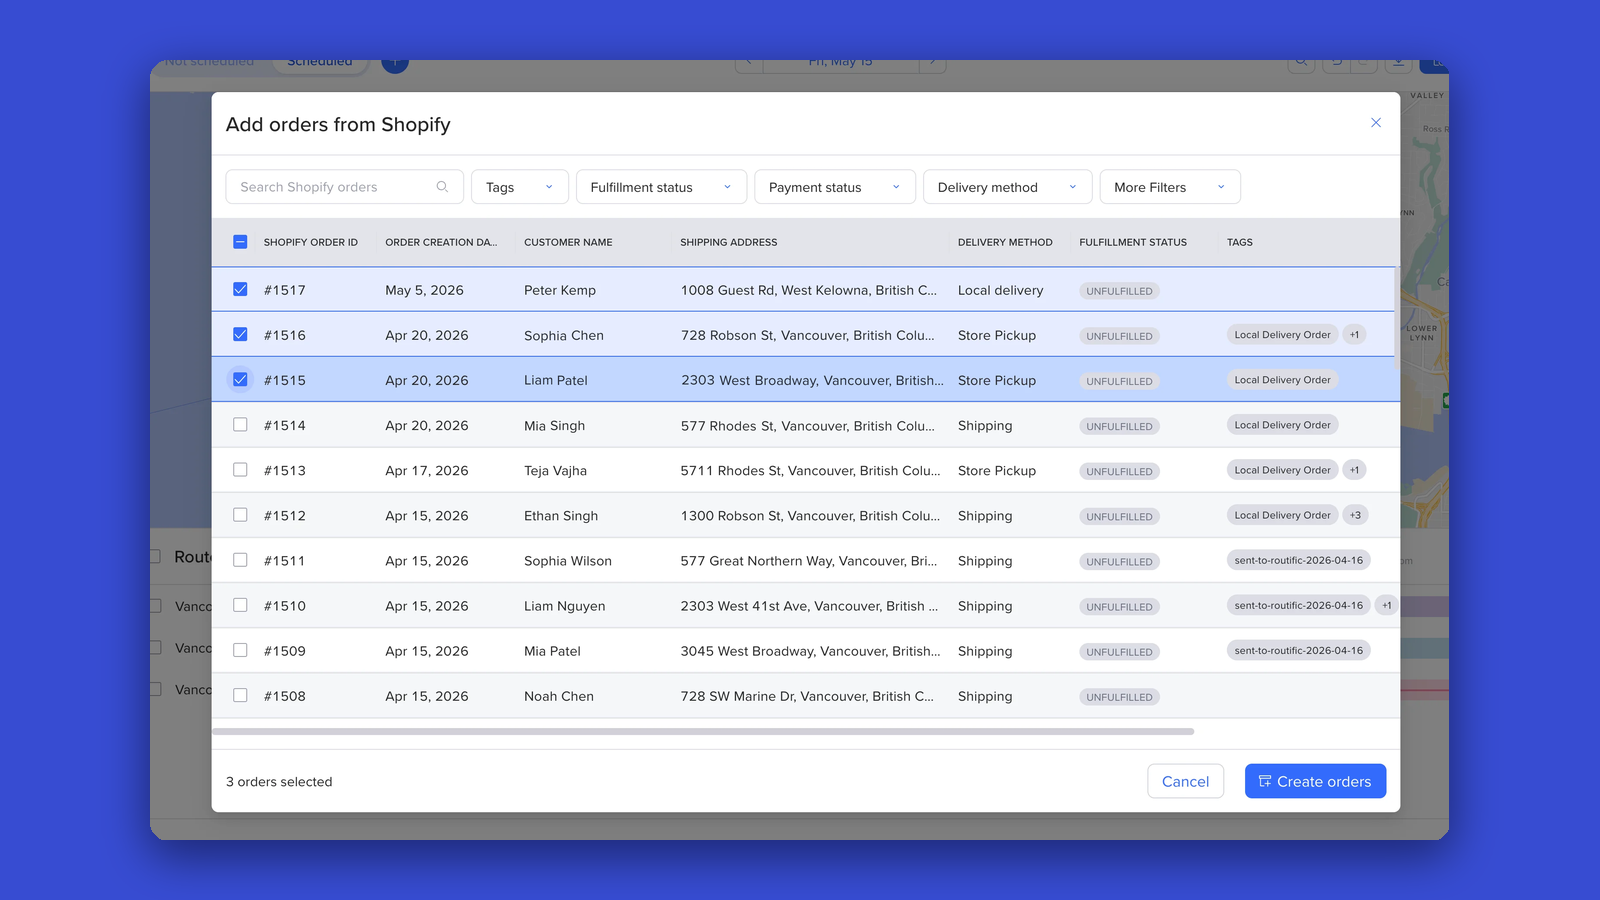
Routific’s app is available on the Shopify marketplace. Click here to find it.
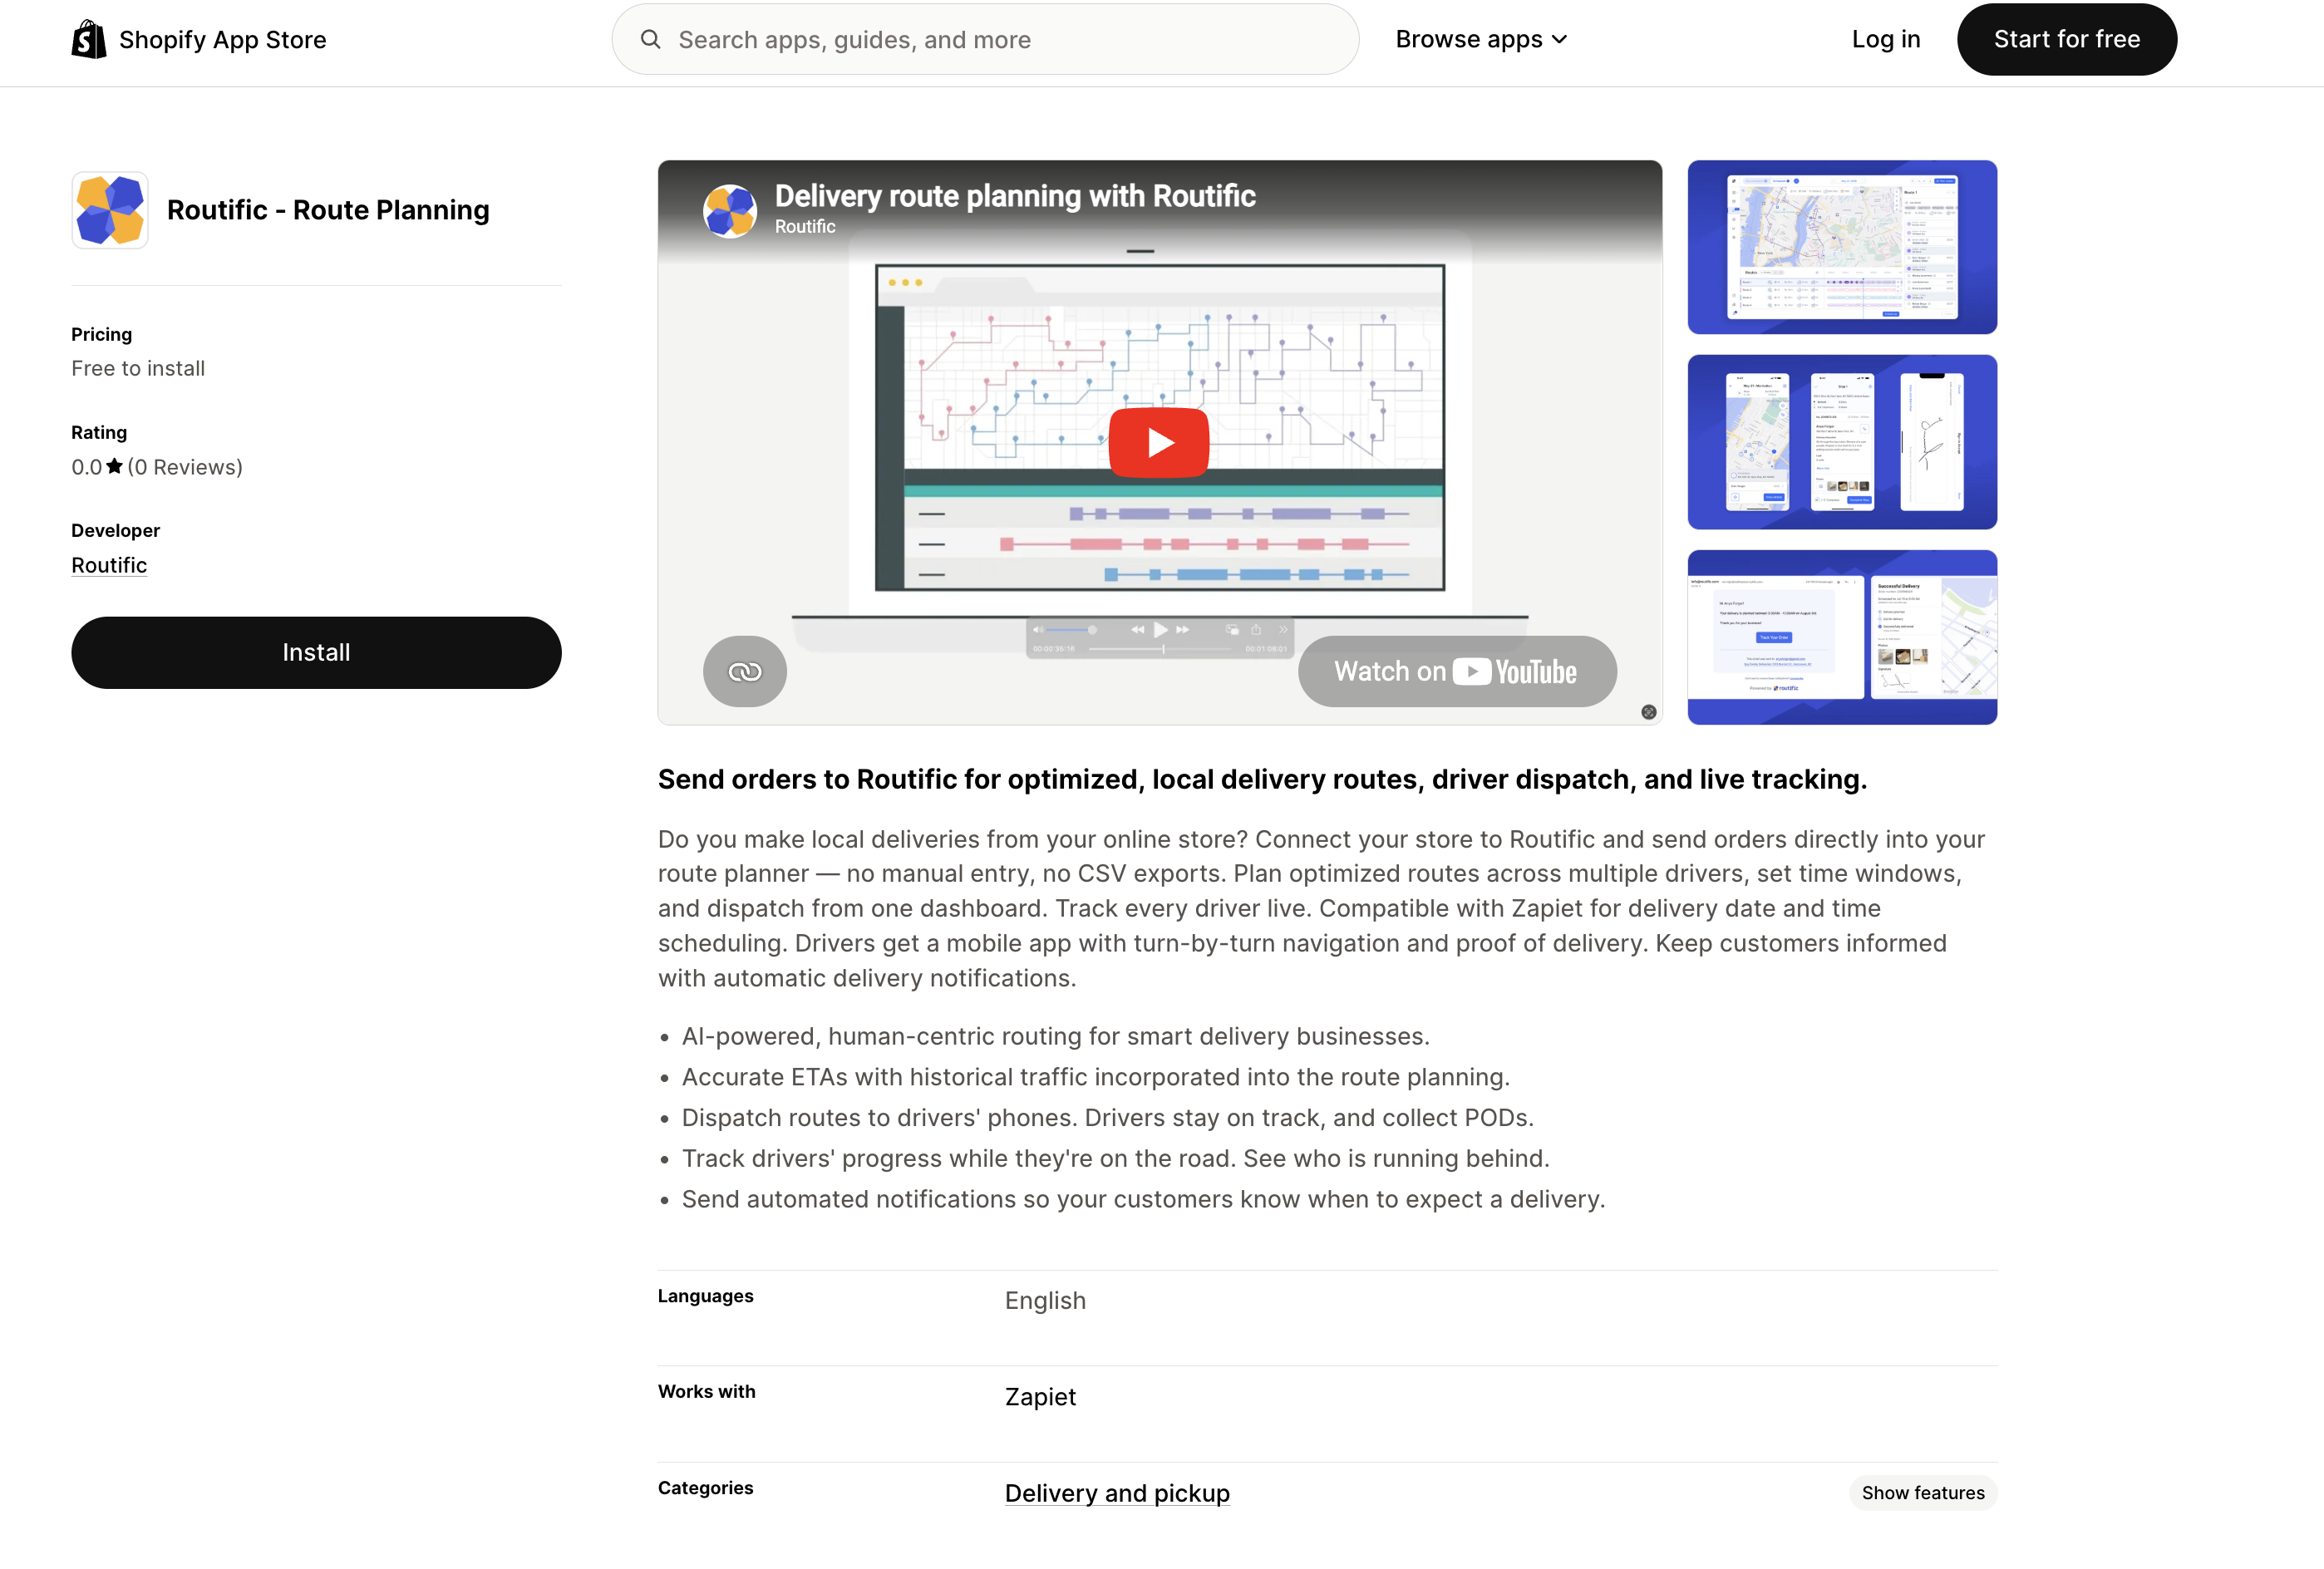
Shopify will ask you permission to install the app.
You can customize your field mappings to ensure you’re importing the right Shopify fields into Routific.
Click the little arrow next to the Shopify field you want to update.
Select or enter the Shopify field(s) you want to map to it.
Not seeing the fields you want? You can add custom fields at the bottom of the screen.
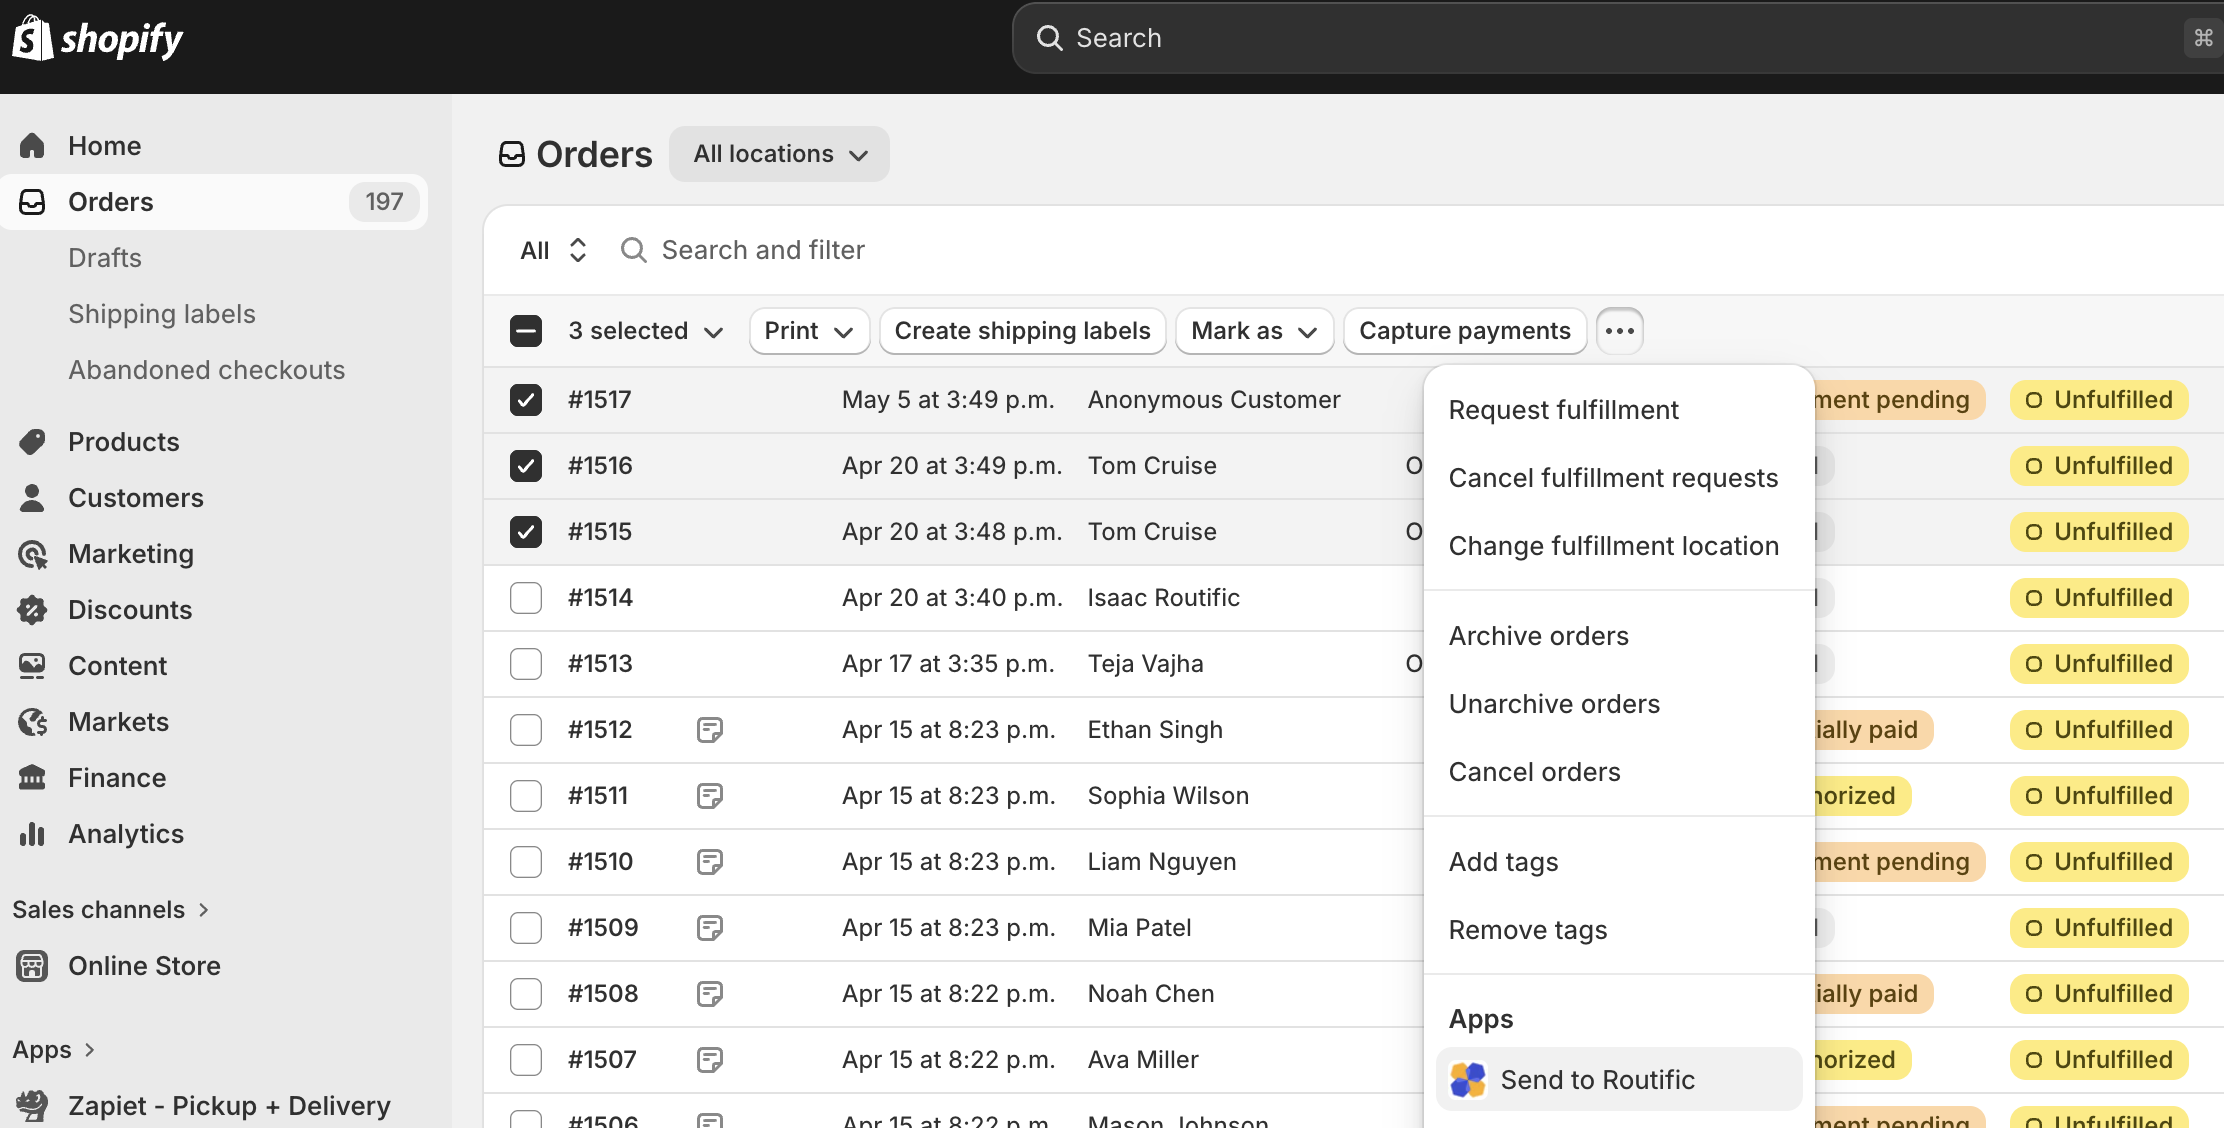
Select orders from your store and click the three dots. Click Send to Routific
You’ll see this confirmation screen, along with a choice to send the orders to a specific Routific workspace.
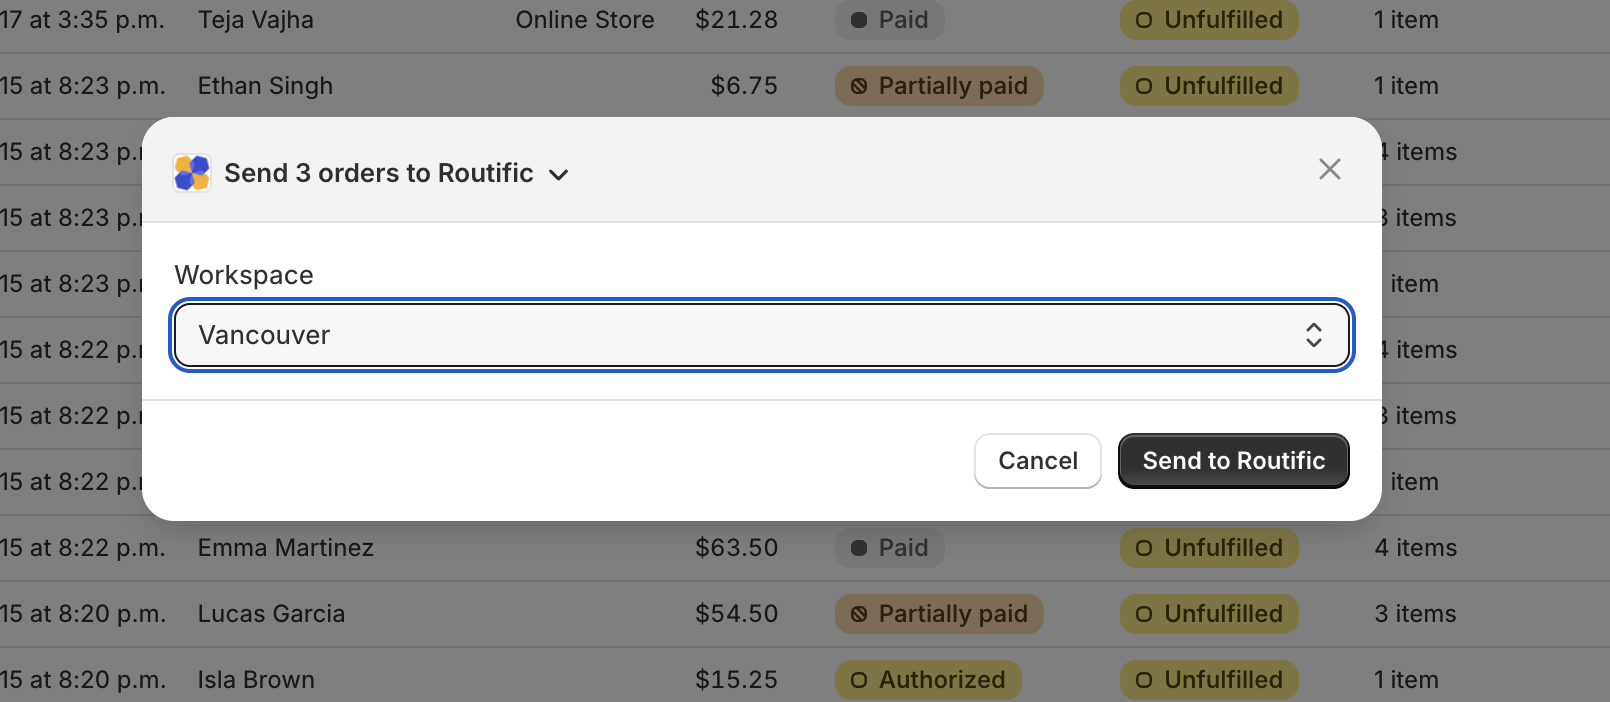
Click Send to Routific and you’re done! The selected orders will appear in Routific.
Shopify sends Routific a request whenever a customer requests their data, asks to have it deleted, or uninstalls the app. Routific handles these automatically — you don’t need to do anything, but we’ll email you once each request is processed.
Customer data requests: We compile the customer’s data into a CSV report. You’ll get an email with a link — click it, authenticate with your Routific credentials, and you’ll be able to download the report. For privacy, the file itself isn’t attached to the email, and the download link expires after 7 days.
Customer data deletion: When a customer asks to have their data erased, we scrub any Personally Identifiable Information (PII) from Routific and send you a confirmation email once it’s done.
Store data deletion: If you uninstall the Routific app, we scrub your store’s data after Shopify’s required waiting period and email you a confirmation.
Can I import the same order twice?
Yes. Routific won't block duplicate imports, but previously synced orders are flagged so you can spot them easily.
What if a field comes in blank?
Routific will try each mapped Shopify field in order and use the first one with a value. If all mapped fields are empty, that Routific field will be left blank on the order.
Can I connect more than one Shopify store?
Not currently — at the moment, each Routific account supports one connected store at a time.
I was using the Shopify integration on the old Routific. Do I need to set it up again?
Yes. You’ll need to reconnect your store. Just follow the steps at the beginning of this help article.