🎥 A video version of this help article is available here.
A workspace is where you do all your route planning activities in Routific.
If you operate in more than one place, you should create a Workspace for each one. For example, you might have one workspace for Vancouver and another for Toronto.
This keeps your customer data, account settings, and routes for each place separate.
You can name your workspaces however you like — most people use the name of their city or region.
* Please keep in mind that your Insights page crosses over all of your workspaces, and is not individual to the workspace you are working in.
The first time you log in to Routific, we'll automatically create a workspace for you and name it New workspace.
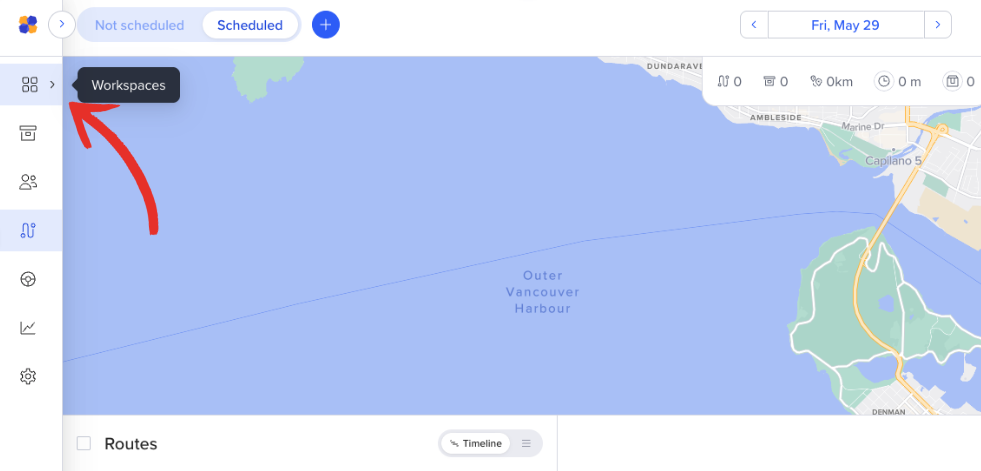
Access workspaces by clicking the icon with 4 squares in the upper left corner, under the Routific Logo.
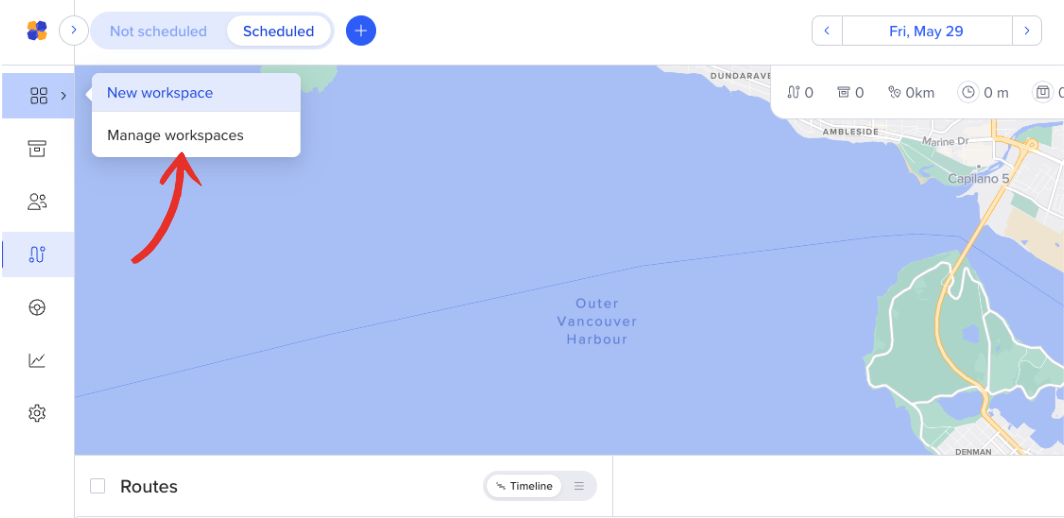
Click on Manage workspaces to go to your workspace settings.
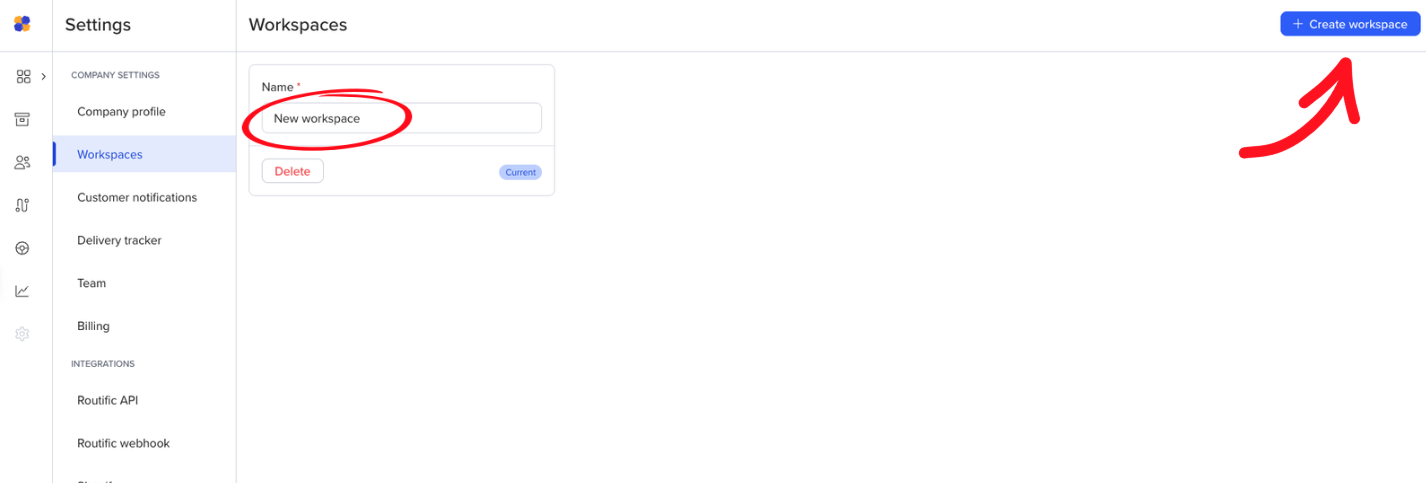
In your Workspaces settings, you can rename your Workspace by selecting the words New workspace and typing a new name, or click Create workspace to create an entirely new one.
Voila! You've changed the name of your workspace and created a new one.
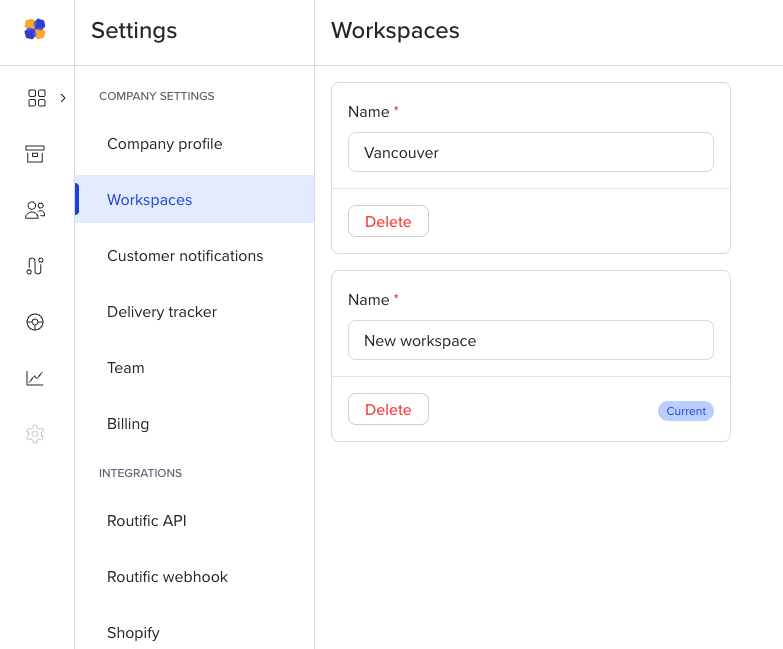
Your newly named Workspaces are now available from the side menu.