Assigning delivery dates to your orders helps you stay organized and plan ahead. Instead of uploading orders day by day, you can upload all your orders at once and indicate delivery dates so Routific knows exactly when each order should go out.
This makes it easier to:
Plan routes in advance — upload all your orders at once and have them assigned to the right date
Stay aligned with your delivery schedule — ensure drivers go to the right areas on the right days.
Meet customer expectations — fulfill orders on the dates your customers requested.
In short: use delivery dates whenever it matters which day an order is delivered. They give you more control, less manual work, and a clearer view of what’s happening each day.
This is the first version of this feature, and your feedback will help shape how it grows. We’d love to hear what you think — please email us at [email protected].
Orders with a delivery date
If they’re not yet scheduled to a route, they’ll show up on their assigned delivery date.
When you schedule routes for that date, all unscheduled orders with the same delivery date will automatically be included.
Orders without a delivery date
These appear on every date.
They can be scheduled on any day you choose, and will always be considered in the optimization for that day.
Routific is clever enough to be able to detect the format you intend, but the safest way to ensure we’re parsing your dates correctly is to tell us!
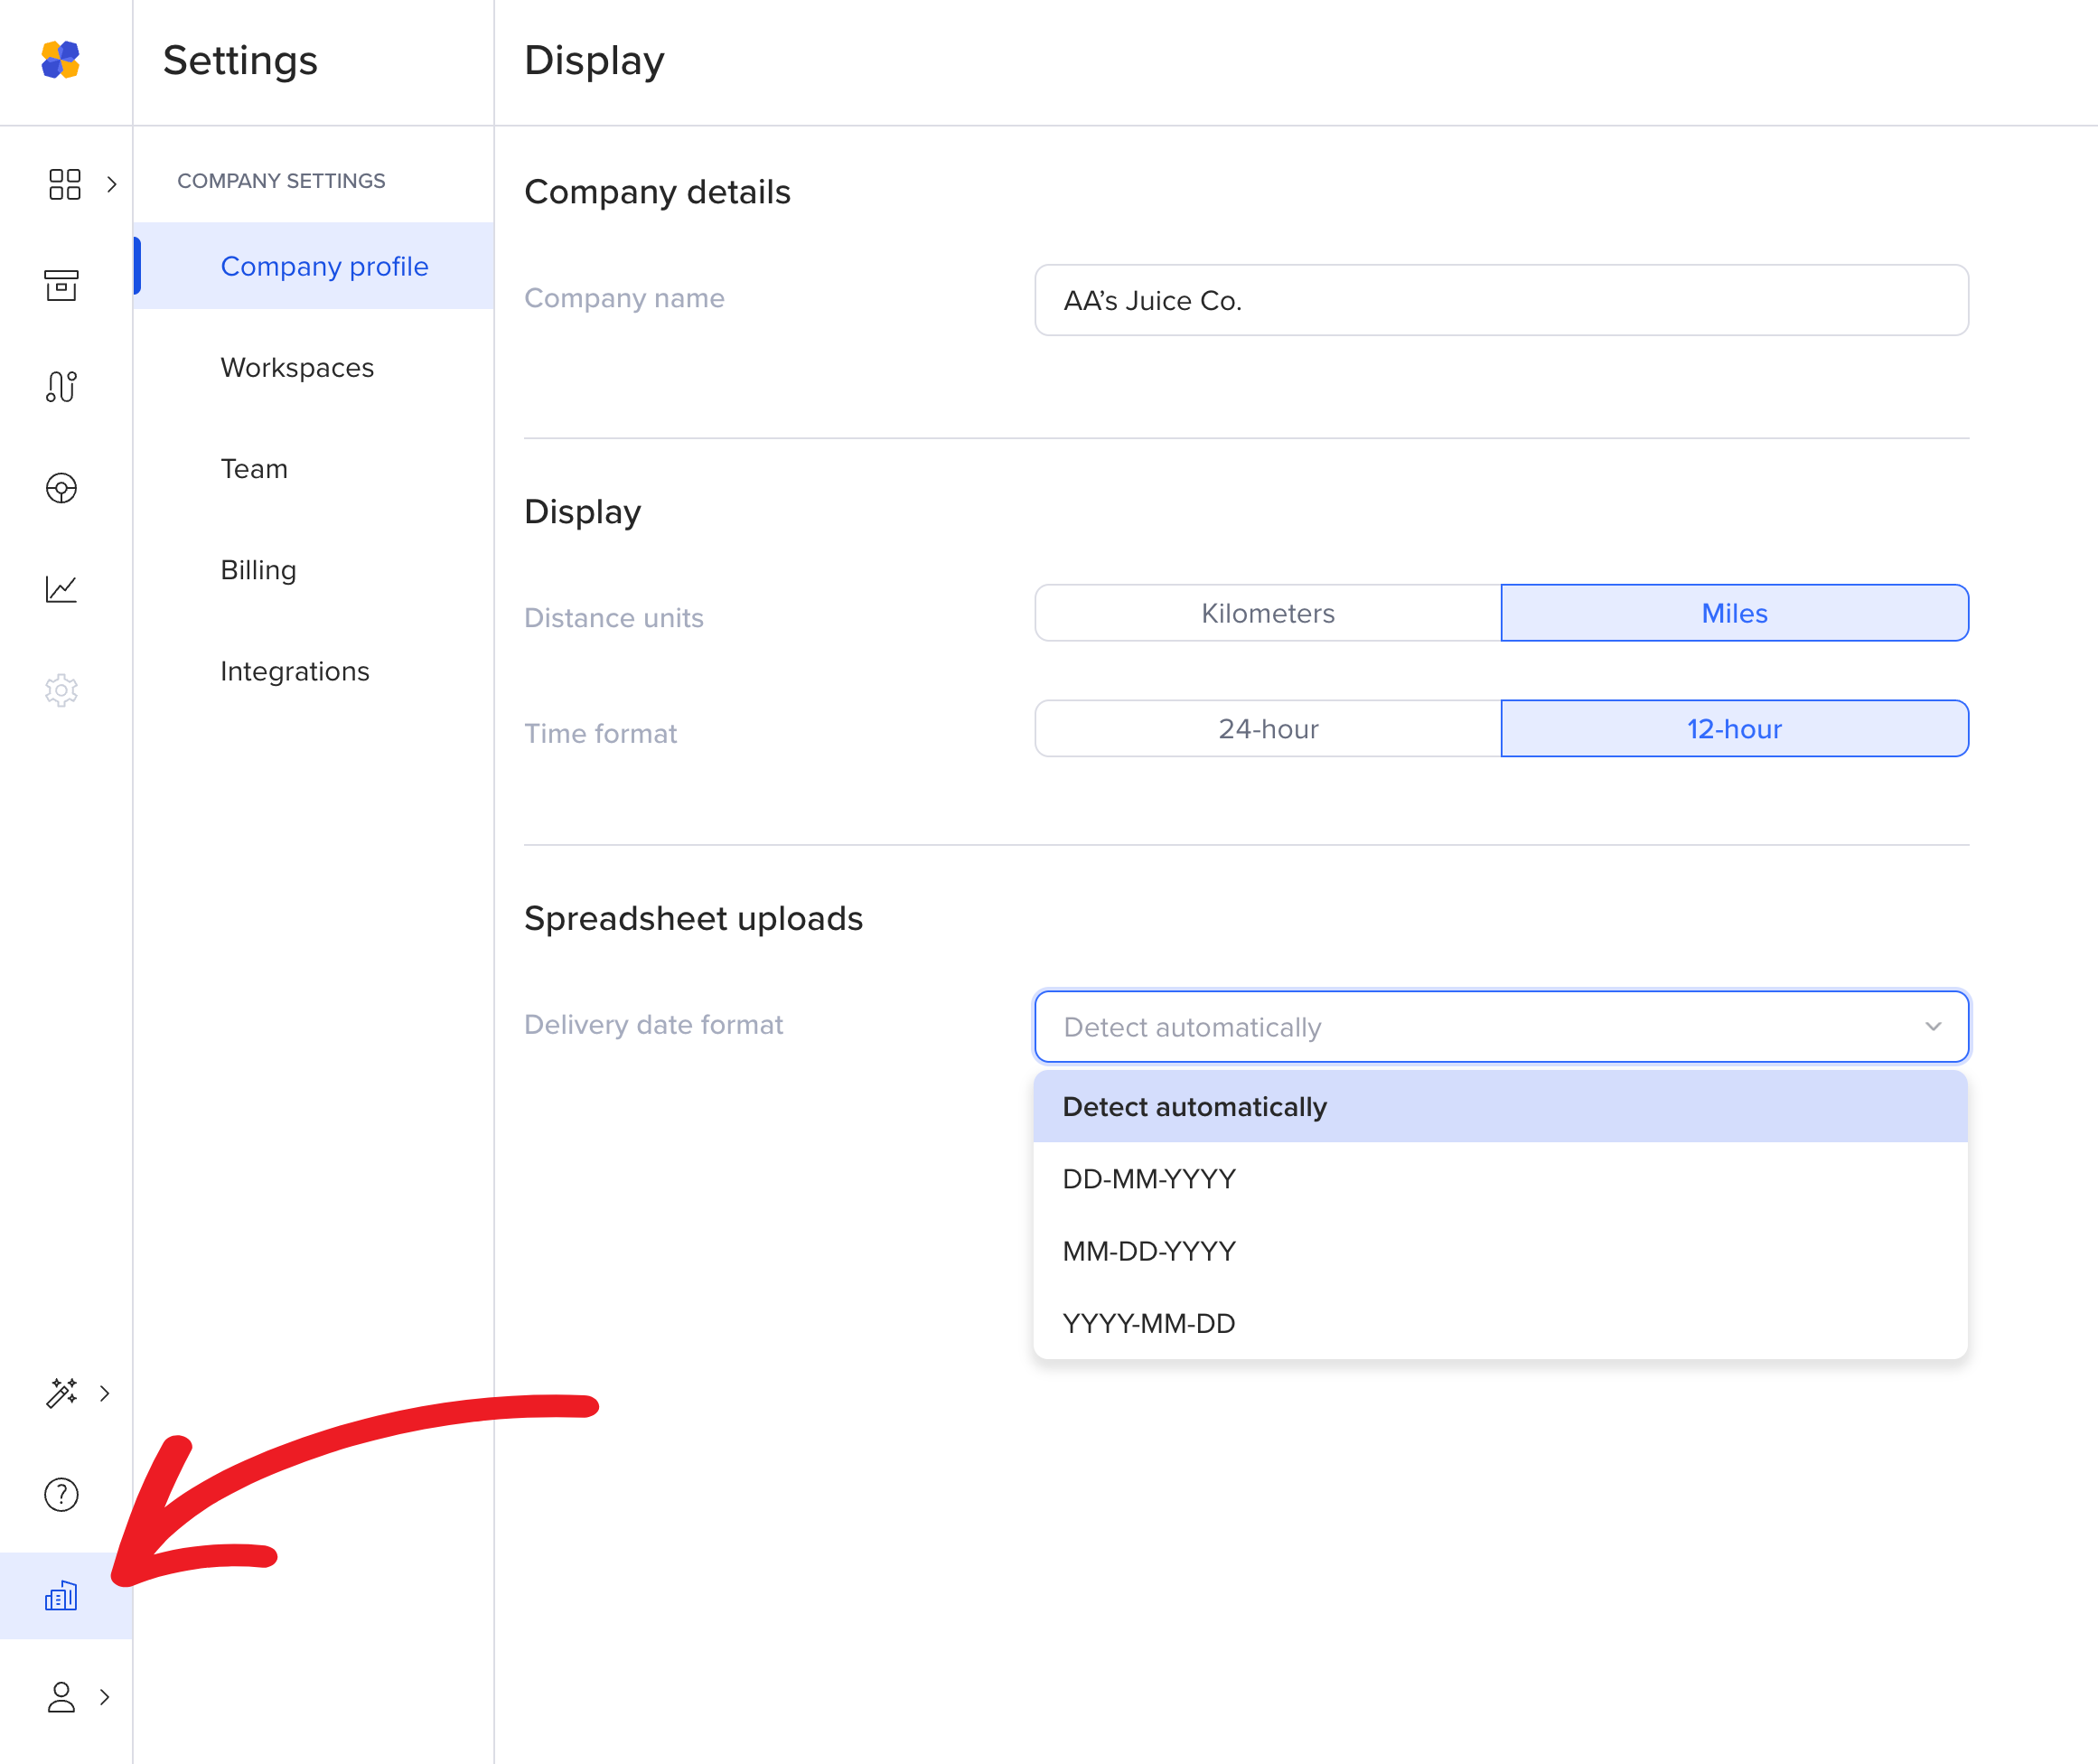
Go to Company Settings at the bottom left of your screen and choose your delivery date format.
Accepted formats:
YYYYMMDD
MMDDYYYY
DDMMYYYY
(Dashes and slashes are also accepted)
Add a column called Delivery date in your CSV and assign dates to orders here.
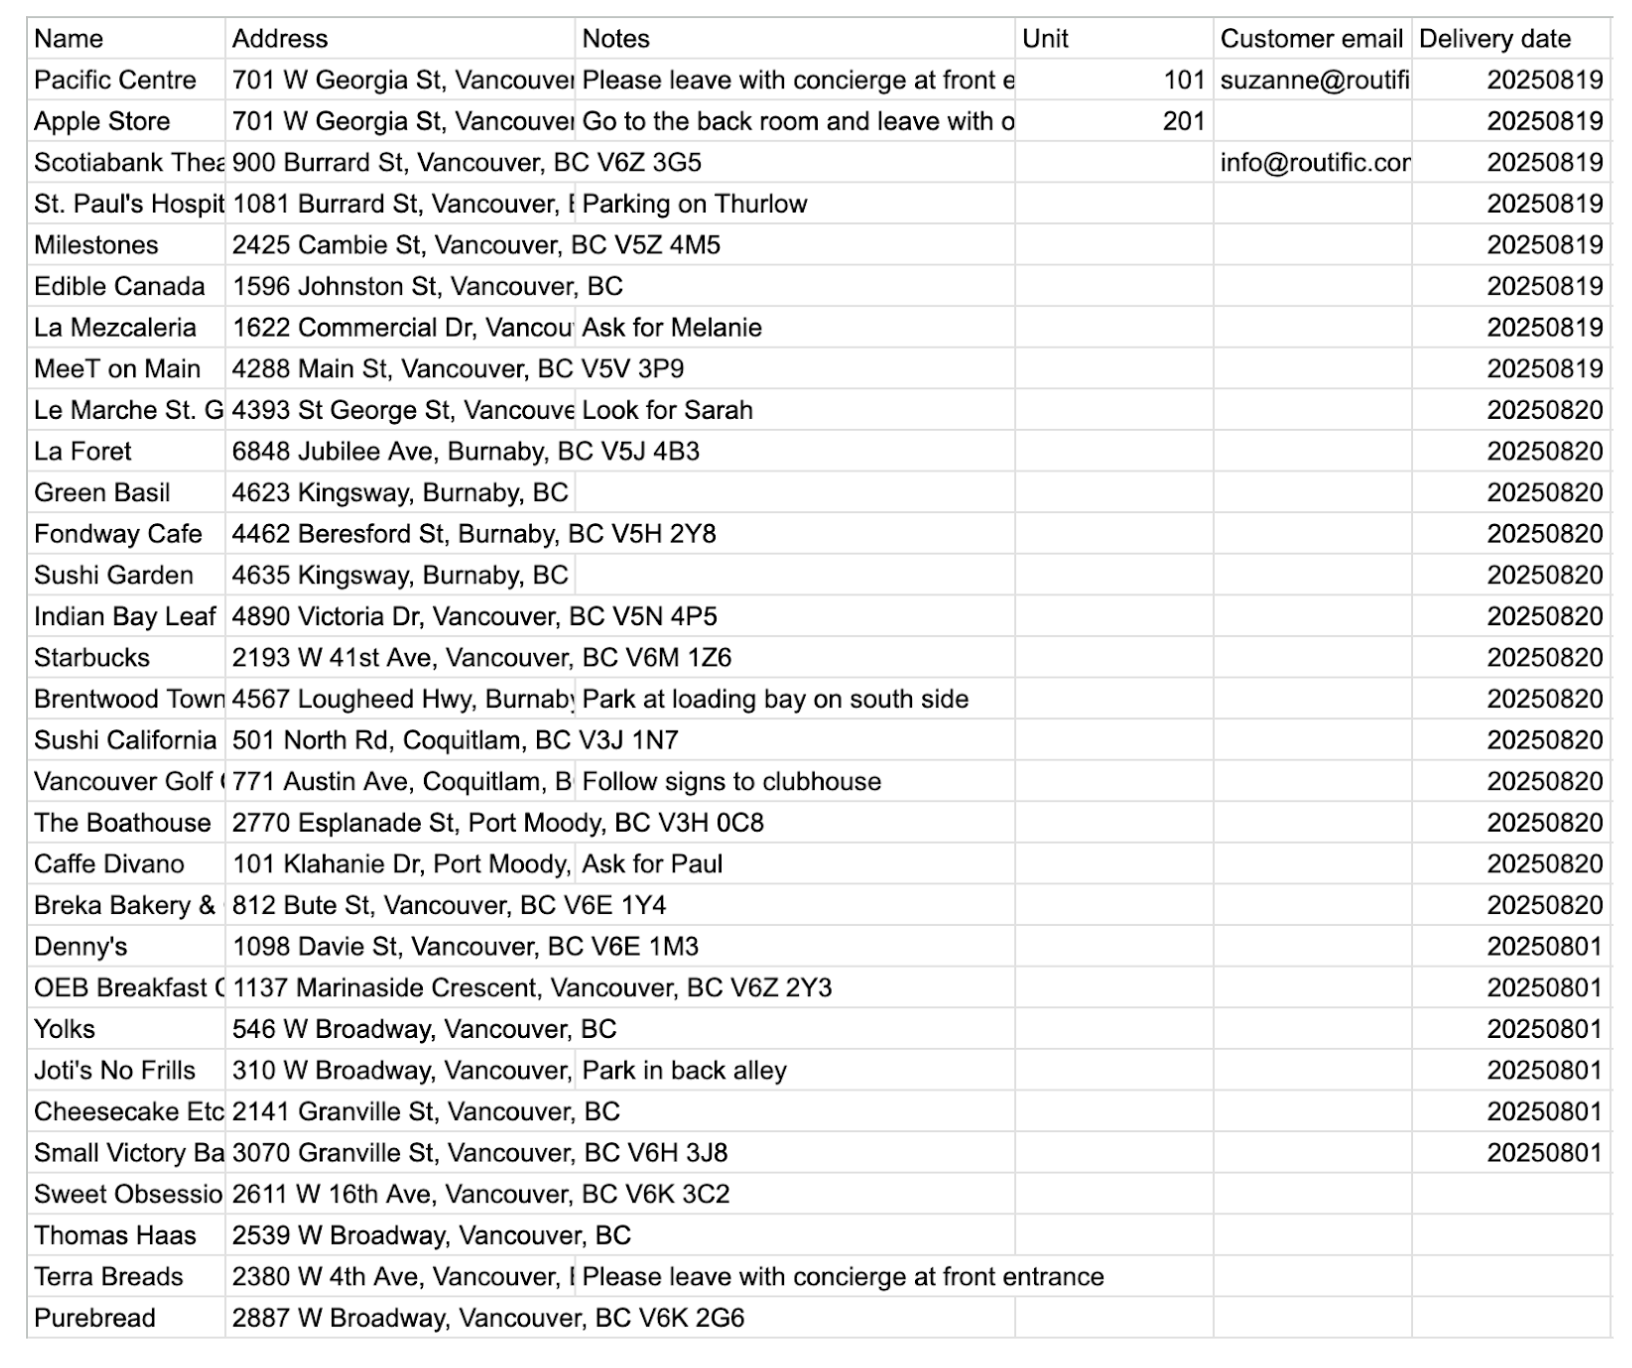
Remember, accepted formats:
YYYYMMDD
MMDDYYYY
DDMMYYYY
(Dashes and slashes are also accepted)
When you upload your CSV with the new Delivery date column for the first time, the CSV mapper will be triggered. Make sure the field is matched correctly before uploading:
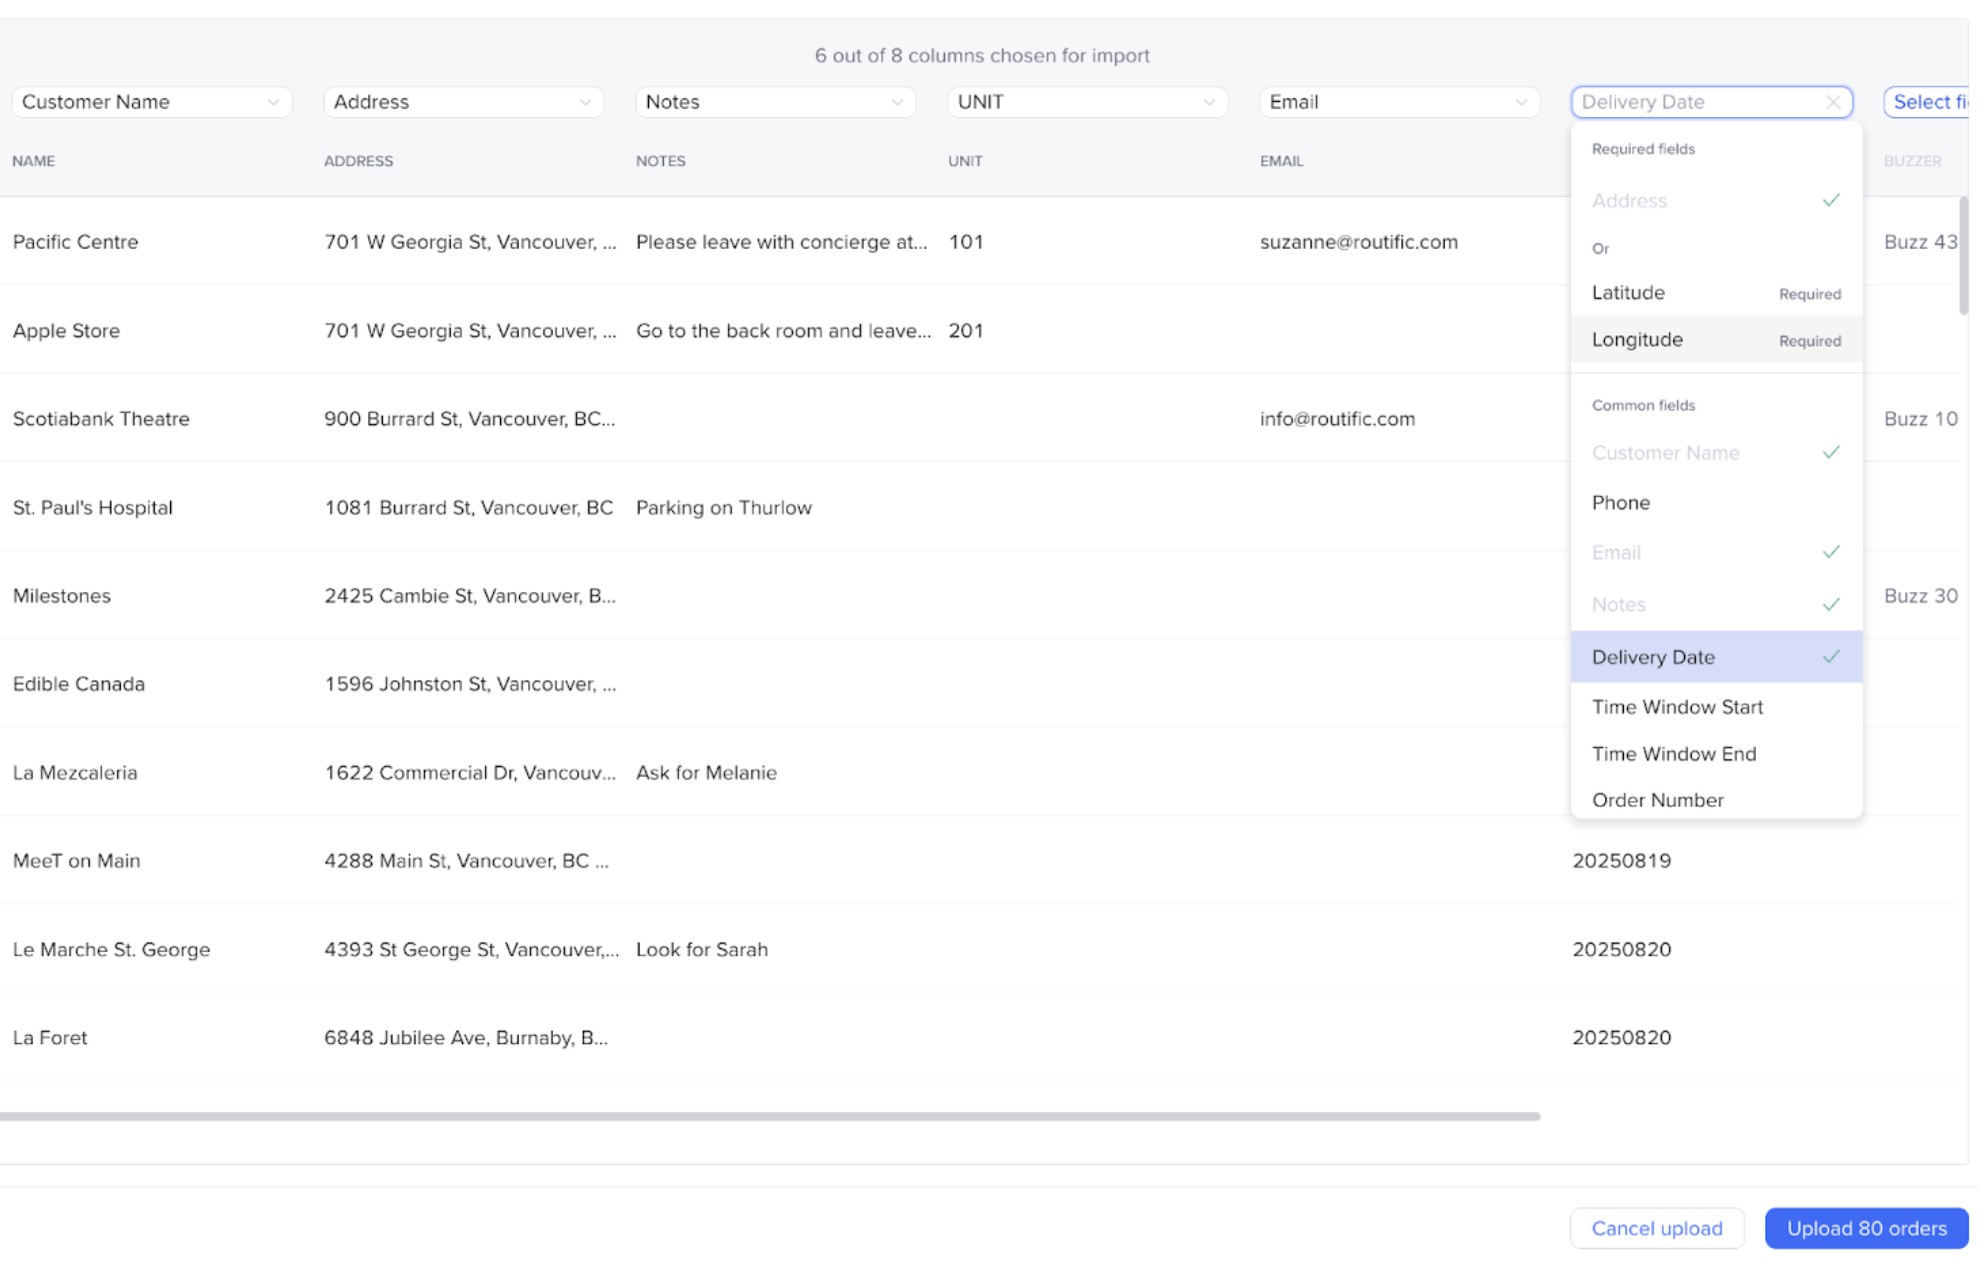
If the date format is incorrect, you will see an error message that shares the acceptable formats.
Once your orders are uploaded, you will see the Delivery date in the order information.
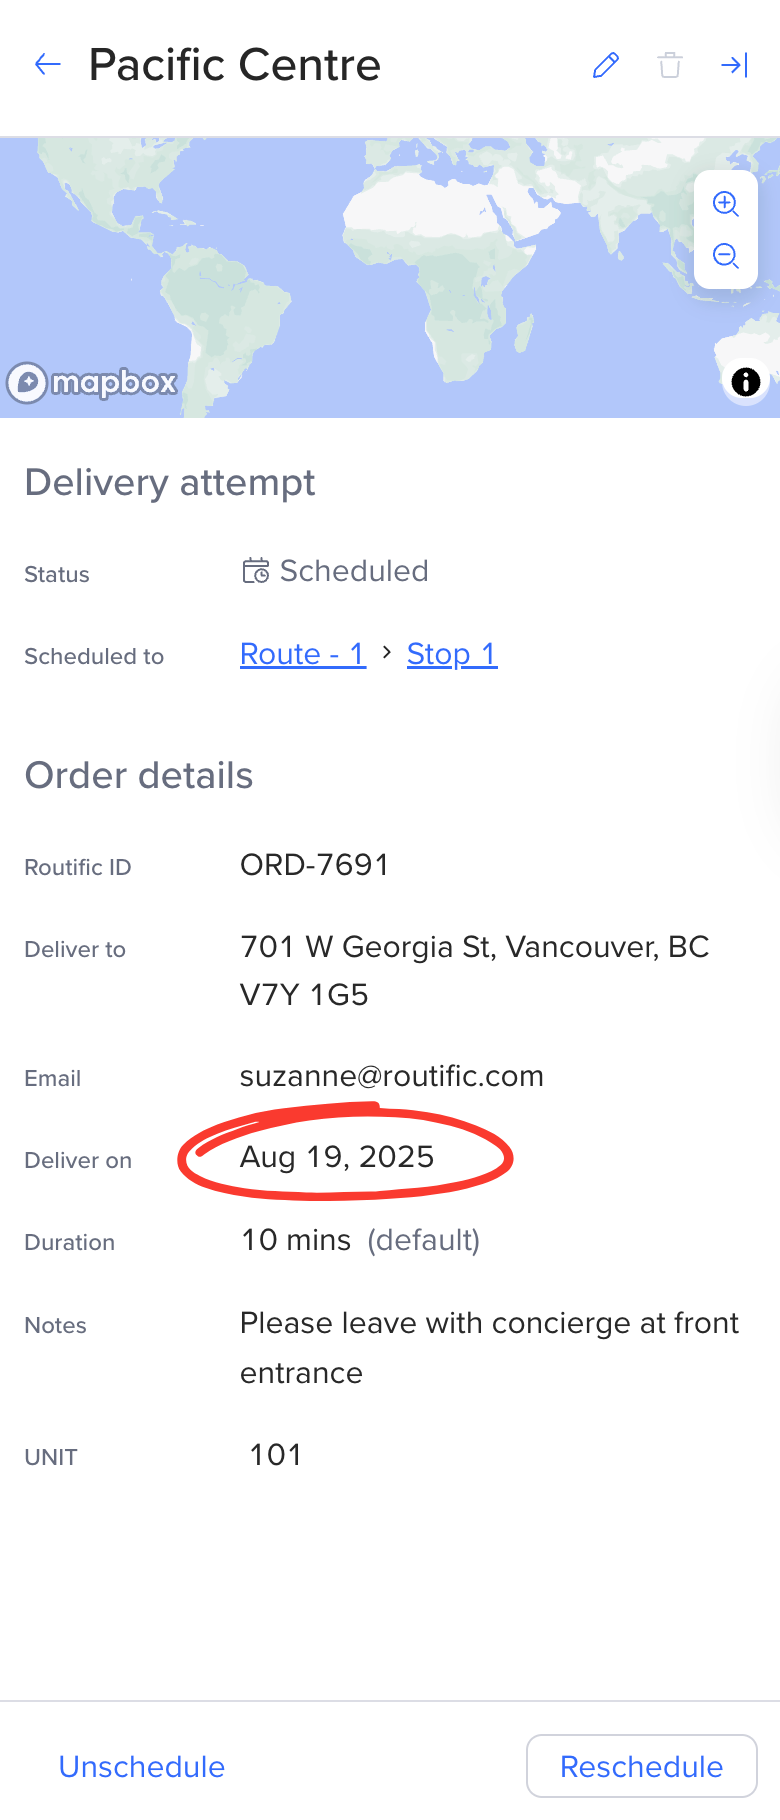
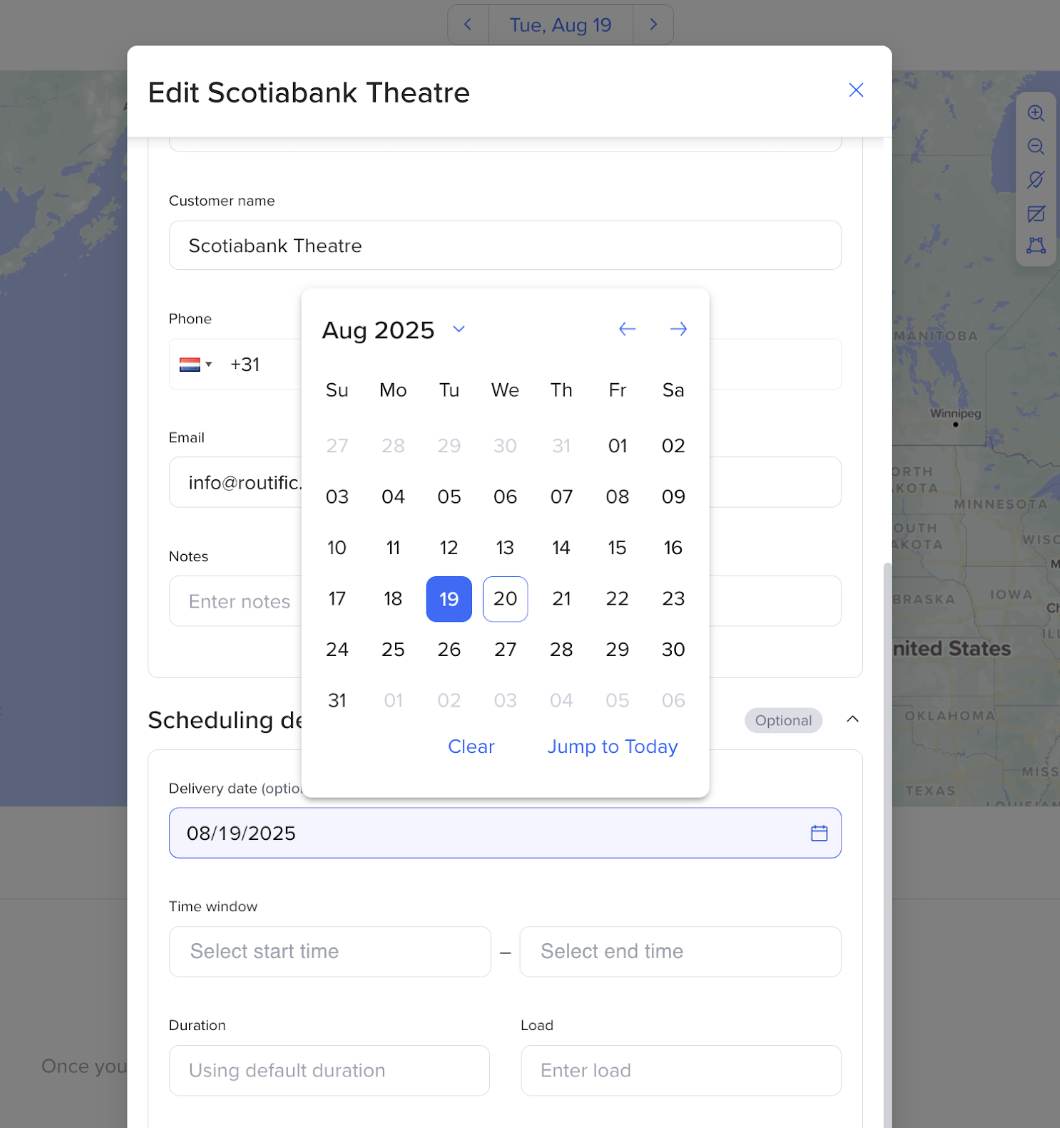
You can always edit the specified Delivery date within Routific.
Select the order > click Edit (pencil icon)
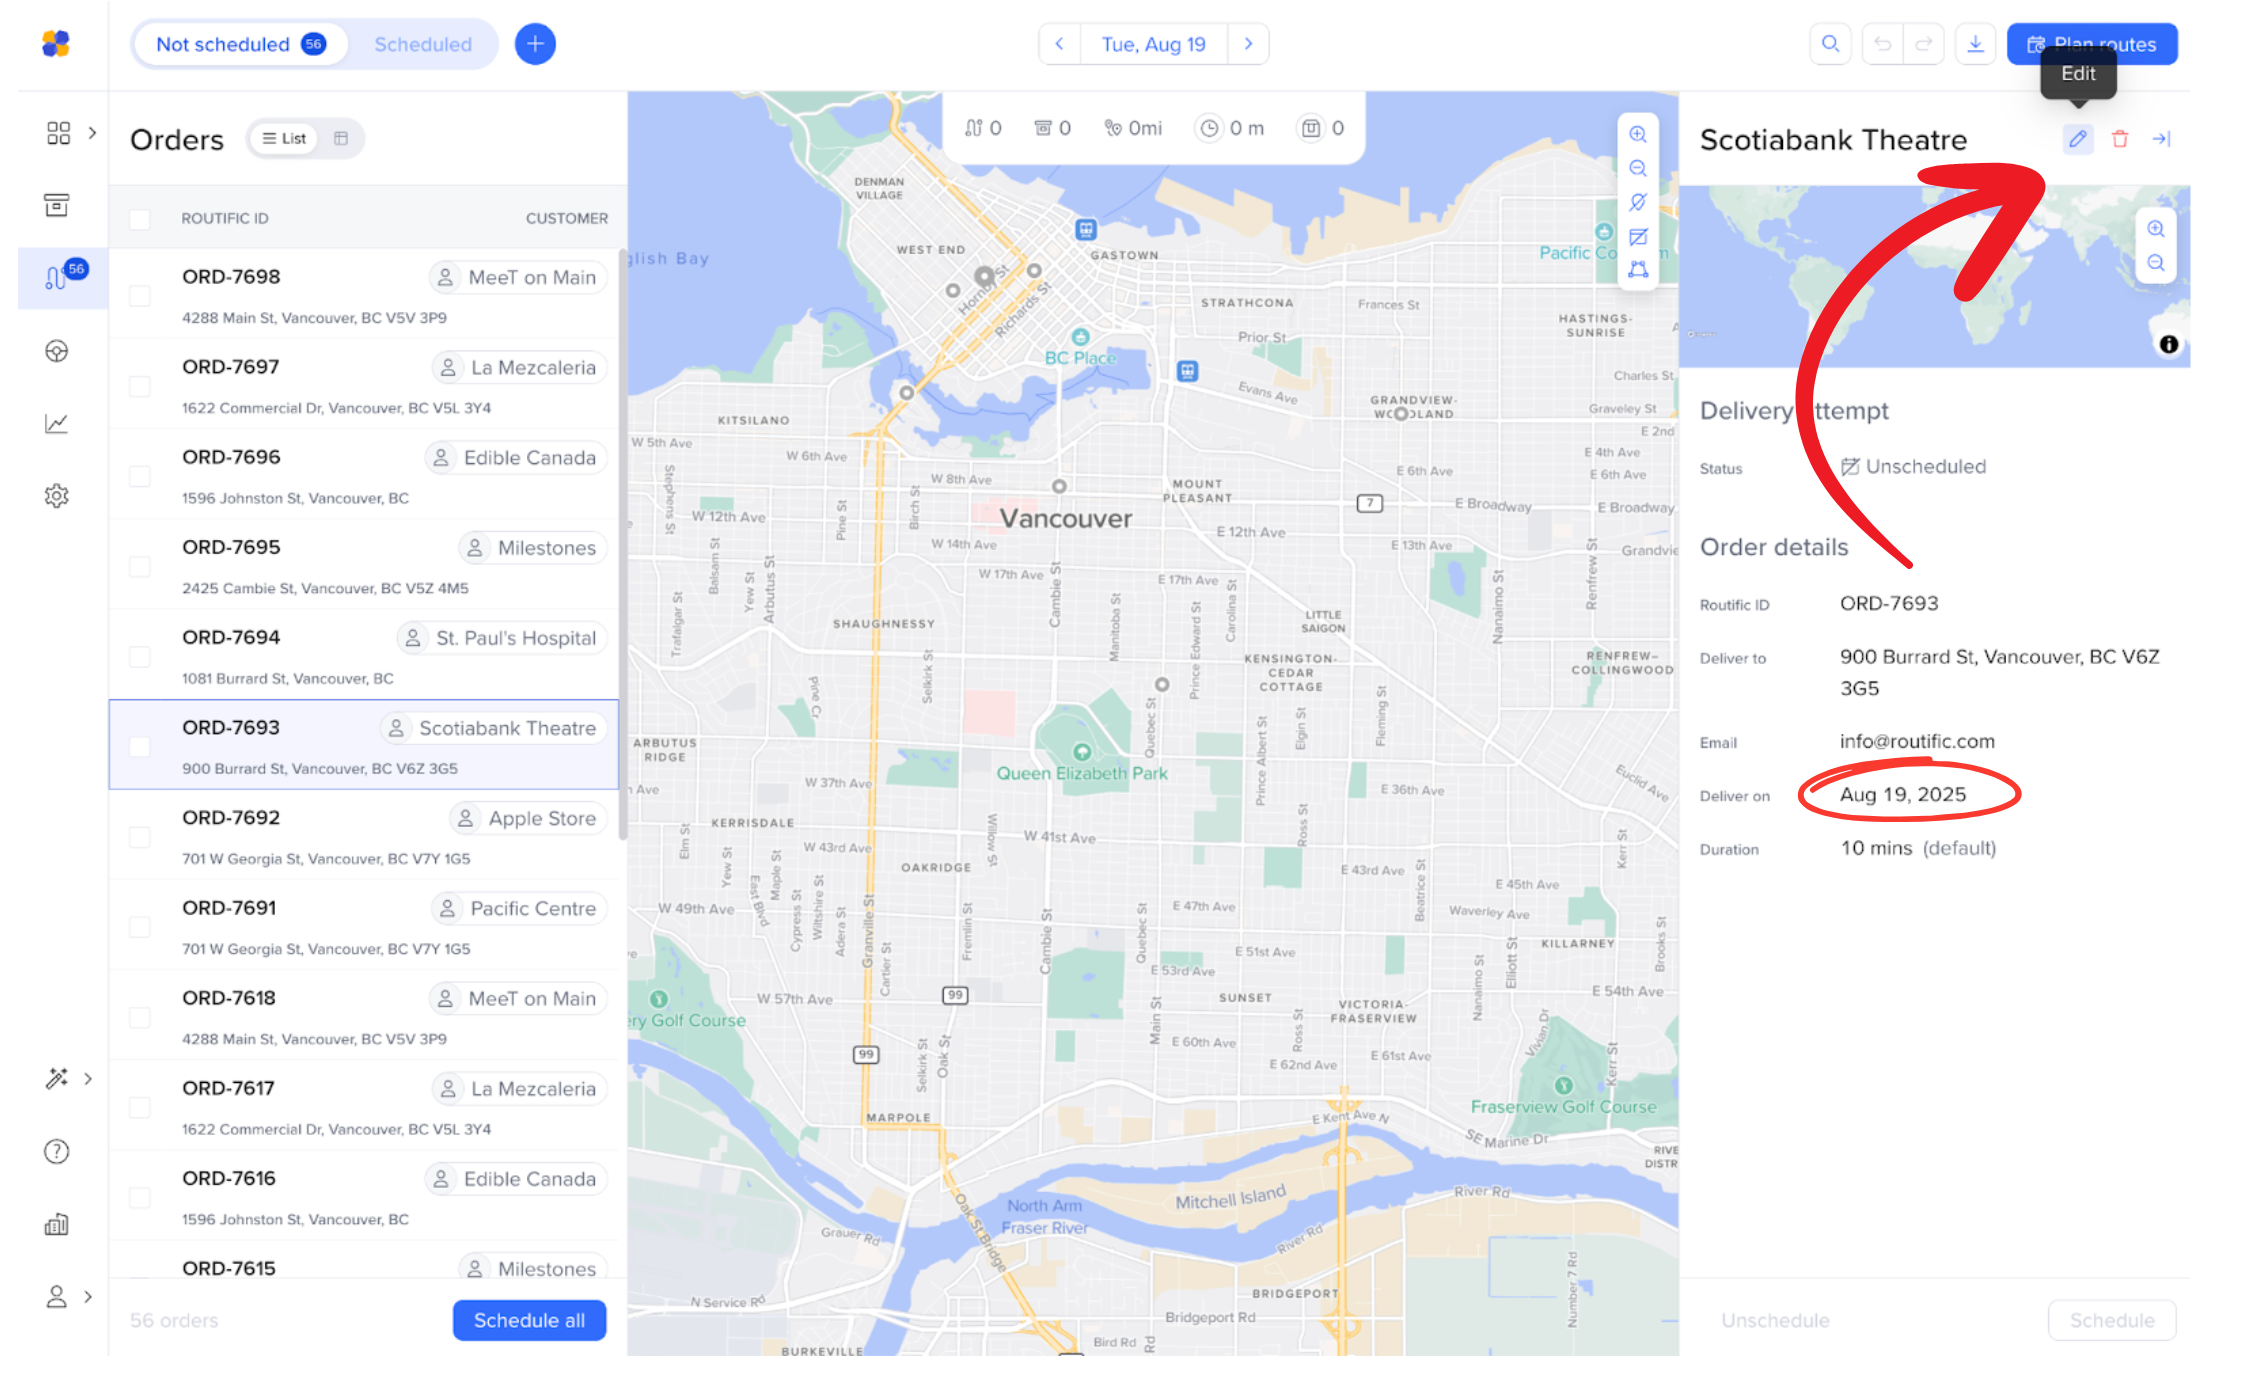
Scroll down to Delivery date and use the calendar picker to choose another date.
Sometimes you’ll need to schedule or complete an order on a day that doesn’t match its original delivery date. Routific supports this flexibility.
So, what happens when you change the delivery date?
When an order is not yet scheduled:
It will be removed from its original date and will become visible on its new delivery date.
When an order is already scheduled:
Routific will show a warning to let you know the delivery date doesn’t match the date the route is planned for. Routific does not automatically unschedule the order from the current route or schedule it to a route on the new date.

API documentation for creating new orders (with delivery date) can be found here: https://routific-platform.readme.io/reference/create-orders-deliverydatepreview
For each order uploaded through the API, a delivery date for the order can be set through the "deliveryDate" field:
[

    {

        "name": "Metro",

        "locations": [

            {

                "address": "510 W 8th Ave, Vancouver, BC V5Z 1C5",

                "latitude":  49.26413,

                "longitude": -123.11499

            }

        ],

        "phone": "+16043215582",

        "email": "[email protected]",

        "duration": 600,

        "load": 1,

        "instructions": "Deliver at loading bay at the back of the building.",

        "timeWindows": [

            {

                "startTime": "9:00",

                "endTime": "10:00"

            }

        ],

        "customerOrderNumber": "external-1",

        "deliveryDate": "2025-12-25"

    }

]